Complete Hiking Guide to Trolltunga
/
“Hey, Trolltunga is right up the road. Should we hike it?” A question that should not be taken lightly, but nonetheless a question that led to one of our favorite experiences from our time in Norway.
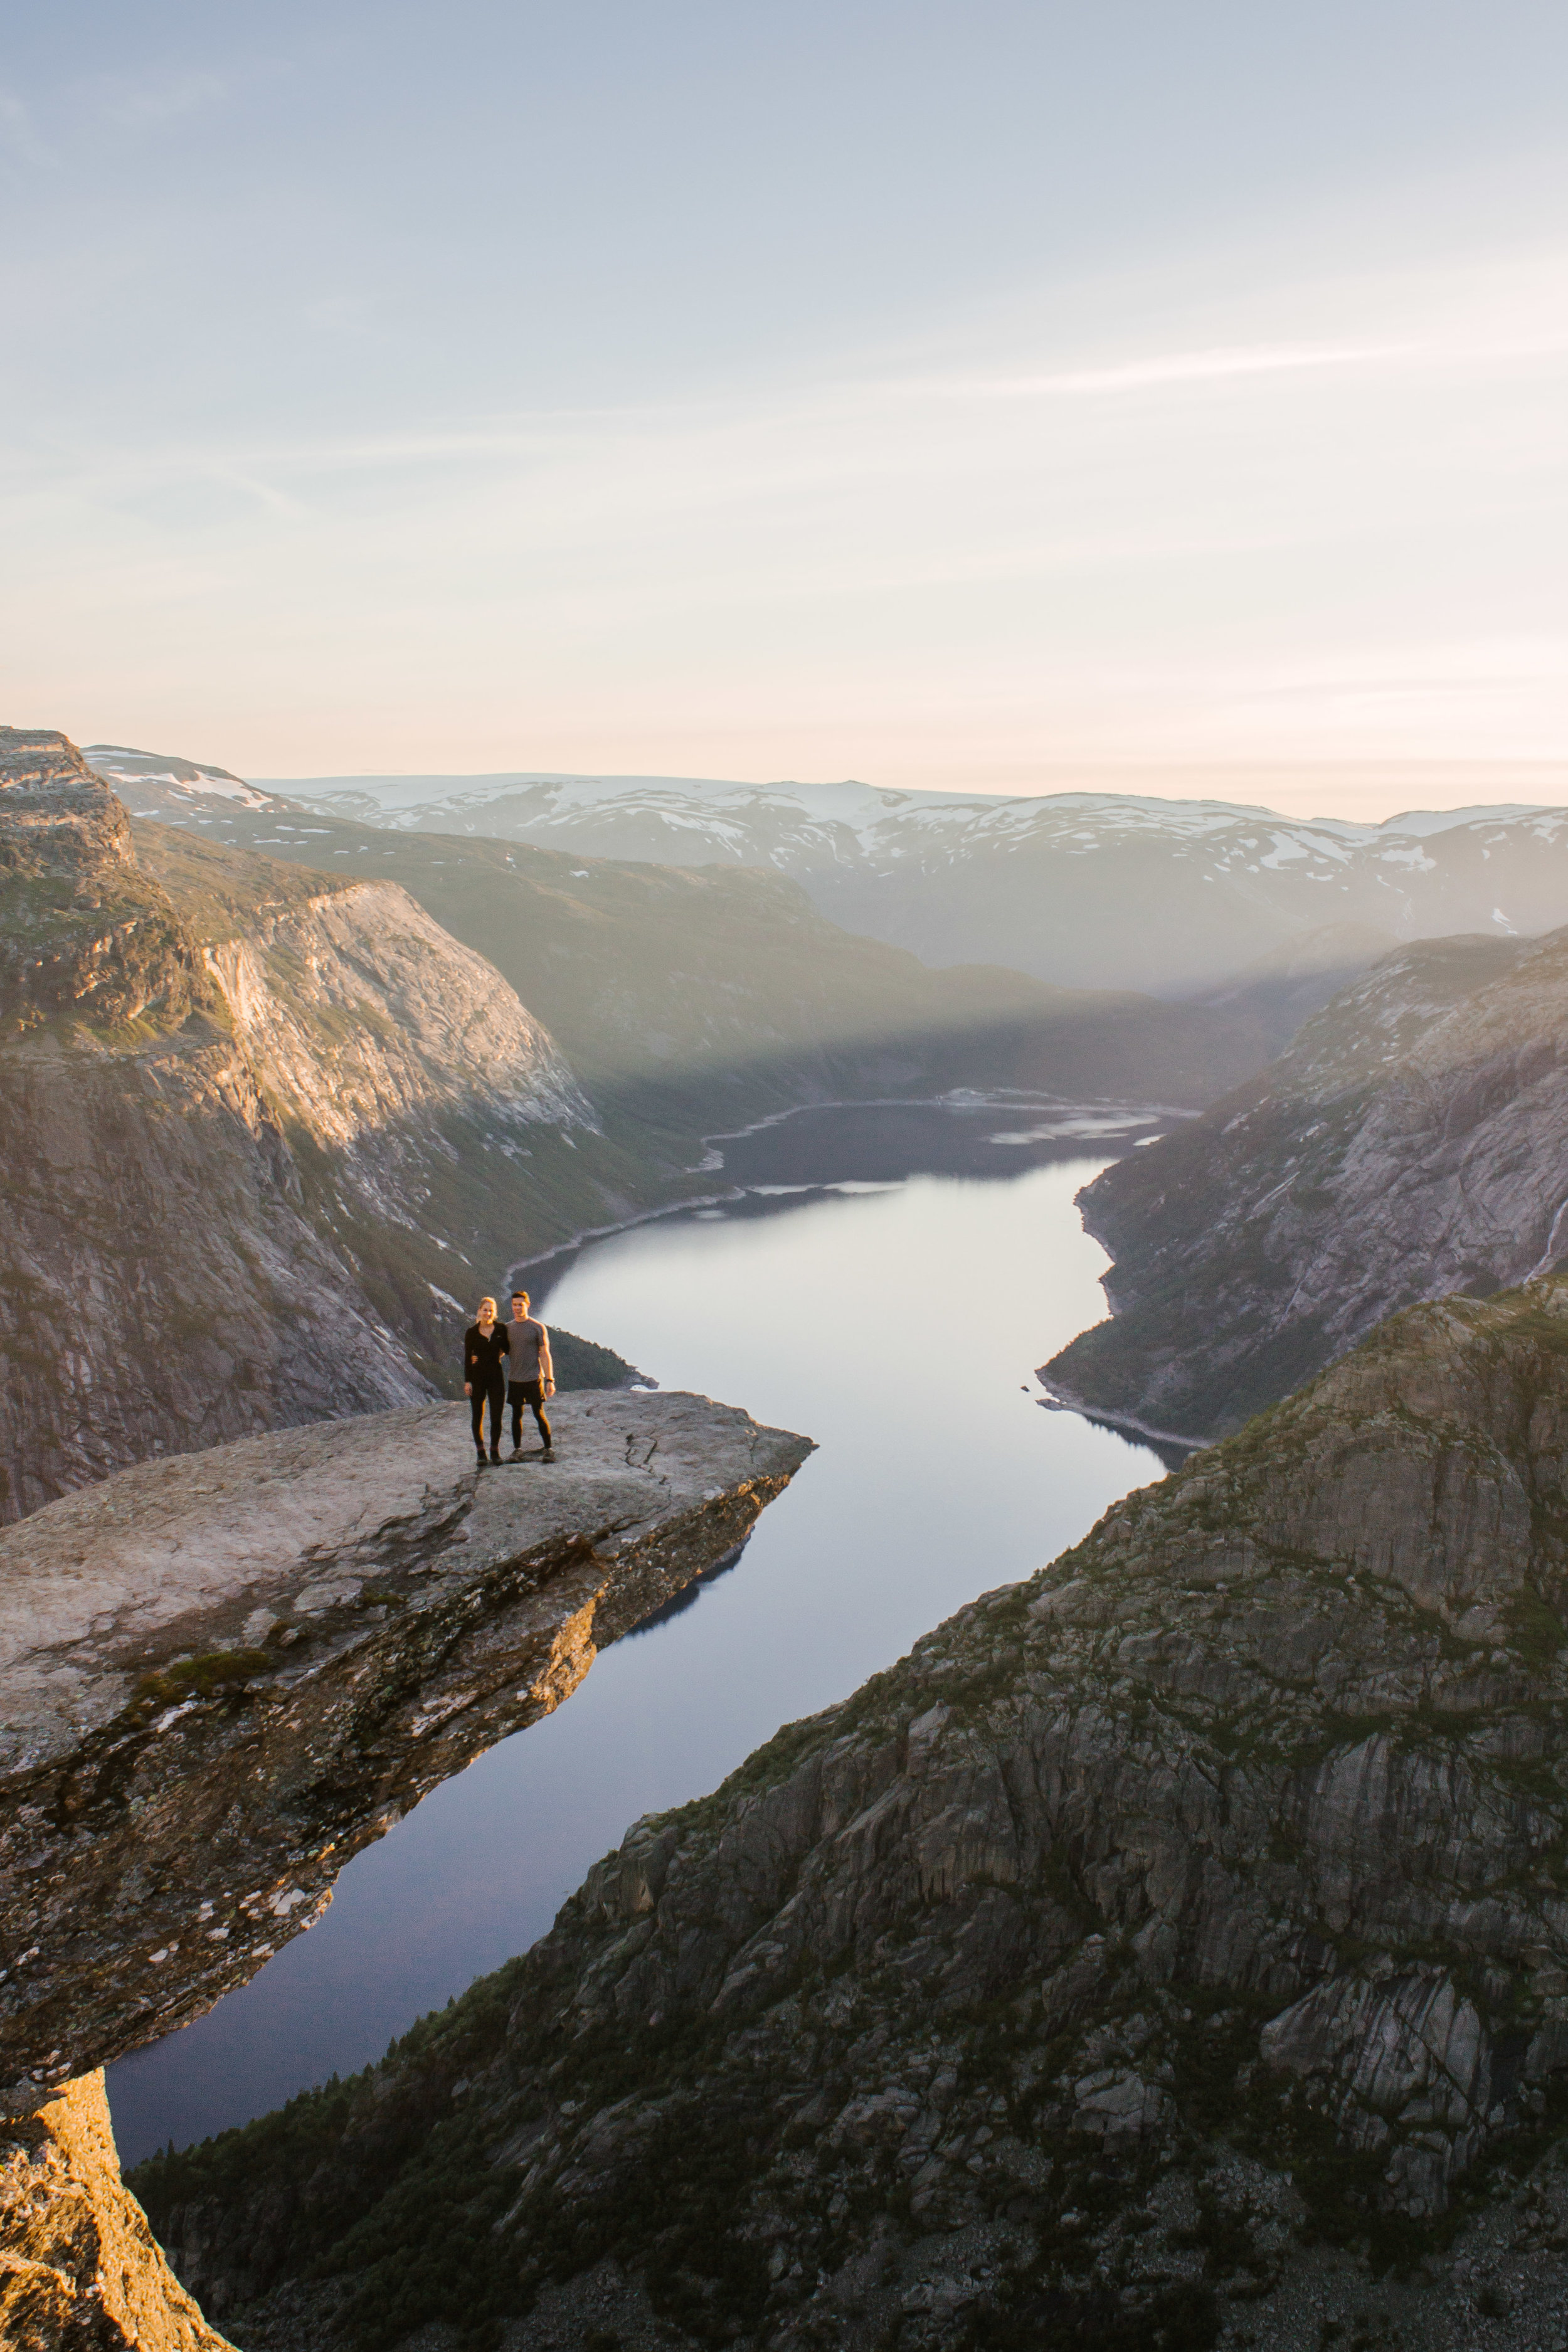
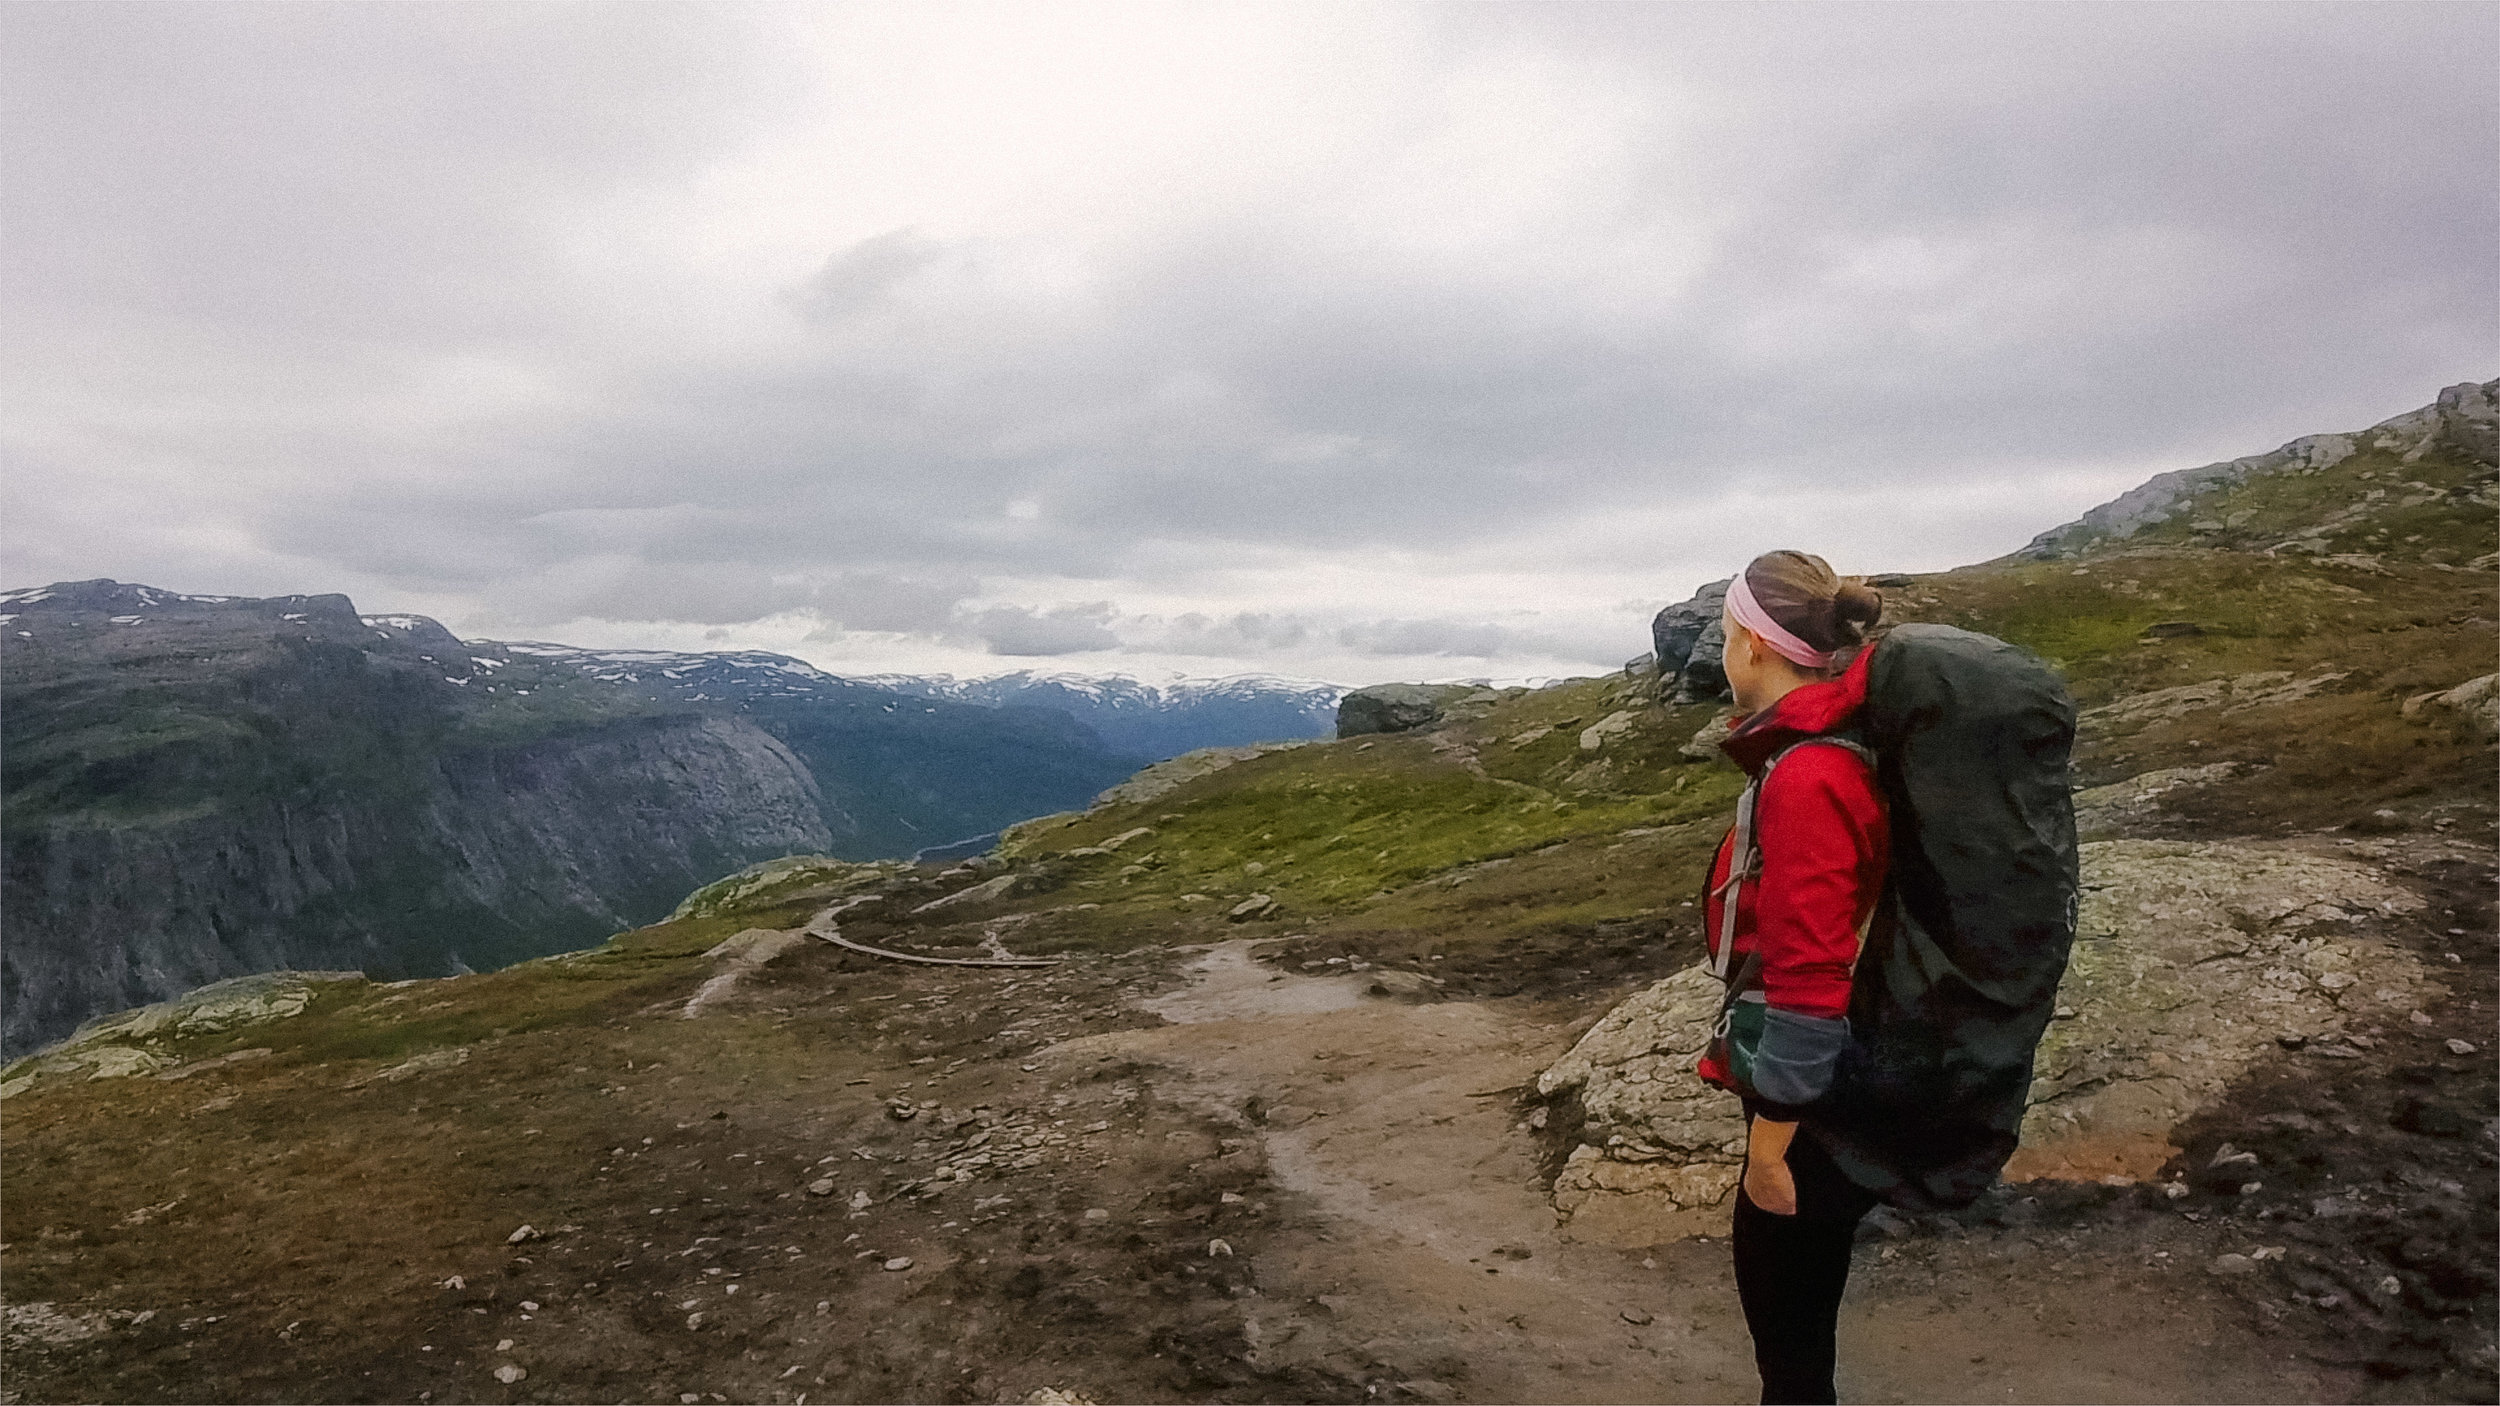
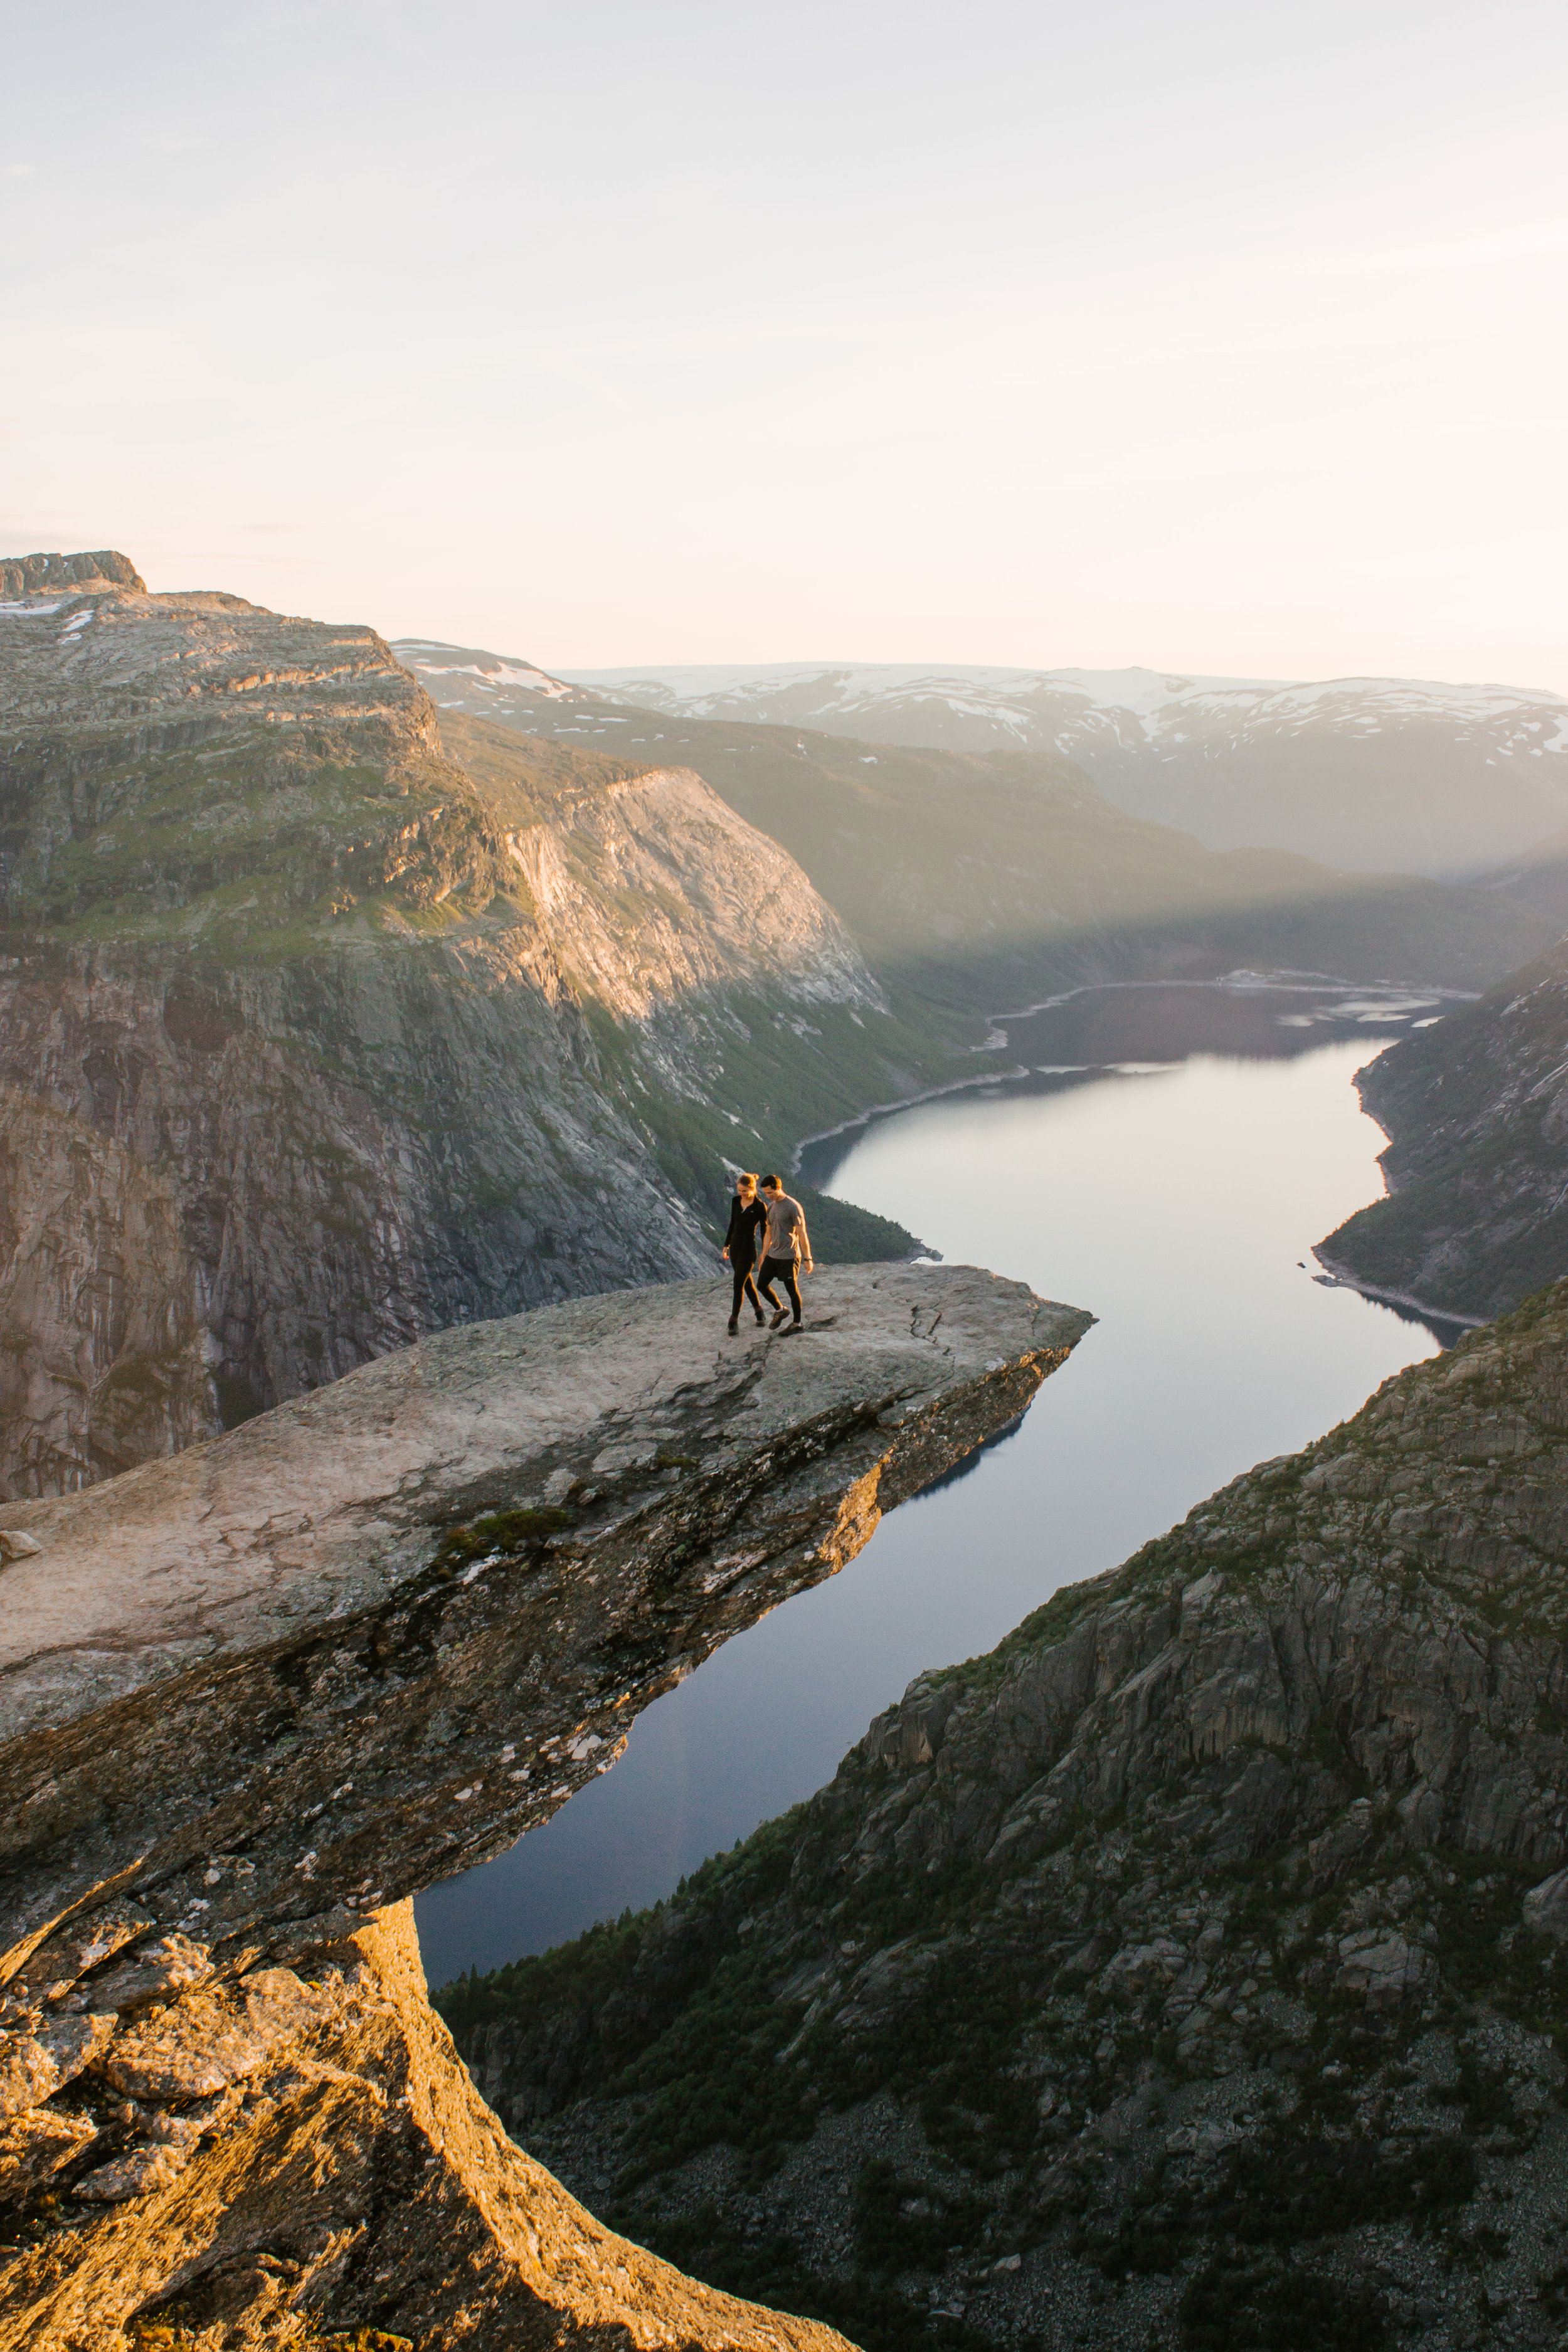
An hour and a half later, with our 30-pound packs secured, we started the 5 hour ascent. Fellow hikers who had completed the hike were making their way down the steep trail. Some had smiles of triumph on their faces, some were walking heavily with each step, and some were walking casually as if on a stroll – these were the Norweigans. But as we were the only ones going against the downward parade, all of these folks stared at us as if we were crazy. (Great, this is a promising sign). The landscape changed every couple kilometers – ranging from wide dirt paths, to rocky terrain, to reflection pools and left over snow, to mossy wetlands, to grassy outlooks, and hills of rock. Mile after mile we climbed. Faster and faster we went as we tried to beat the falling sun, eager to make it to the top before sunset. Looking ahead with each step, I desperately tried to cheat a look at Trolltunga from the distance, but no such luck. Then suddenly after 4 hours we were there. Trolltunga, the subject of thousands of pictures and the platform of numerous surprise proposals, was finally in front of us, in the foreground of the start of a glorious sunset. My heart pounded as we walked out onto the narrow rock, 700 m (2300 ft) suspended in air. The sun’s golden light hitting our face, with a 360 degree view, it was difficult to take in the vastness of the moment. Then, I'll admit, some slight social panic struck as we had to quickly pose for the camera in a creative way (because that’s what you do) as the small line of people waited for us – but how on Earth were we supposed to top the girl who went before us, holding her dog up like baby Simba??
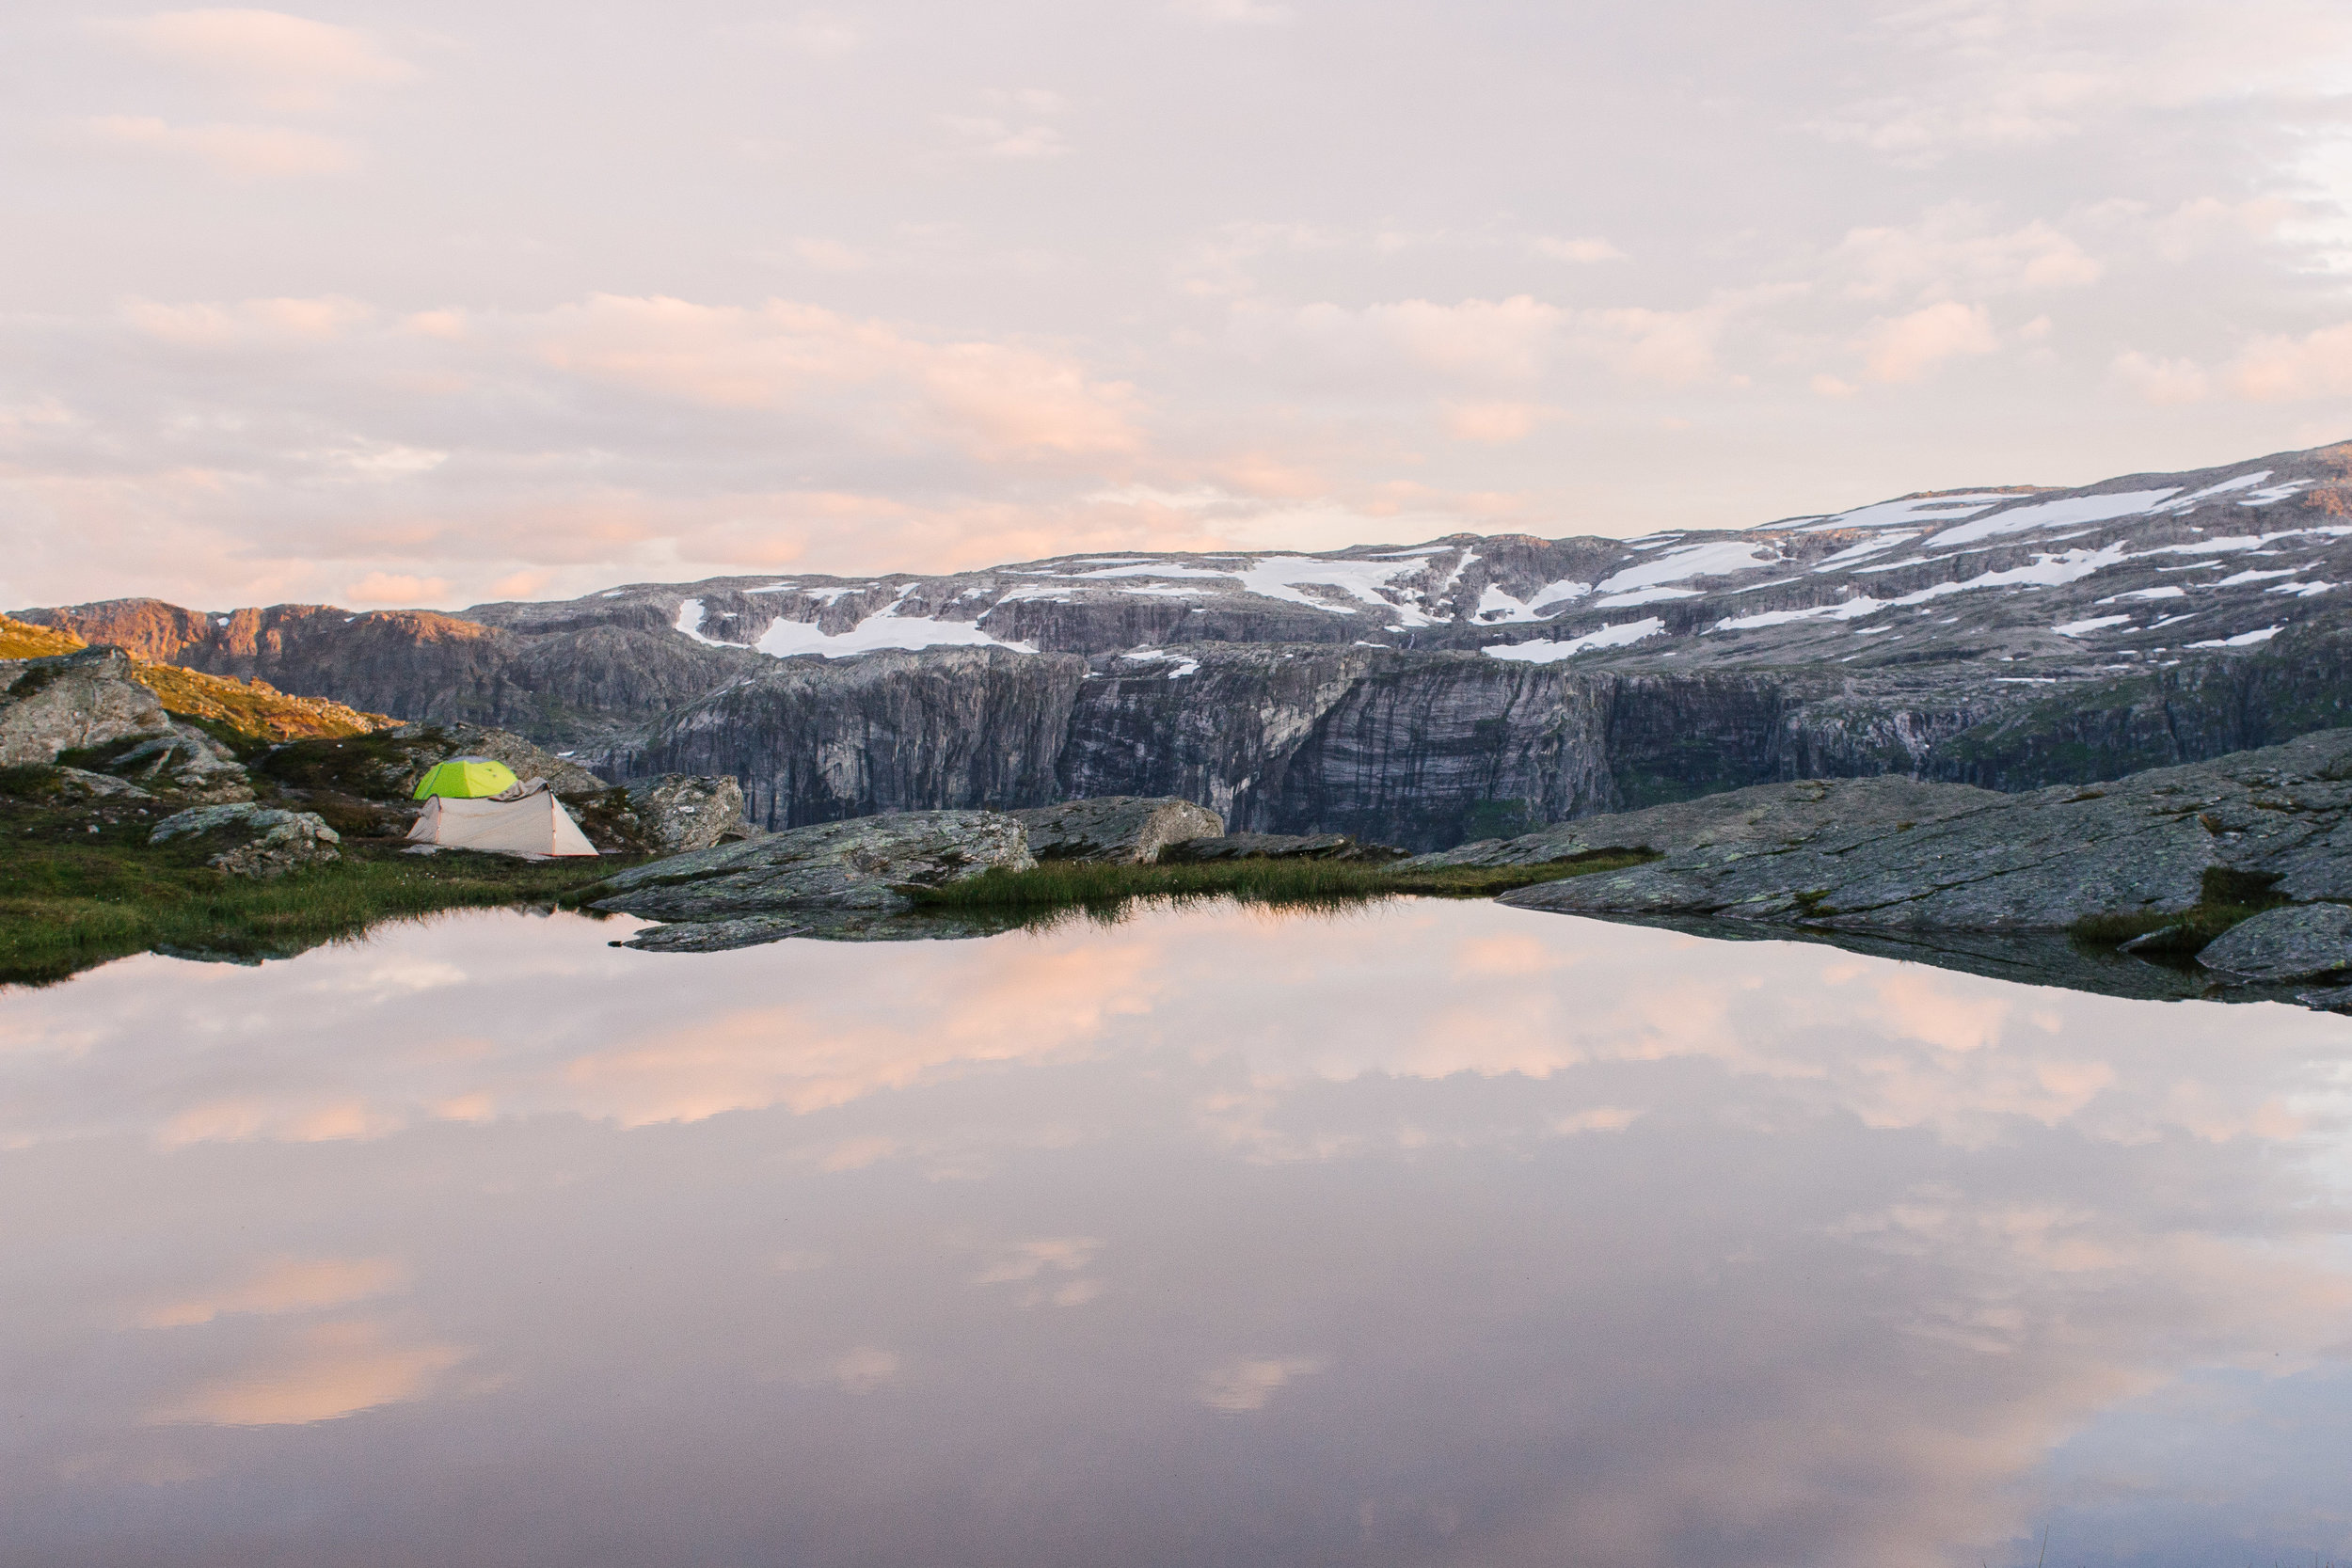
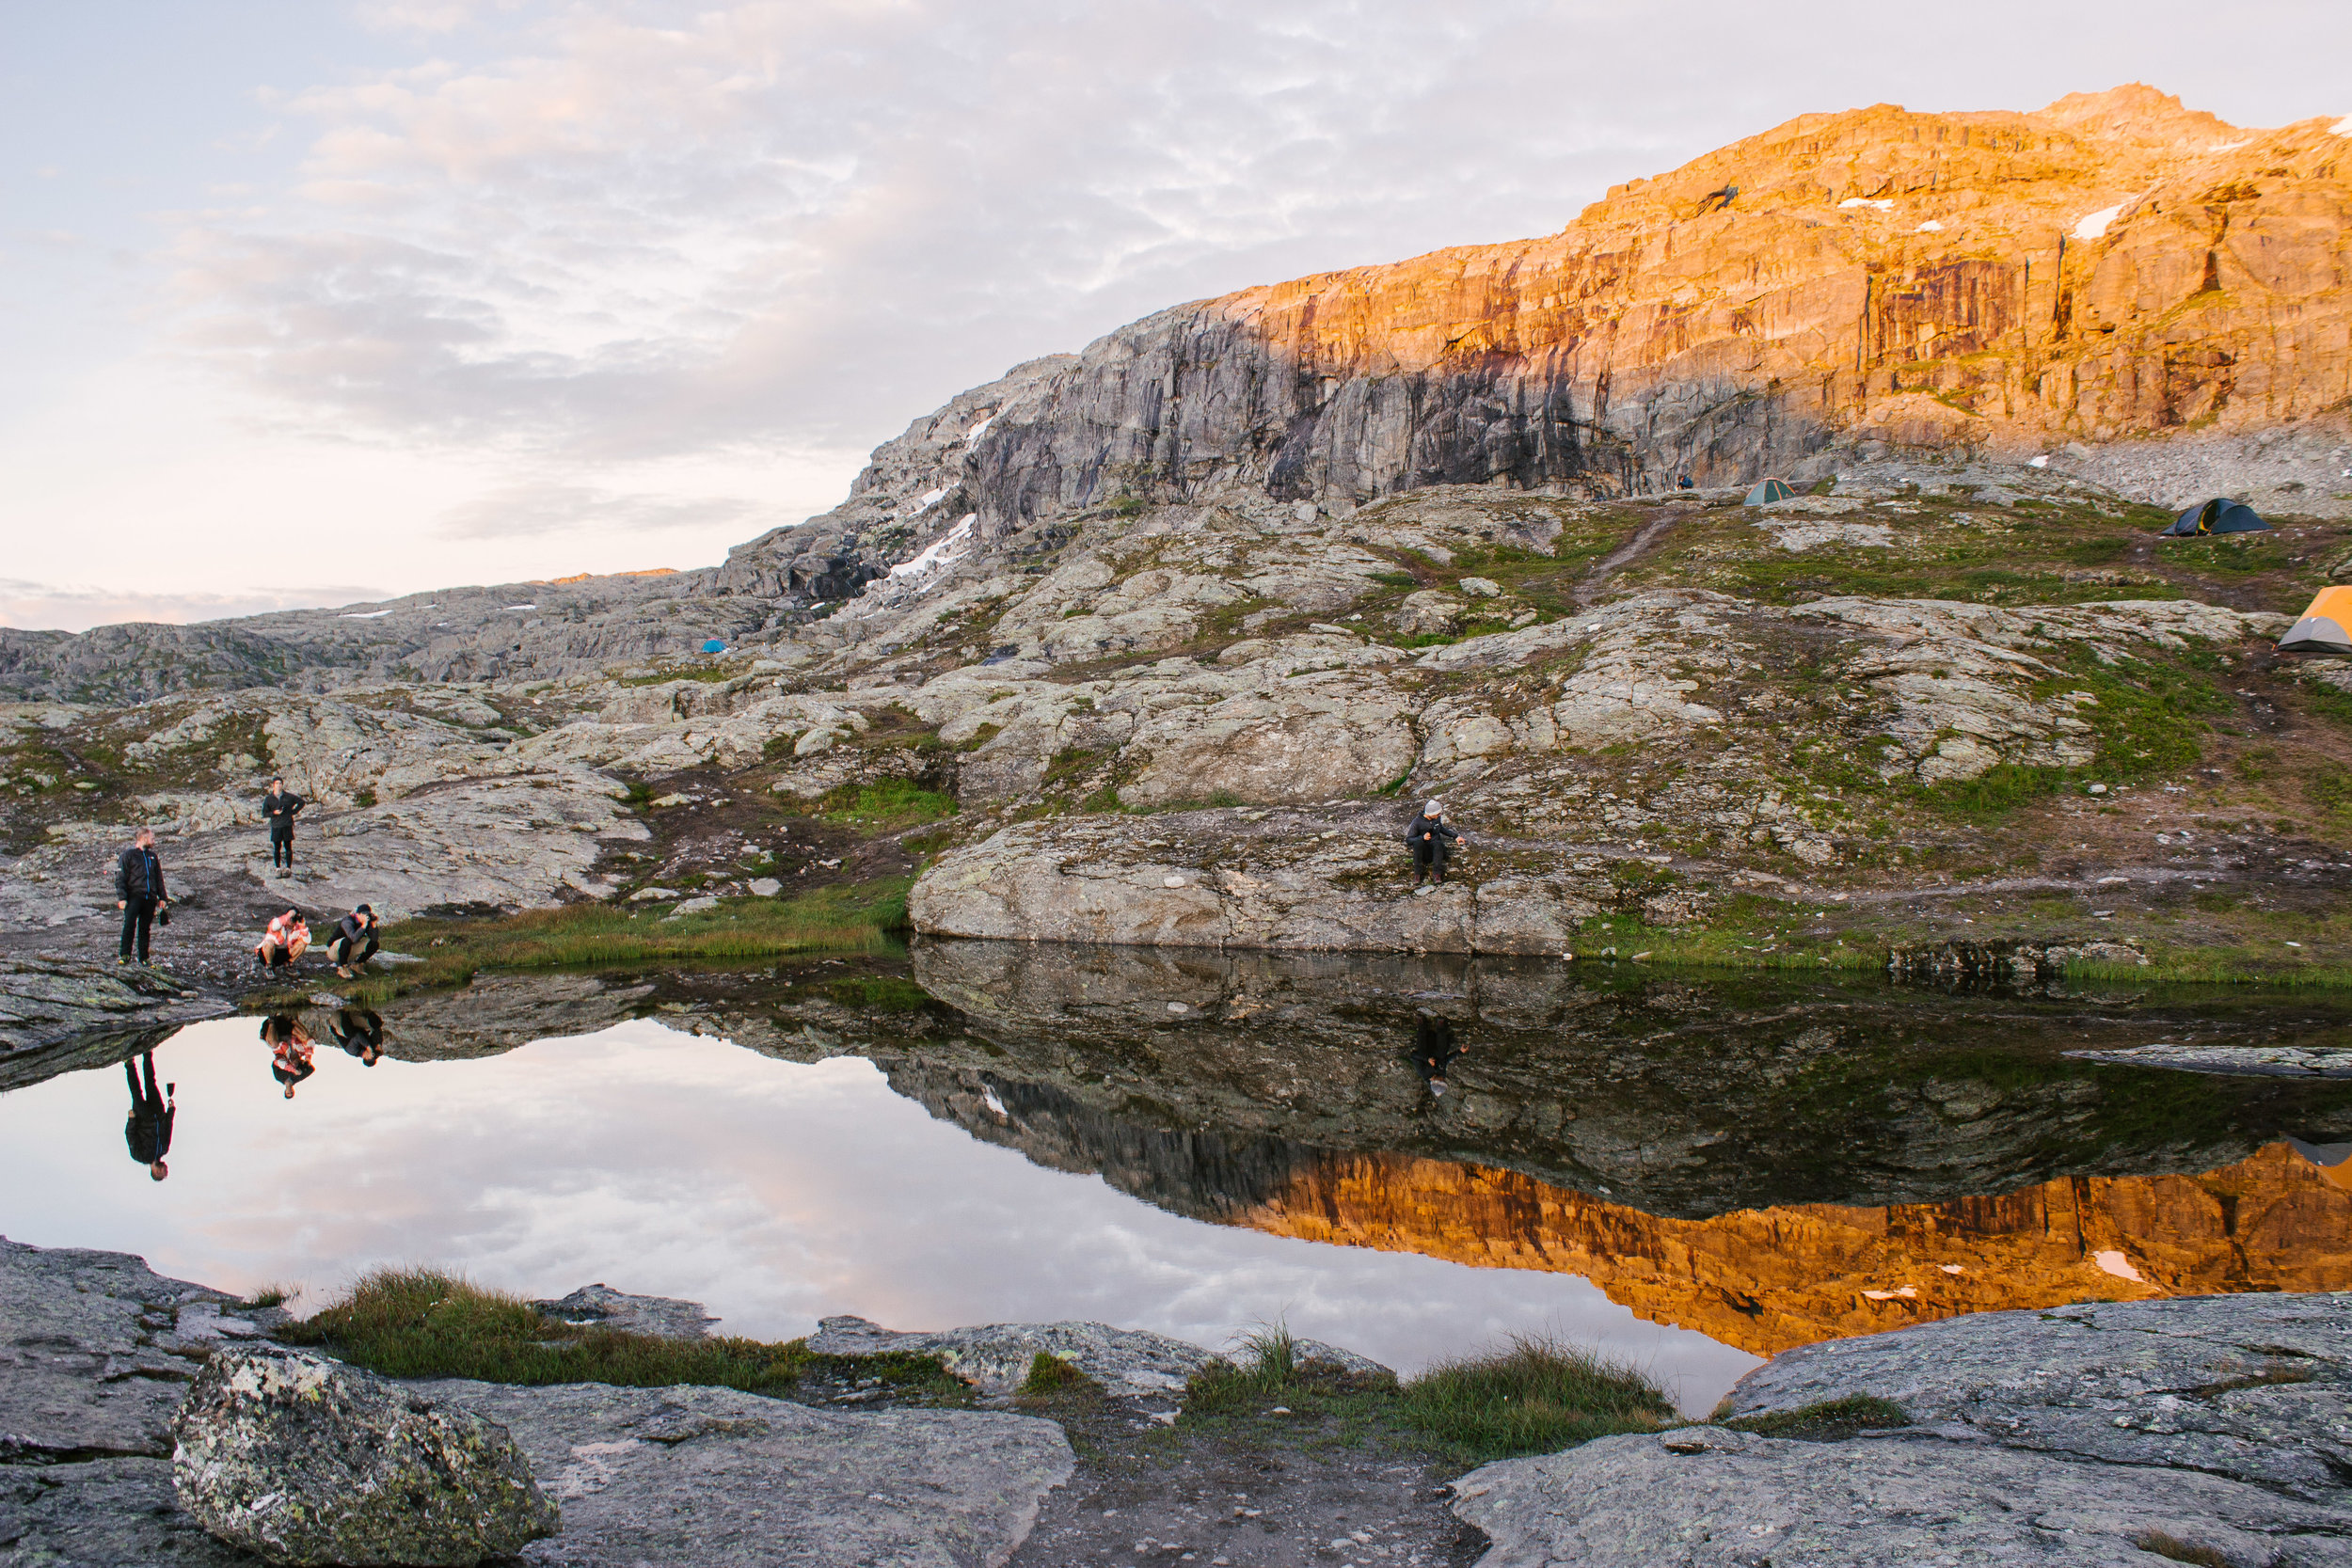
As the sun continued downward, the colors of the sky grew and changed. Various tents were set up along the ridge, overlooking the lake below. Hungry and in search for shelter away from the windy mountain edge, we re-traced our steps until we found a secluded grassy patch protected by surrounding mounds of rocks. Sticky from sweat and still hungry after eating our “serves 2 (but not really)” backpacking meal we feel asleep in the complete silence of the mountain top.
Pitter patter as a light rain gently hit against our tent, telling us to get going. It was dawn, but no sunrise was visible thanks to the vast cloud cover. With all our gear and selves protected under their respective rain covers, we set out.
By the time we hit the last 4 km, our legs numb with soreness and our feet in physical pain, we started running. Running to cover more ground with each step so as not to prolong the pain. Remember, we had 30-pound packs on our backs – bouncing in every direction as we clumsily and noisily ran down the steep dirt slopes.
Was the hike worth the pain?
ABSOLUTELY.
When in Norway, I HIGHLY recommend doing as the locals do, and hike. Norweigans grow up hiking in the plethora of mountains that make up the country. Some of the most beautiful scenery we saw in Norway was seen by foot.
But I’ll be honest, Trolltunga was not the #1 hike we wanted to do – in fact, we didn’t even plan to hike Trolltunga because of its length of commitment! No, the hike we were eager to complete was Preikestolen (Pulpit Rock). A relatively short hike, the trail leads you to a flat 600m high platform over looking the fjord.
However the weather had a different plan. We landed in Oslo at 6:30 AM after only sleeping 2 hours on our red eye from Reykjavik. The original plan was to get our rental car, and drive 8 hours west to Pulpit Rock AND complete the 2 hour ascent up. Anyone else see how crazily unrealistic my planning was for this day? My eager heart was making promises our future tired selves wouldn’t be able to keep. It’s no surprise then when Alex ended up pulling over to the side of the road a few hours into the drive, and we passed out from exhaustion for a couple hours.
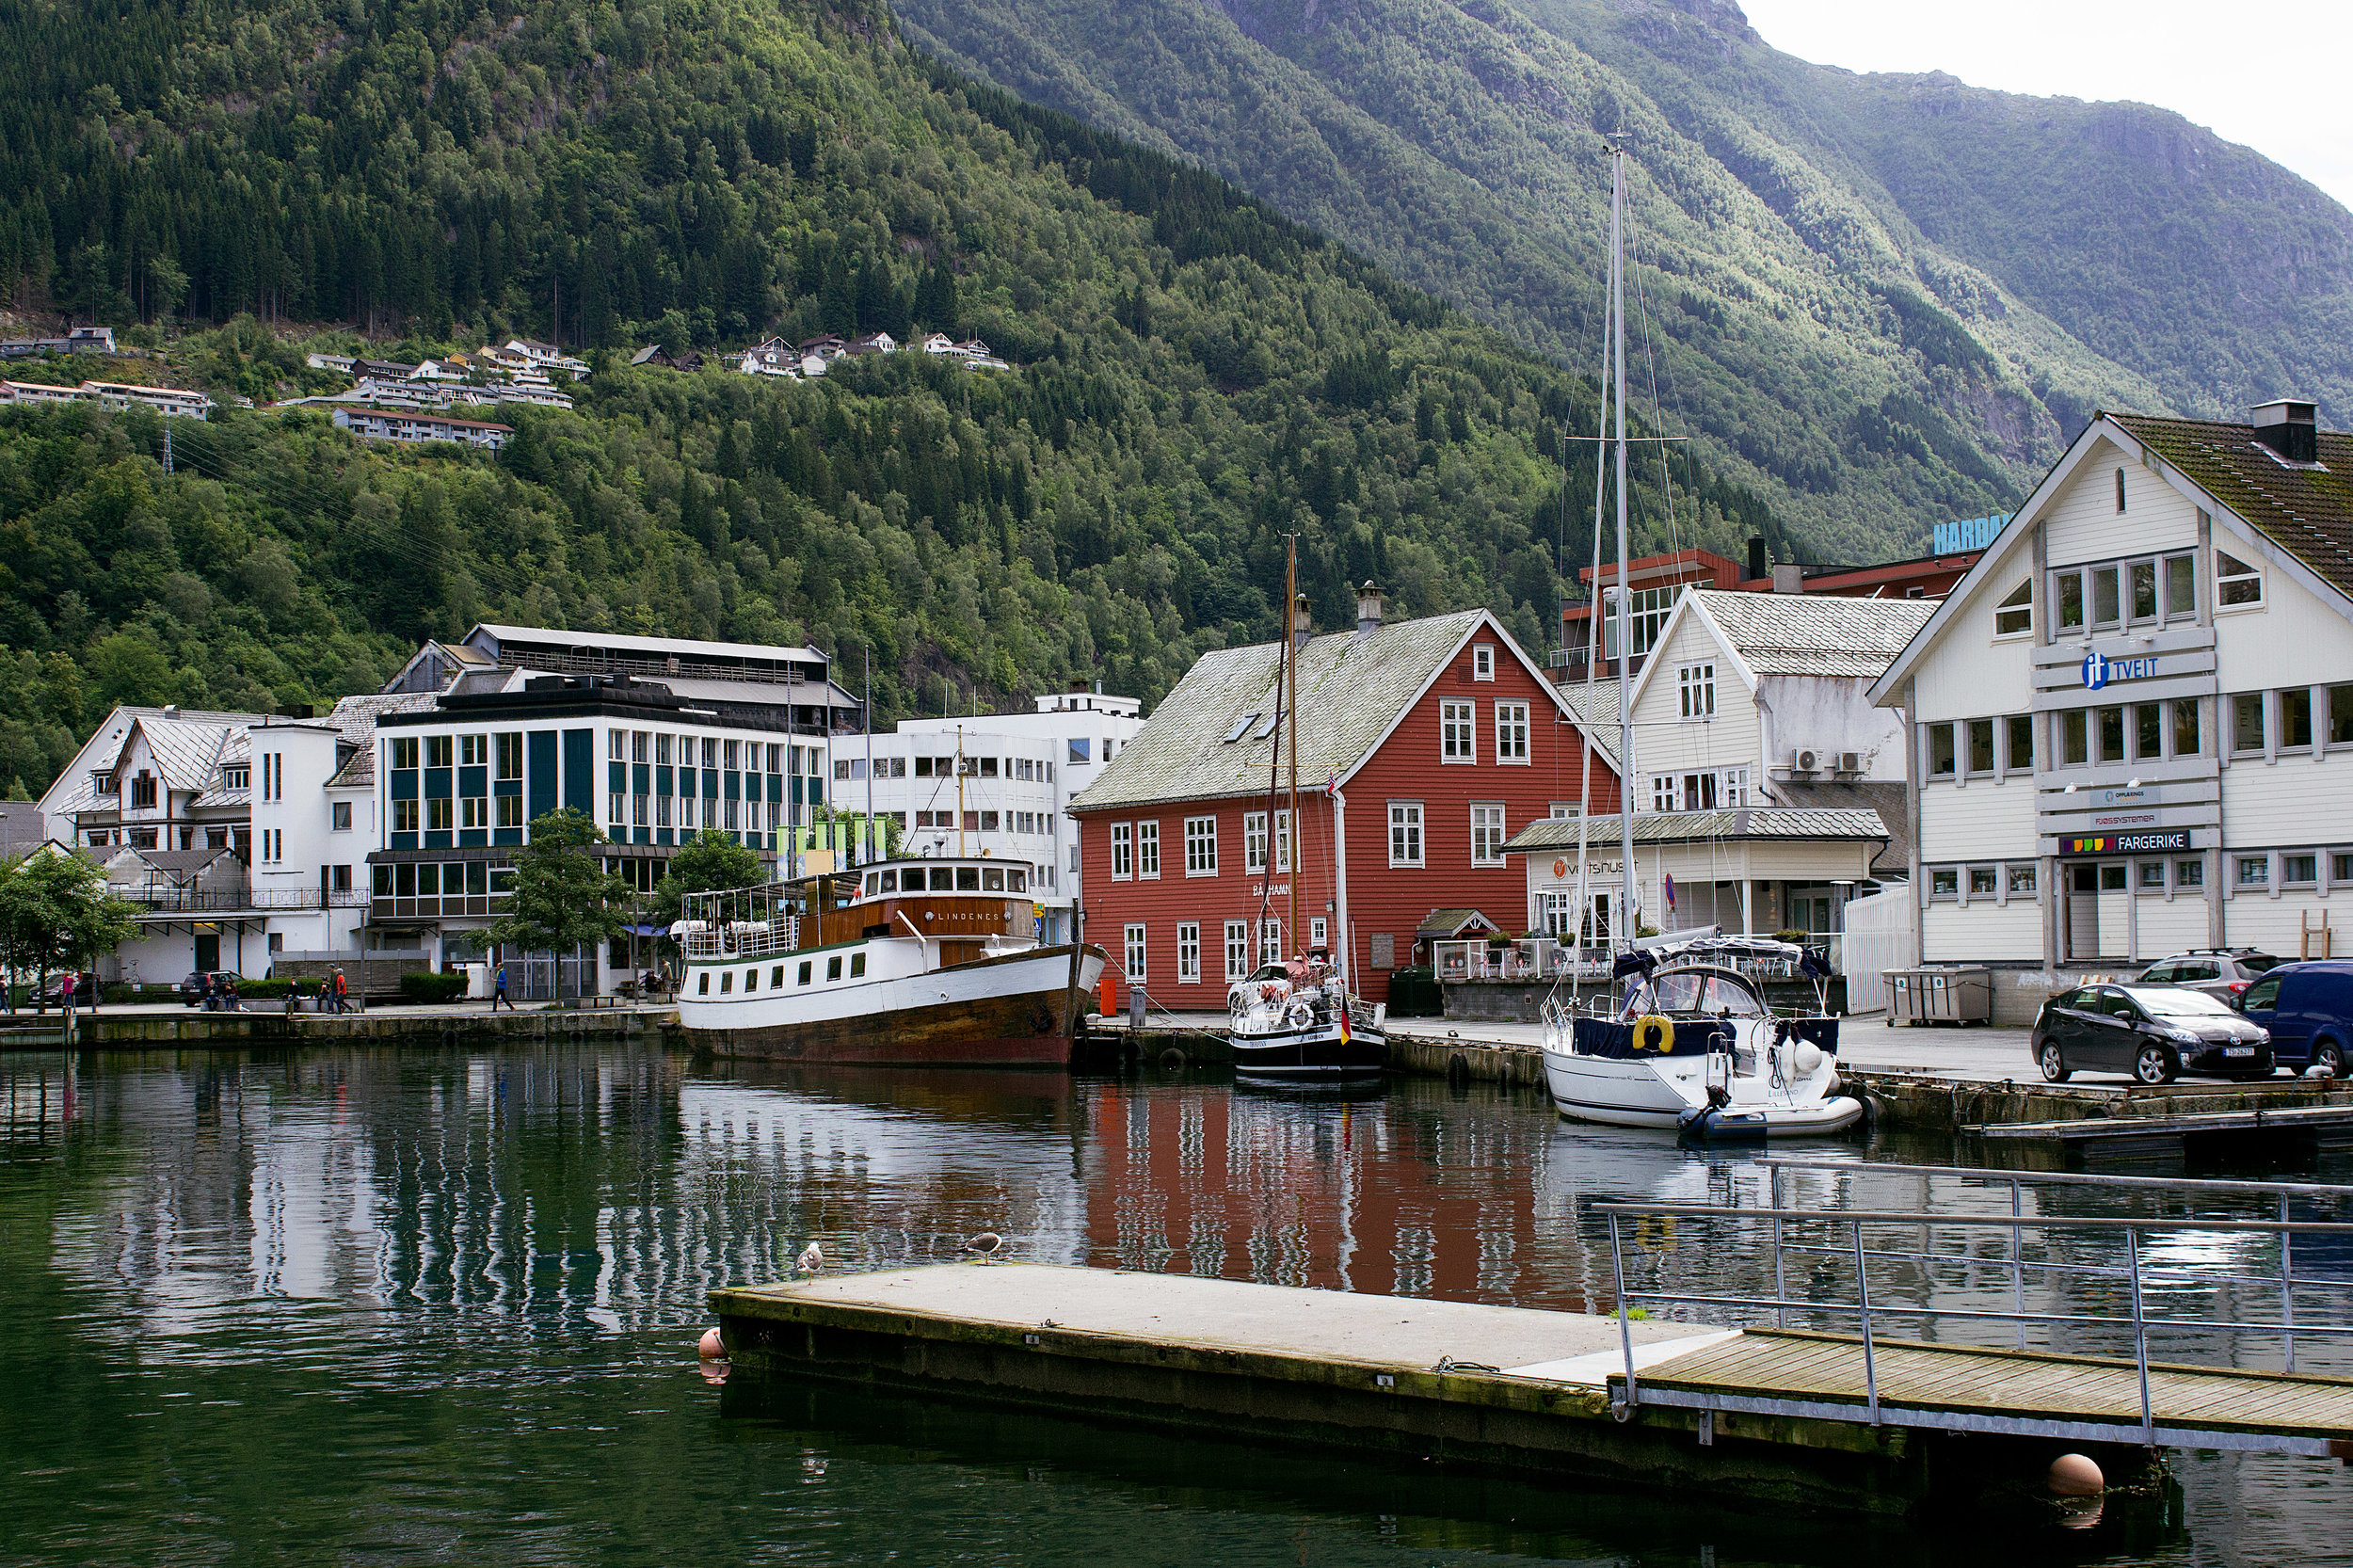
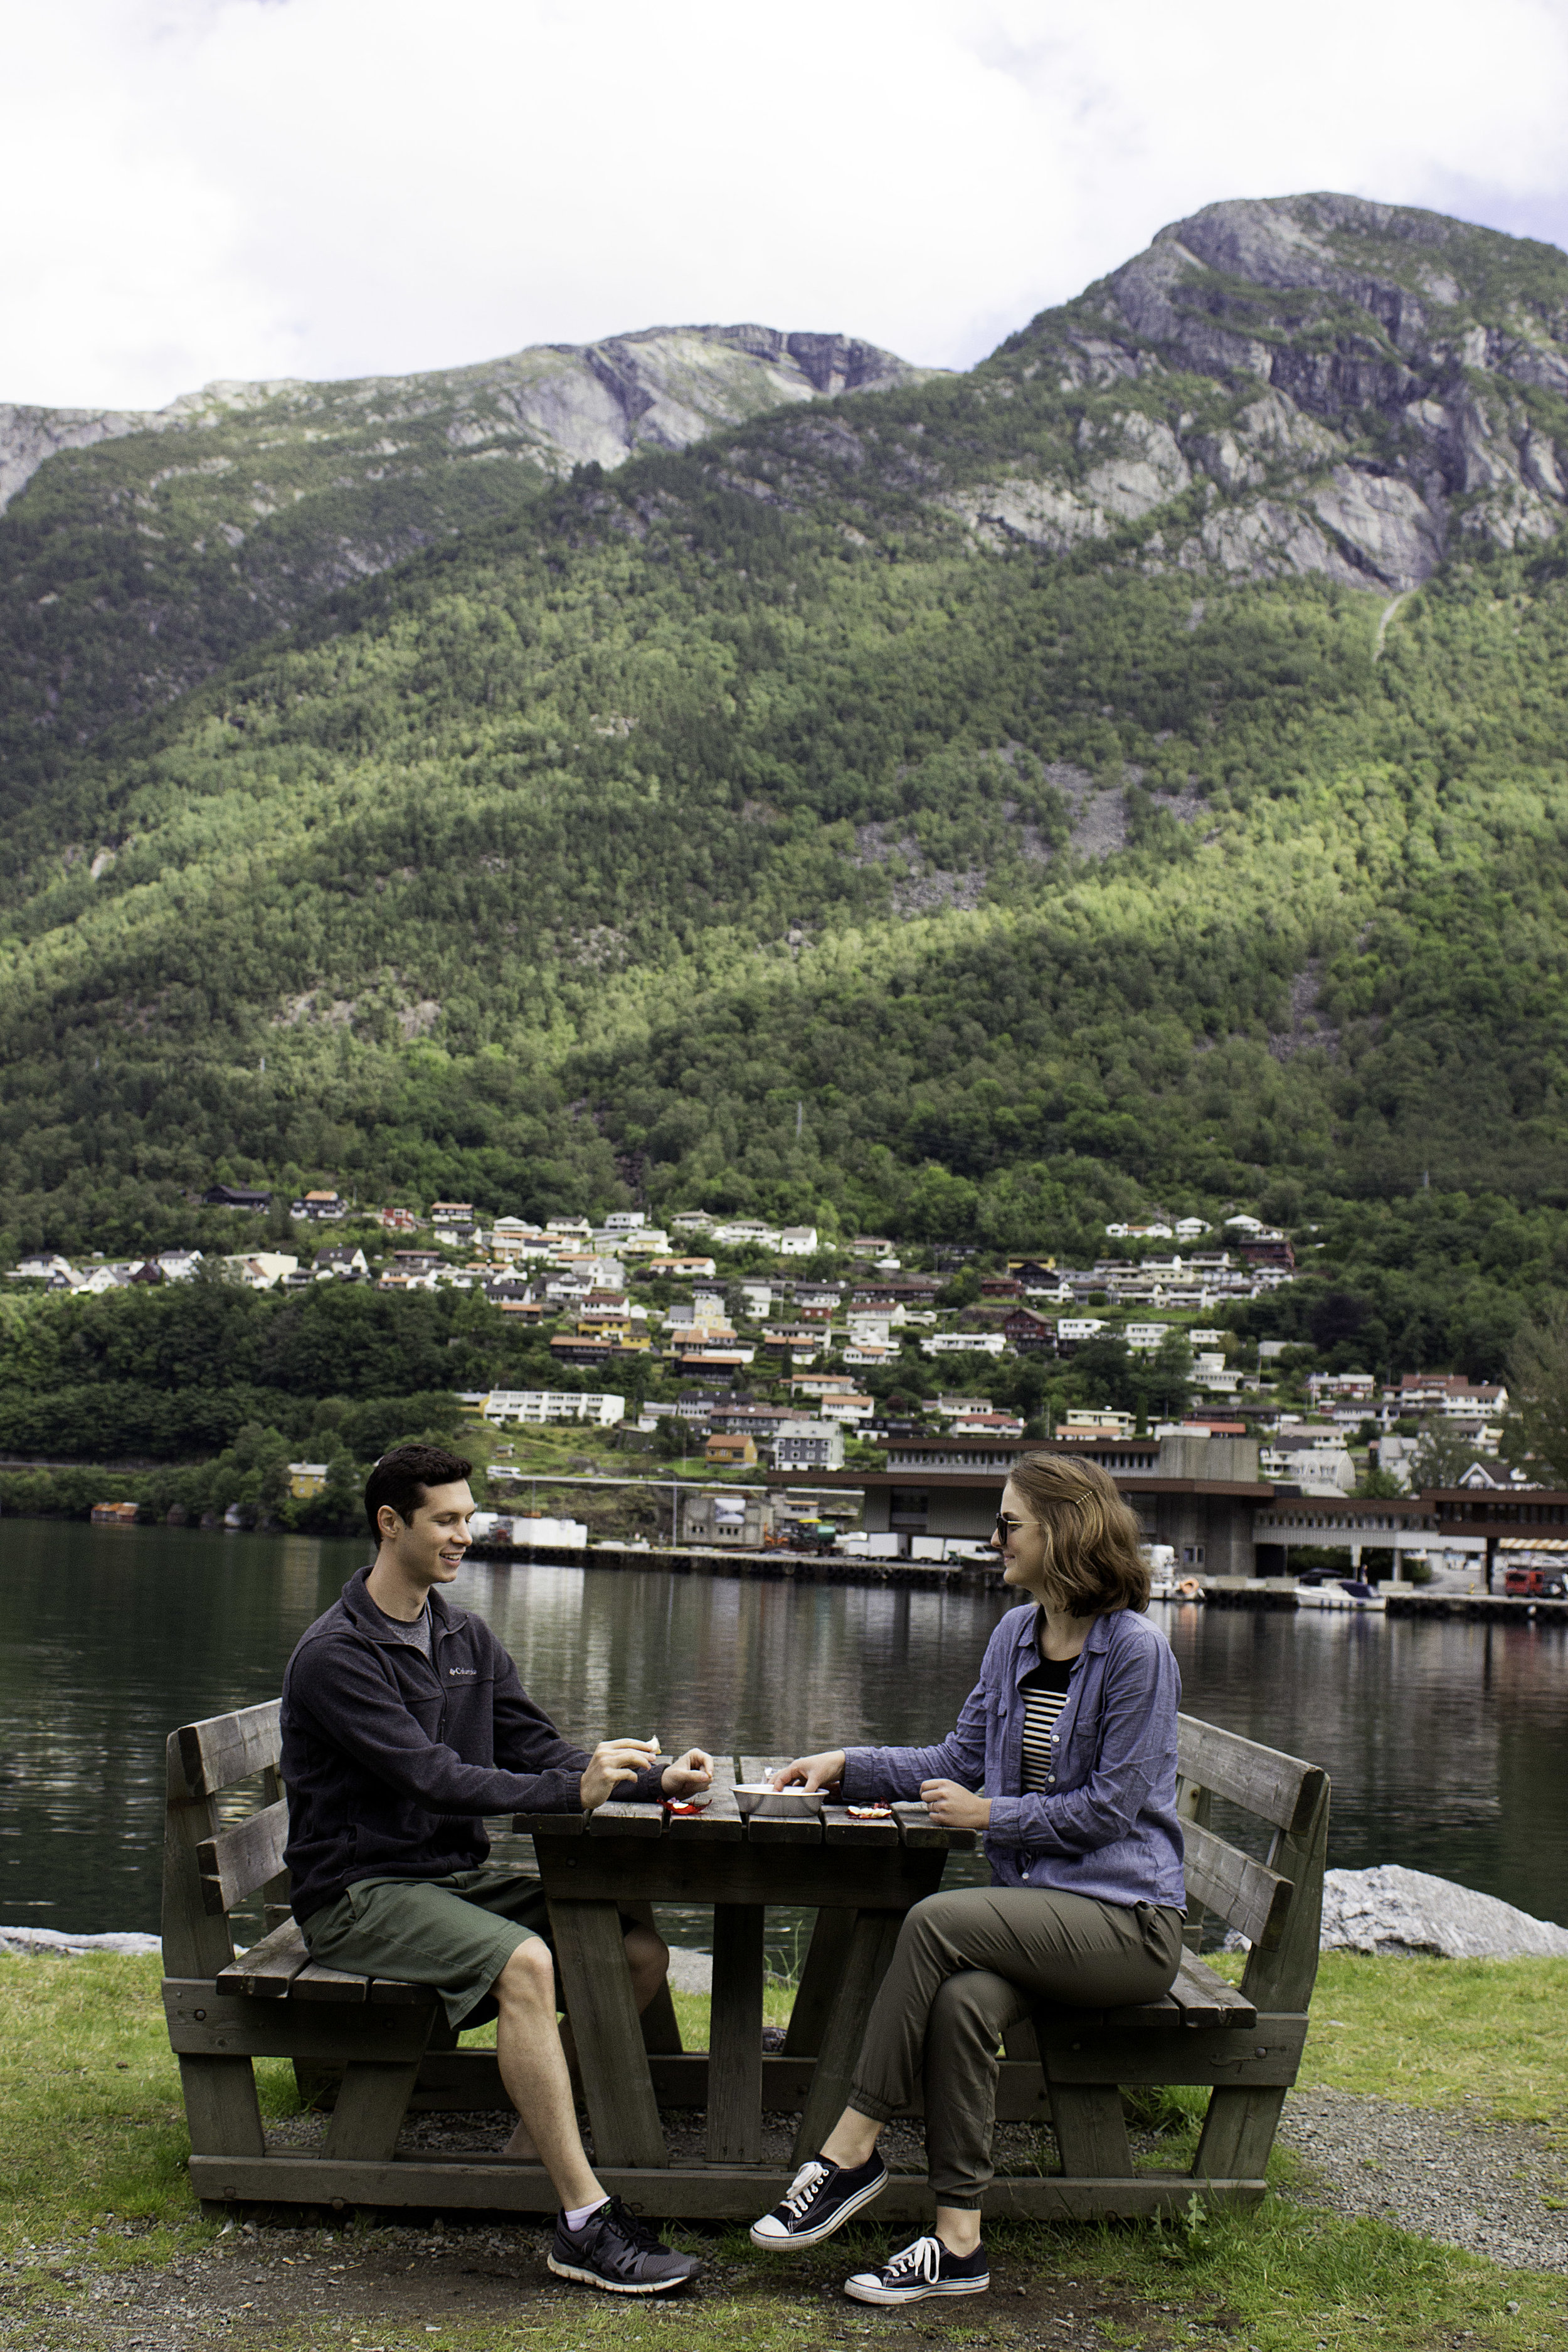
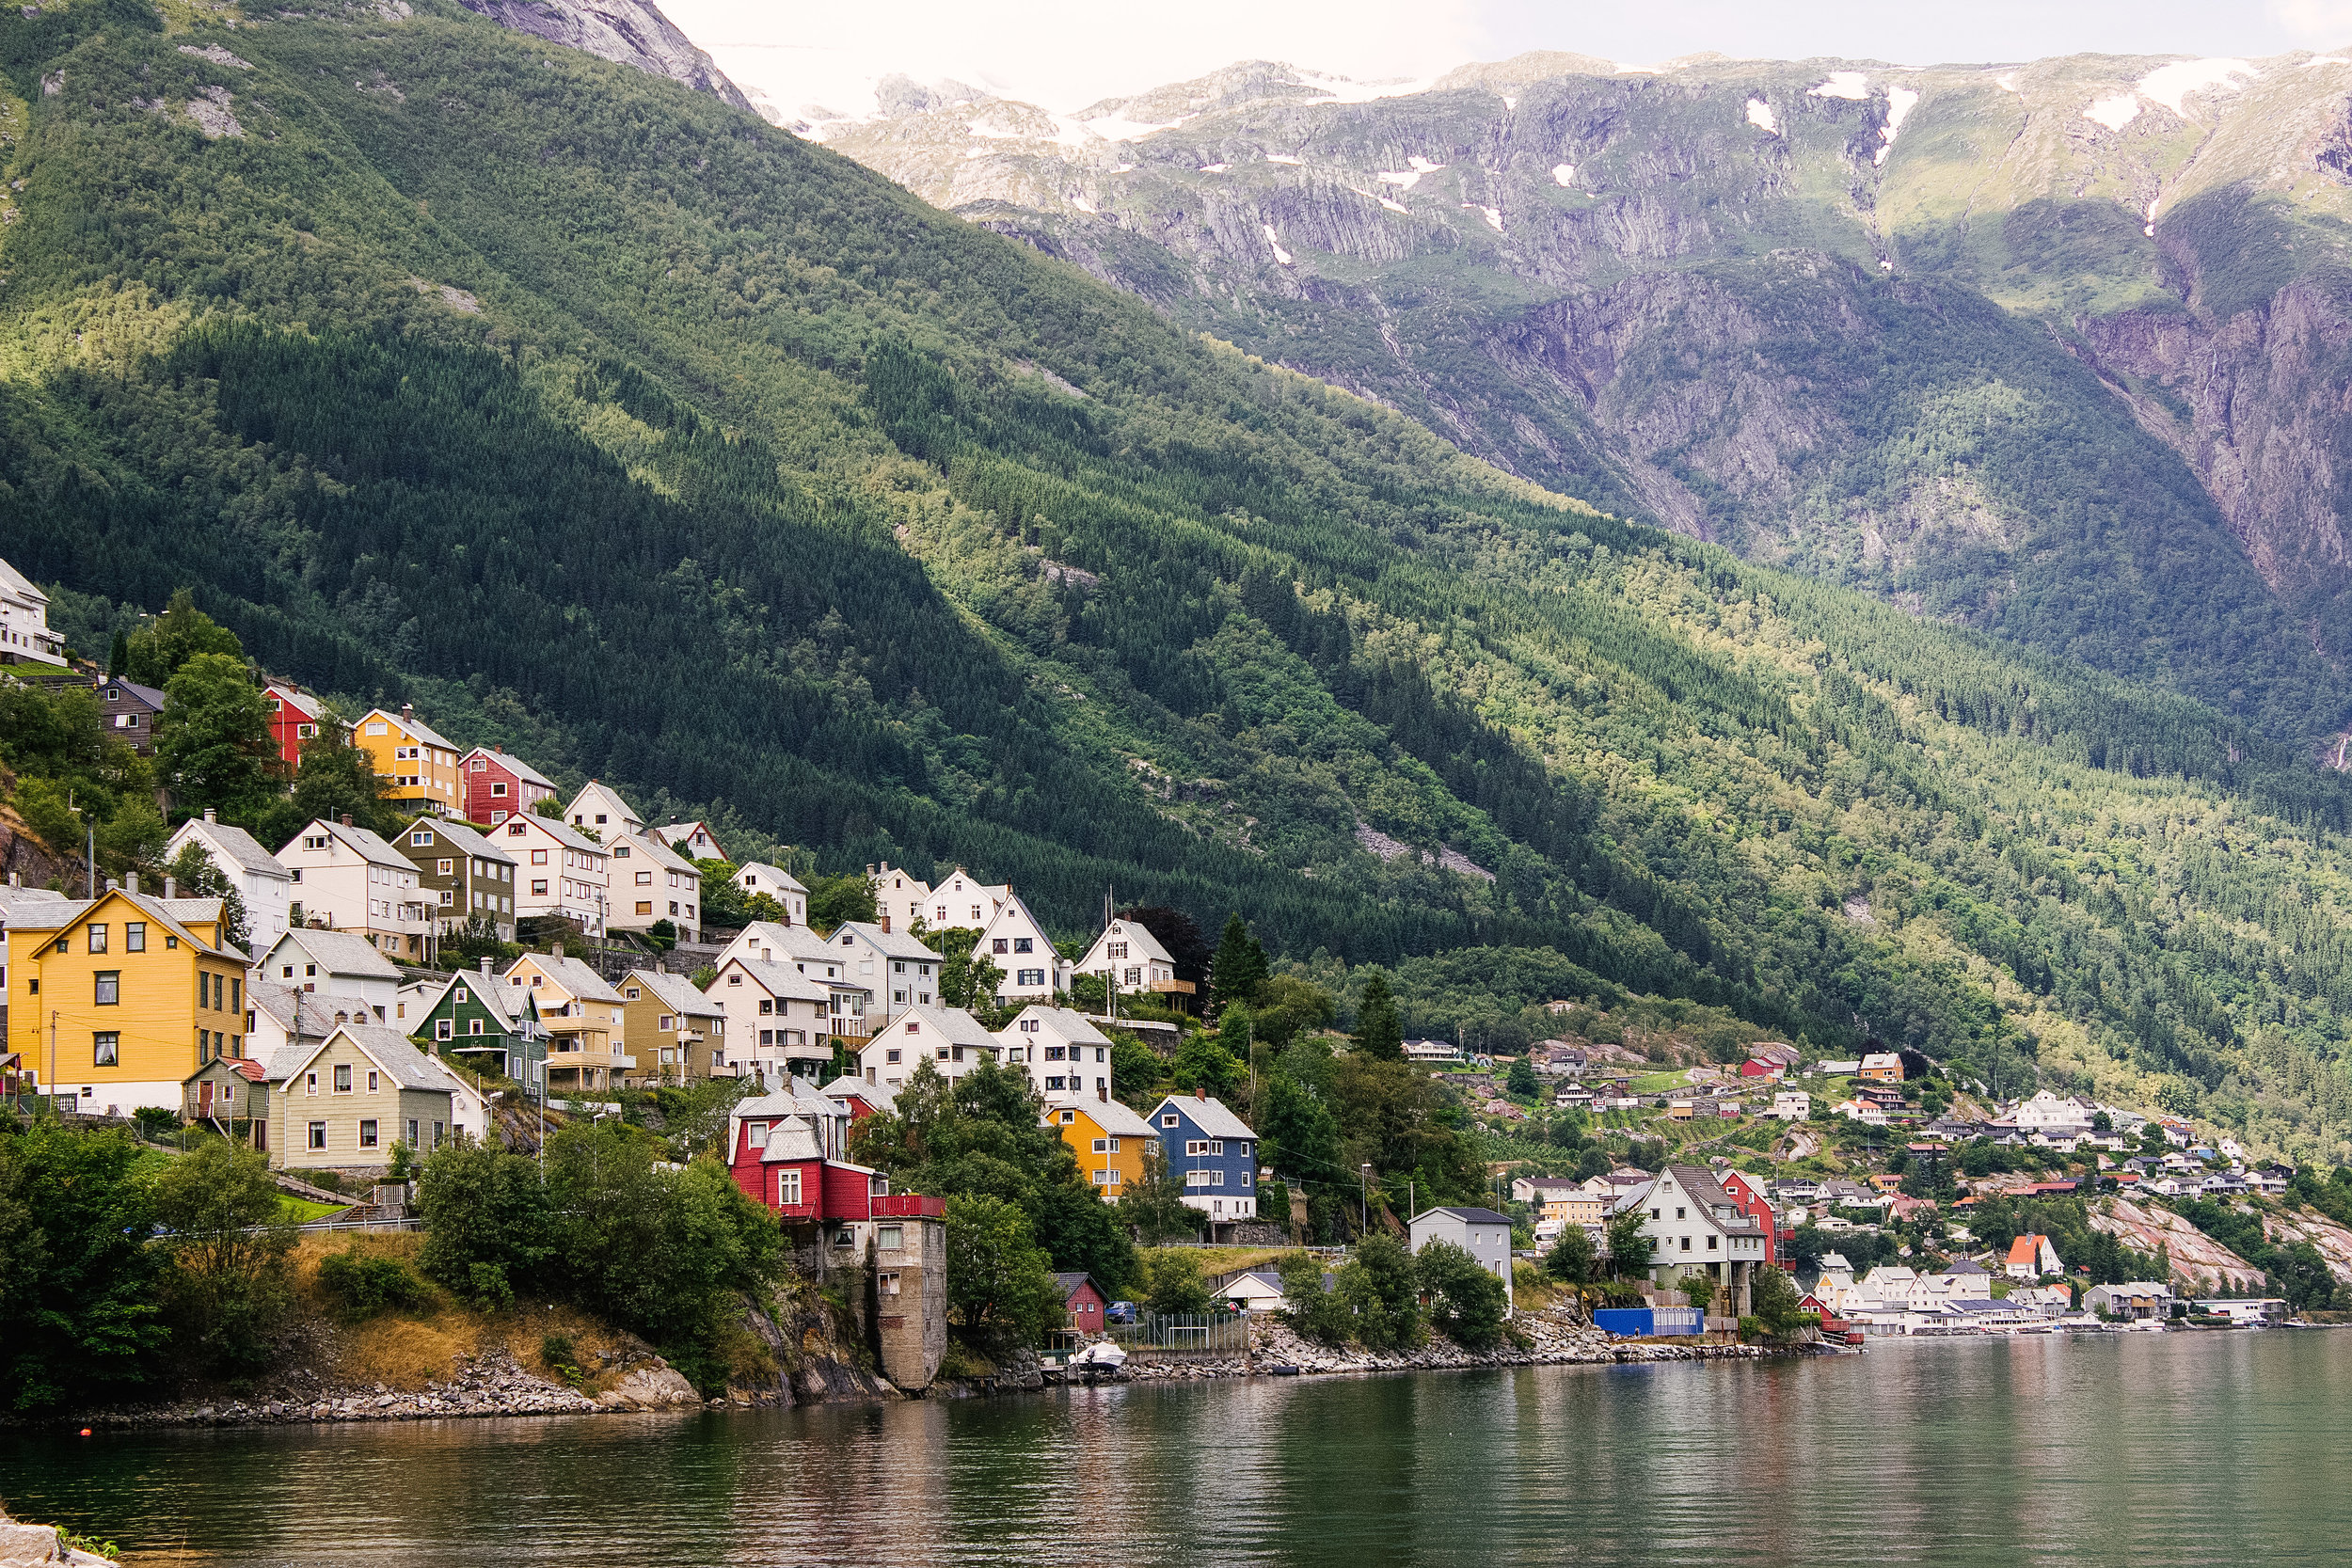
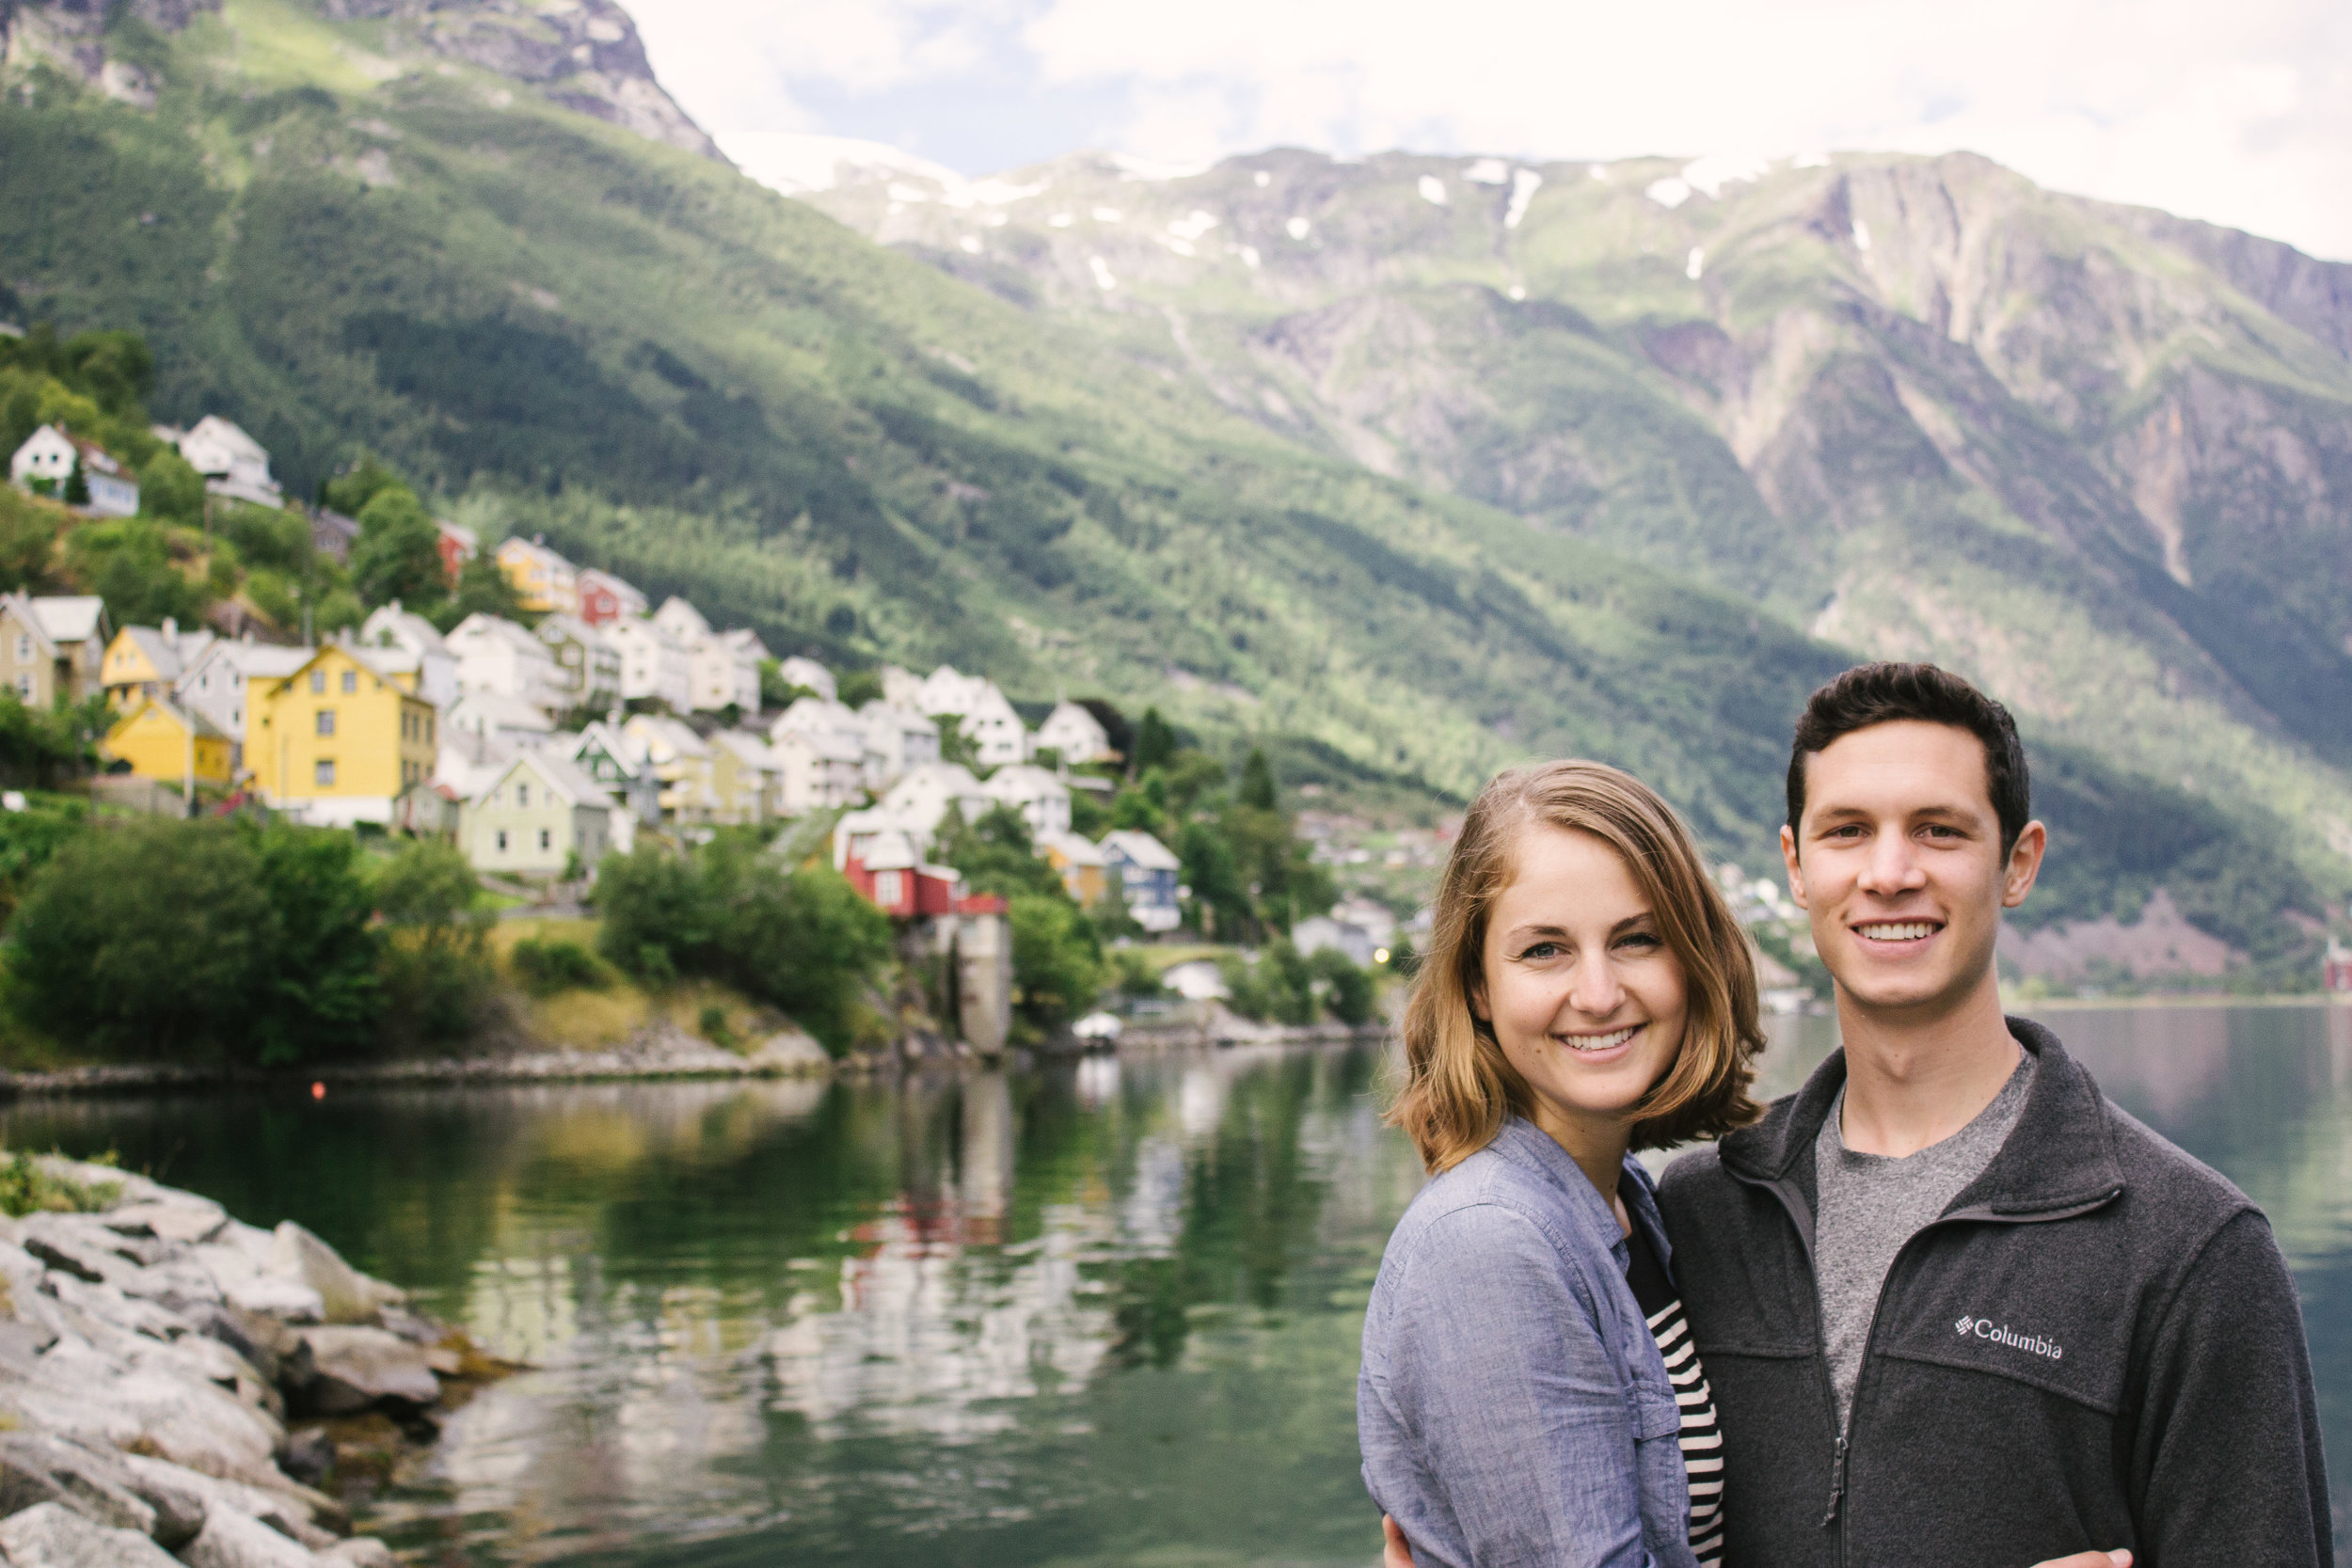
As we made our way closer to the Atlantic Ocean, the rain started, nonstop. Realizing the rain was not going to stop, we cut our loses, and adjusted our travel route so as not to head south anymore nor waste any more hours driving. Goodbye Pulpit Rock. The next morning we traveled to the cutest town of Odda. While having a picnic lunch on the waterfront we met an English couple who were also backpacking their way through Norway. The day prior they had completed Trolltunga, the well known hike whose trailhead was just up the road. They told us the 8-10 hour hike was definitely worth the effort, and seeing as they did it in the rain, that’s saying something! Their love of the hike planted the seed in our hearts to maybe reconsider hiking Trolltunga, and thank goodness we did!
Ok, so getting down to the details…
WHAT:
I’m not going to sugar coat it, this is a very long and demanding hike. From the main starting point near Trolltunga Active, it is a 27.5 km (17 mile) roundtrip hike, taking 8-12 hours to complete. It is such a wide range of time because there are a few factors involved – level of fitness, stopping for pictures, meal breaks, waiting in line to take a picture on Trolltunga (sometimes it can be upwards of 45 minutes!), and then how tired you are coming down. If you plan to hike Trolltunga, please, be prepared. The search and rescue team is already extremely busy here, rescuing unprepared or foolish tourists.
WHEN:
You can complete the hike on your own from Mid-June to Mid-September. Outside of this time you will either have to complete it via a guided tour (with snow shoes in the spring time), or it is simply ill-advised during the harsh winter. Check here for more information.
If you plan to complete the hike in one day, you should begin no later than 8-9 AM, allowing yourself plenty of time to return before it gets dark. However if you plan to spend the night at the top (which I HIGHLY recommend), you should just give yourself enough time to get to the top before dark. While breaking the hike up into two days causes you to hike down with sore muscles, being at Trolltunga with minimal tourists and witnessing sunset and sunrise is well worth it!
Be sure to check the weather before hiking. Trolltunga Active has a print out of the hourly weather forecast for the next 24 hours at their front desk. When we were contemplating whether to hike, we only felt comfortable doing so when we saw there was no rain or wind for that evening, and figured we would be well on our way down the mountain by the time the light rain started the next morning.
GETTING THERE:
We had a rental car, so I don’t have any information regarding public transportation to the trailhead. Some people stayed in the nearby town of Odda the night before or after their day hike to Trolltunga. Heading from Odda, drive north along the fjord for 6 km to reach Tyssedal. Taking a right onto Skjeggedalsvegen you will wind your way up the mountain. You will see signs for one of the parking lots for Trolltunga before you leave Tyssedal. From this parking lot it is an additional 5.5 km up a single lane road to Trolltunga Active in Skjeggedal. The lane has a few widen areas for passing cars, but be careful driving this road as there are a lot of blind curves.
PARKING:
There are a couple of different parking options. The main parking lot is located next to the Trolltunga Active center. There is a fee of 300 NOK for 12 hours and 600 NOK for 24 hours hours. The second option is farther from the trailhead, located in Tyssedal, and costs 150 NOK for 24 hours. Most folks we saw who parked here paid a taxi to transport them to and from the car. The third option is limited – a small parking lot located at the top of the trail's most difficult incline. The dirt road leading to the lot opens at 7 AM, and there is only room for 30 cars. The fee is 500 NOK for 12 hours, and operates on a first come, first serve basis.

There are two trailheads: #1 the red dotted line. These shorter switchbacks result in steeper inclines, over a less distance. #2 the white solid road leading to the upper parking lot. (Remember this parking lot is not only more expensive, but also limited in size, only able to hold 30 cars. The lot is first come, first serve.) This second option, while still steep, is less steep than #1 due to the longer switchbacks. Clearly #2 is longer than #1. At the top of #2, there will be a trailhead sign (the red dotted line). This trail will soon join the #1 option trail.
Click here for original image source
THE TRAIL:
There are a two different starting points from the base that eventually come together after a steep incline. The first is located west of Trolltunga Active. It is essentially a vertical stairmaster with a 450 m elevation gain over 1 km. This route is made up of stone steps, as well as ropes in places of steep incline for added support. The second option is using the dirt road behind Trolltunga Active. The road was recently built leading to the top parking lot. This option is longer in length (~2.5km) due to minimizing the gradient via switchbacks. But this is still steep as well. With 17 hair pin turns, it has upwards of a 17% grade. Once you reach the top of this road, you will see signs for the Trolltunga trailhead. This is where you will start if you opted to park at the top (you’ll just have fresh legs relative to those who hiked to get to this starting point).

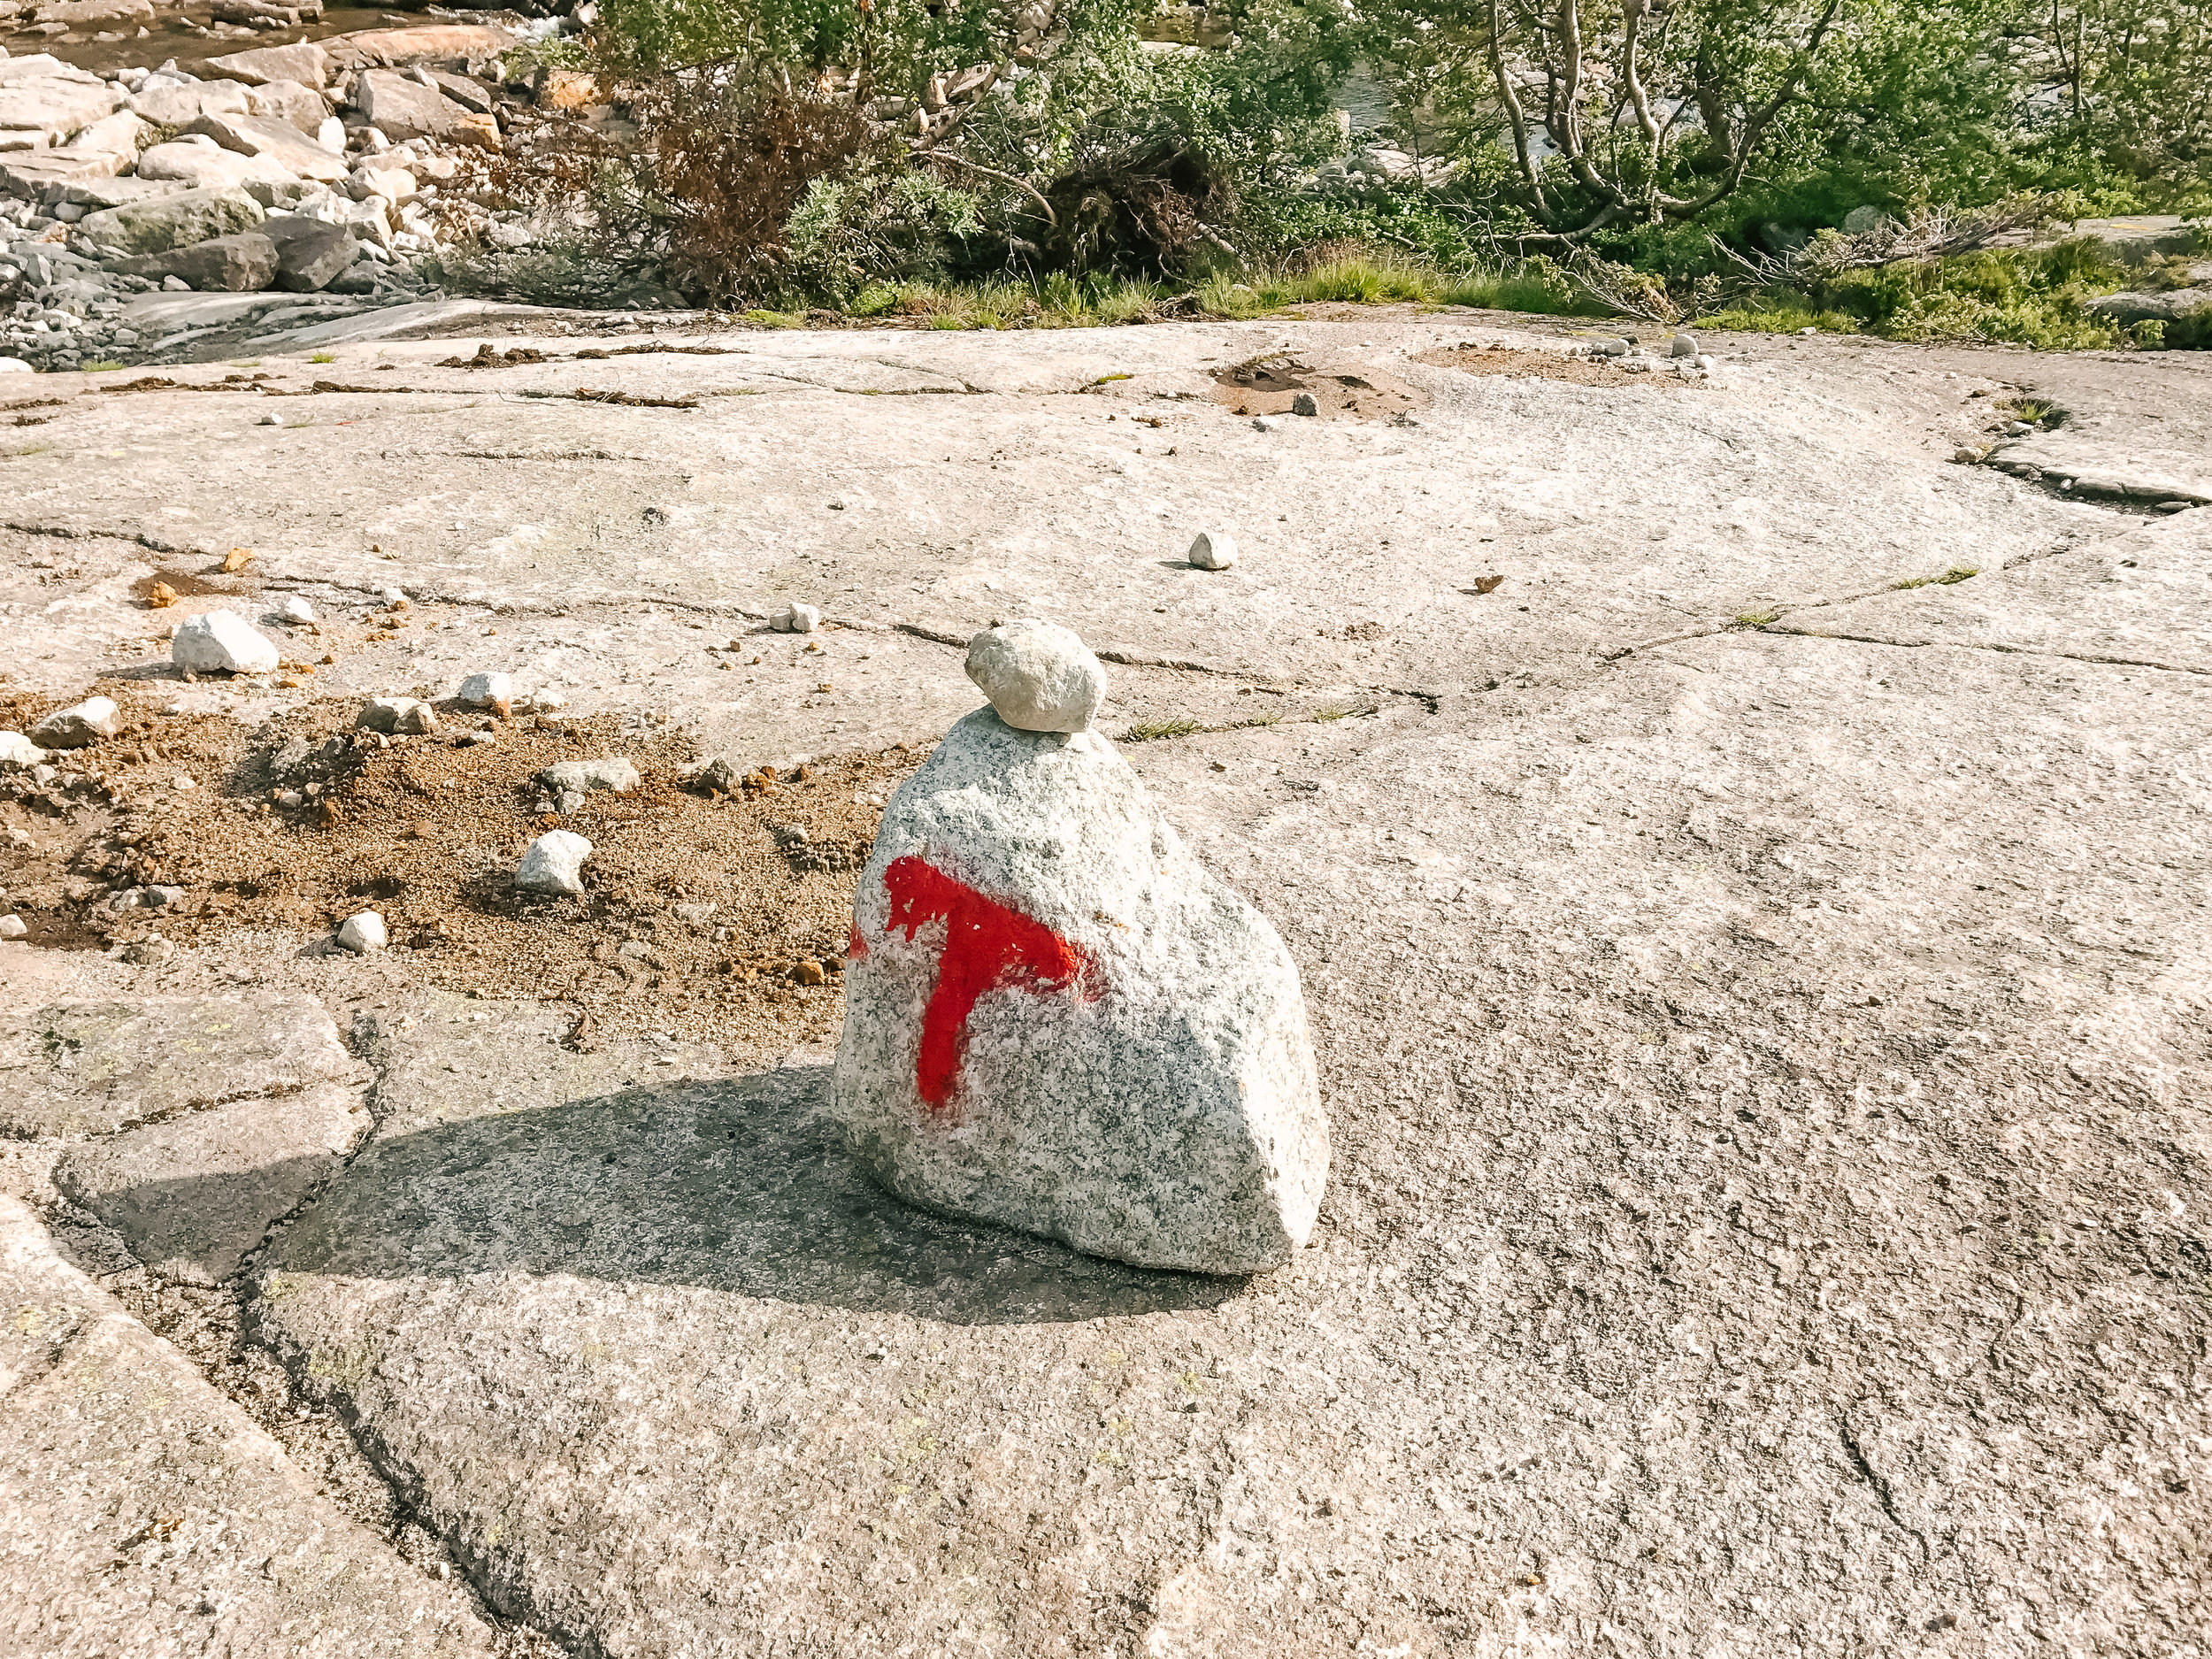
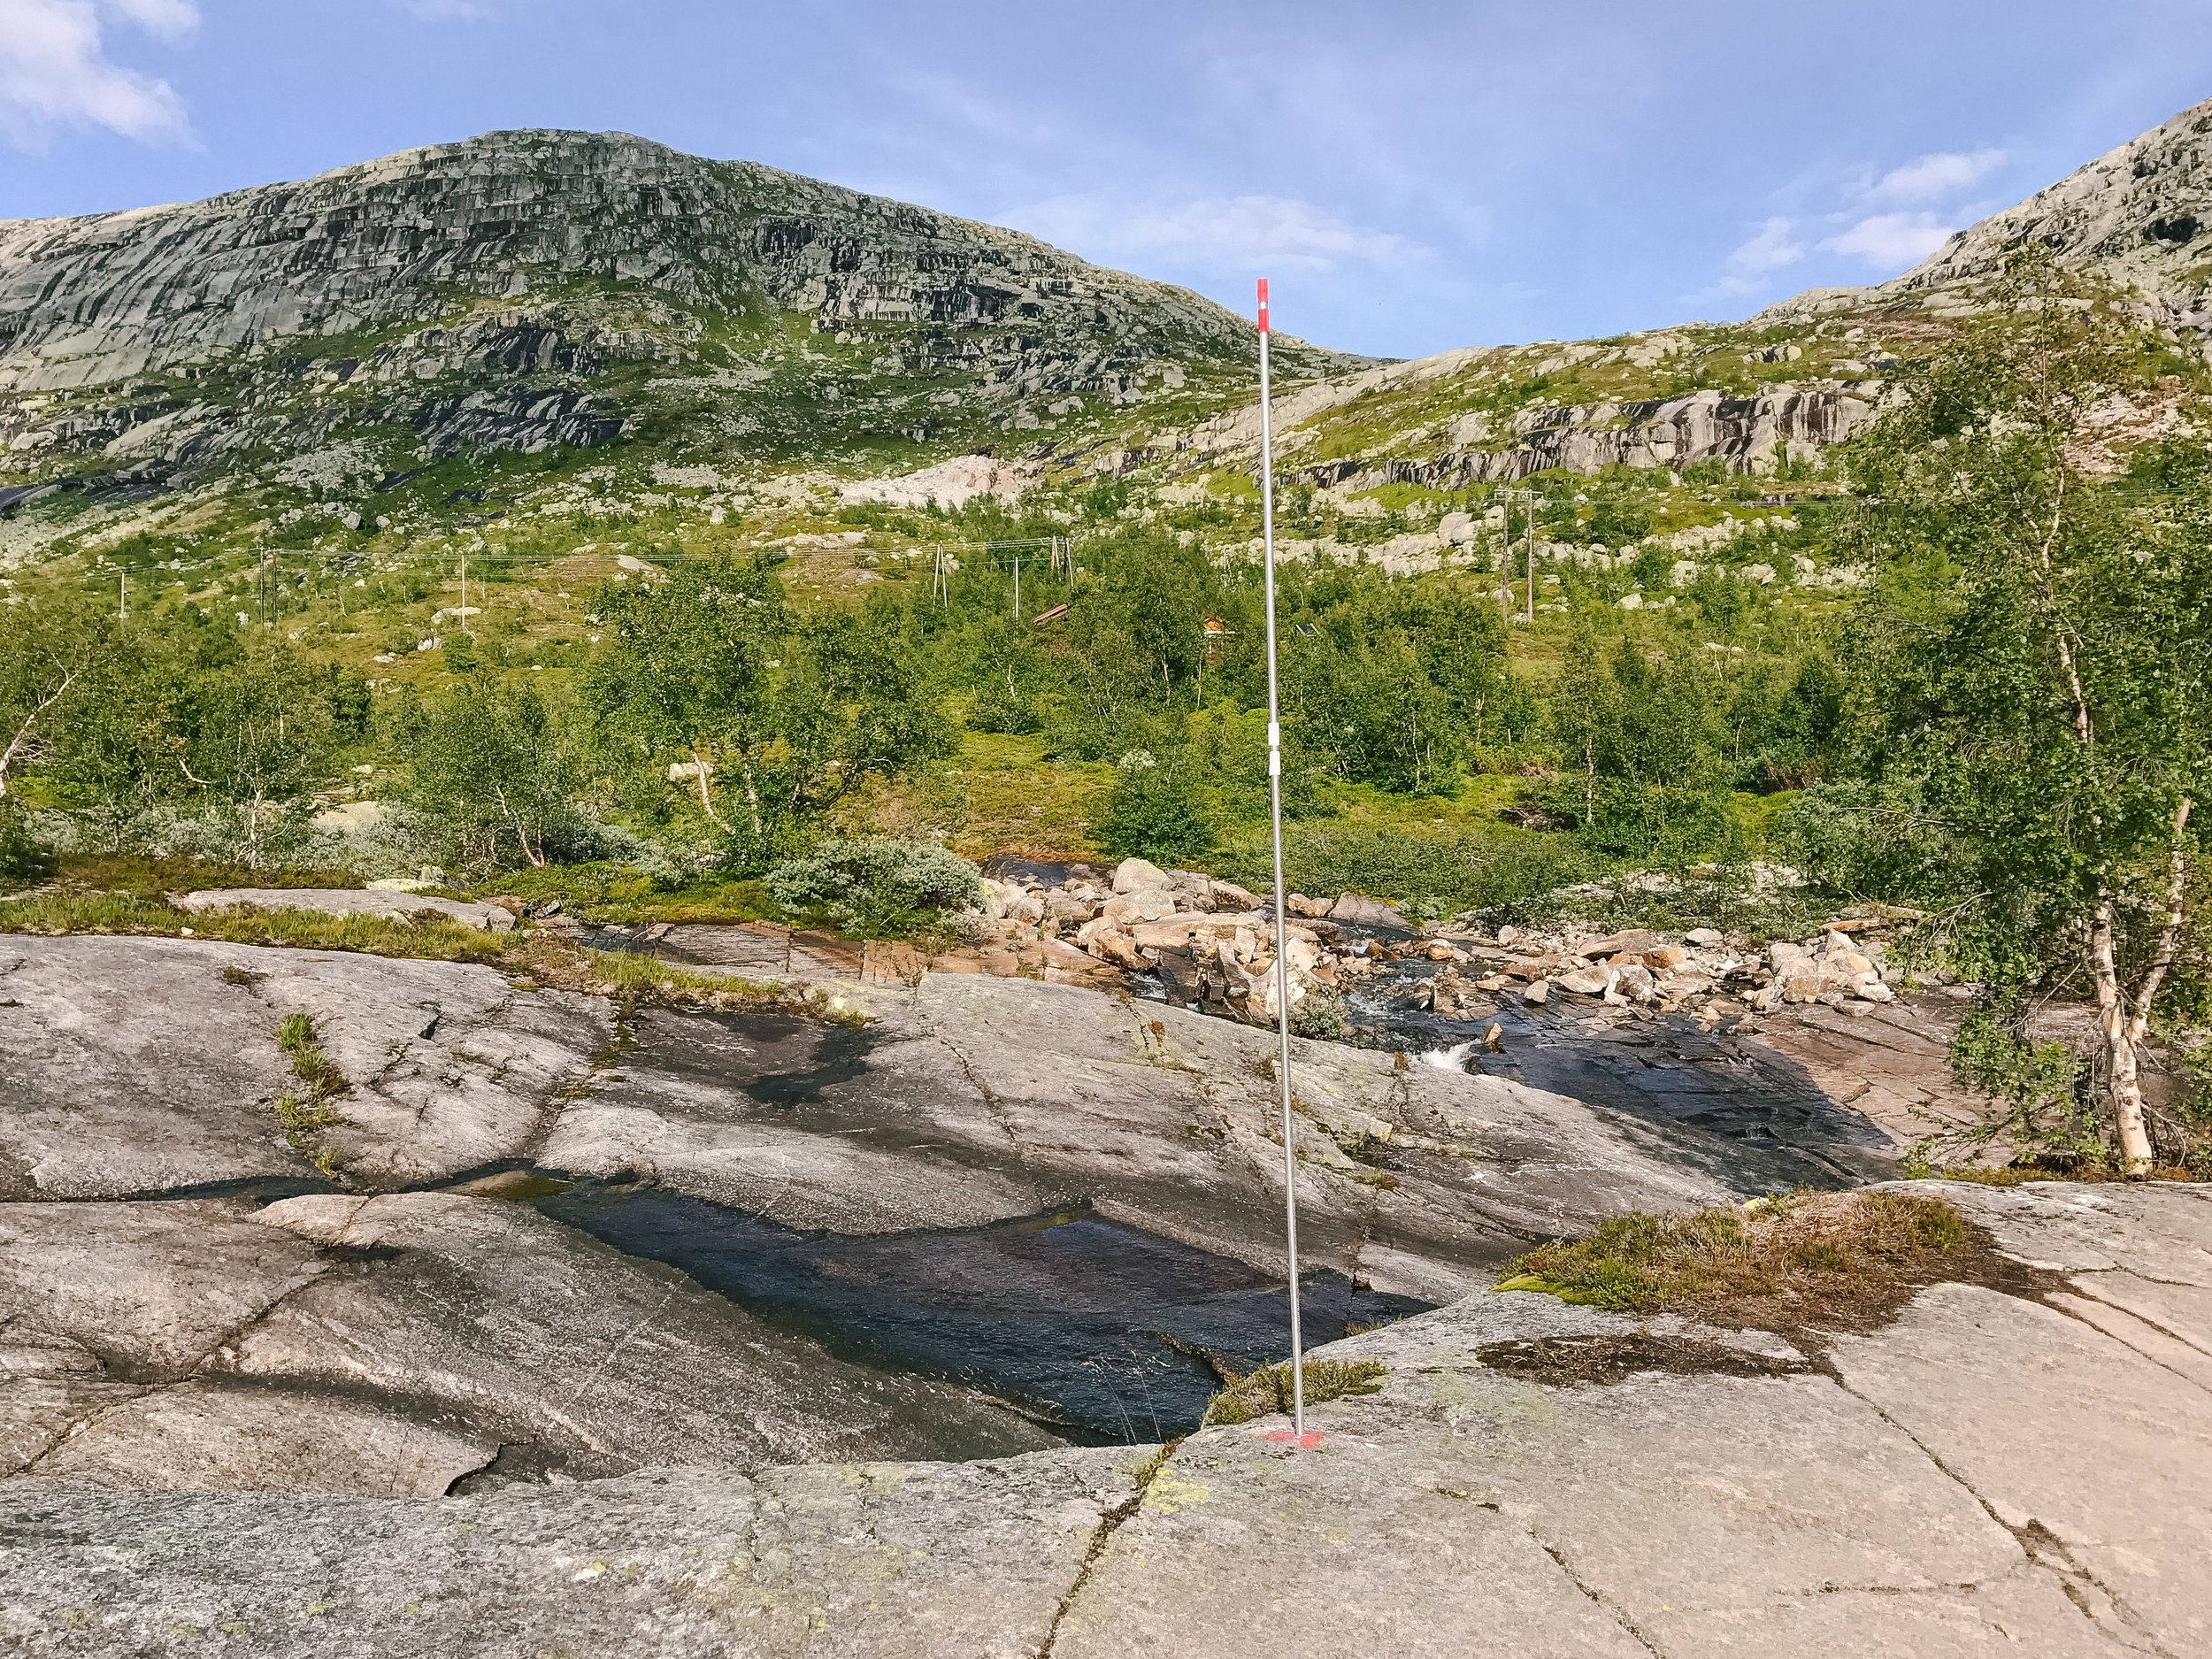
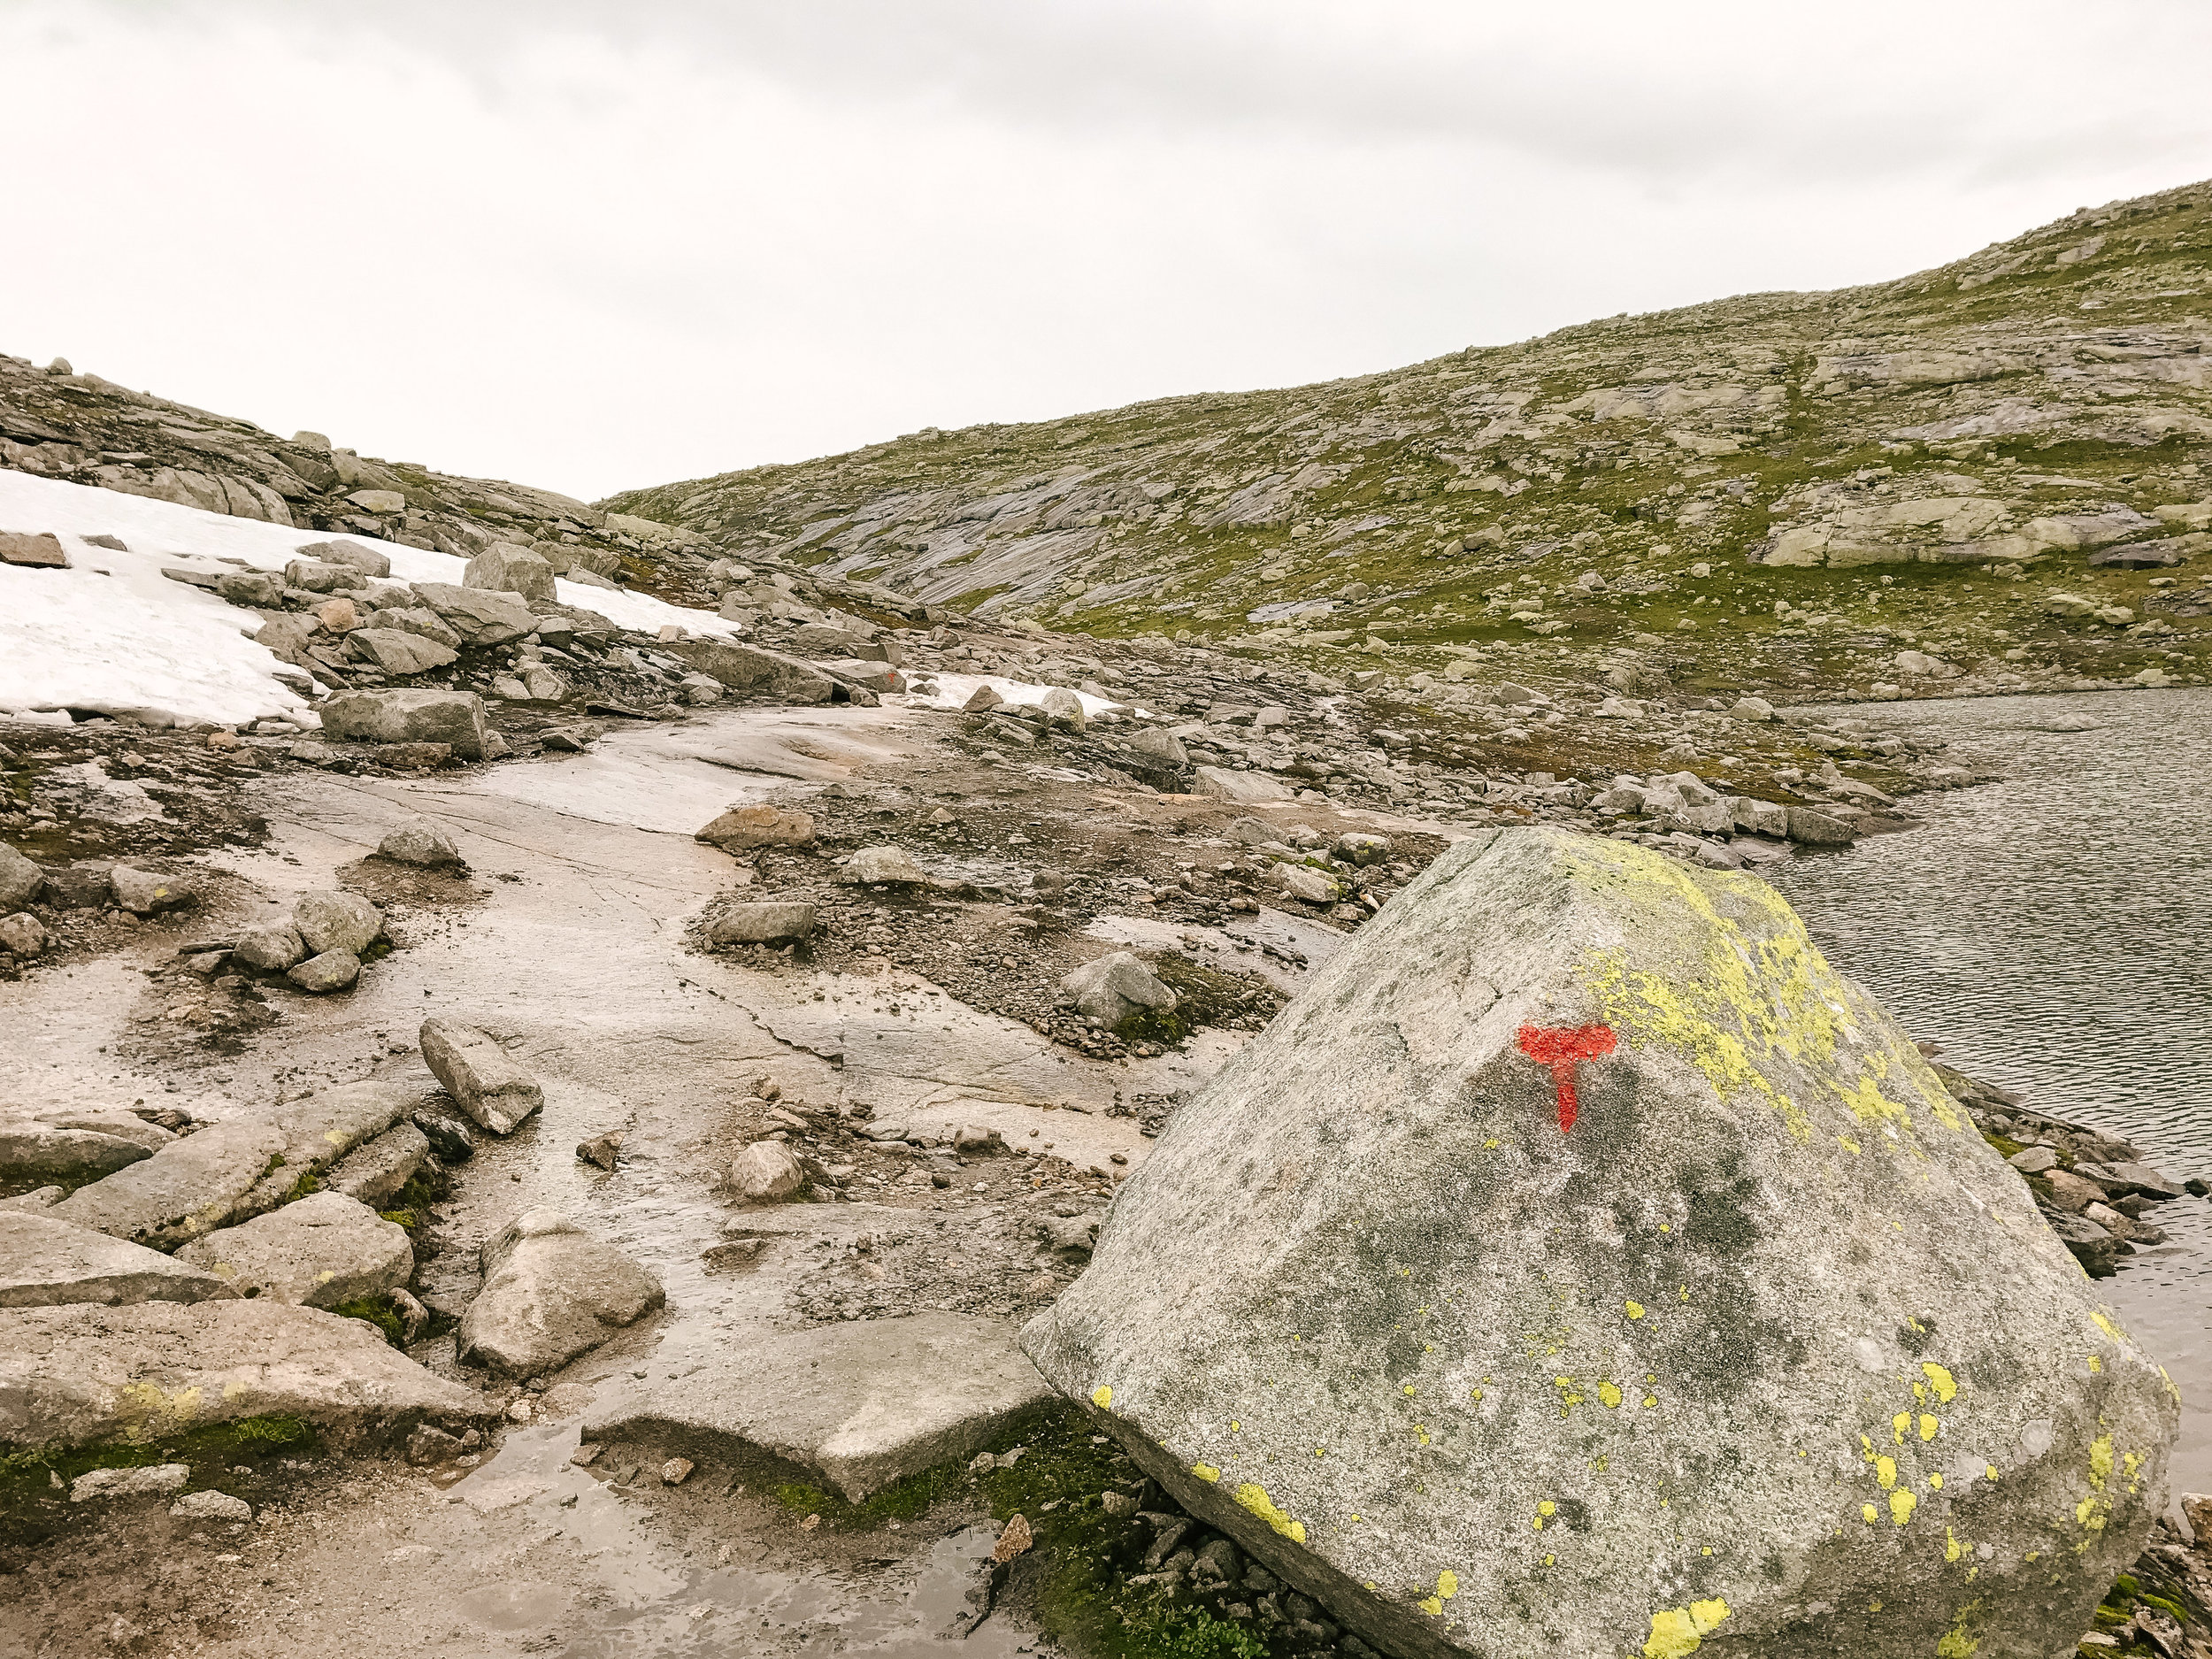
The entire trail is marked with red, spray-painted ‘T”s on the rocks or tall, skinny poles with red tape on the top. These markings are frequent, but if you are not looking ahead to find the next “T” you may get a little off track. Additionally, there are a signs every 1-2 kilometers, indicating the number of kilometers hiked, and the amount remaining.
The initial incline is the worst, so don’t get too discouraged from it! From here the trail levels out as you make your way through the “valley of cabins.” There are numerous glacial streams and wooden bridges to make your path through the marshy area easier. After a km you will come to the second worse incline (about 300m). The incline starts with large stone steps, and eventually turns into an enormous rock face – which looks slippery, but we had no trouble feeling secure with our steps. Once you reach the top of the rock face you will see the 4 km sign.
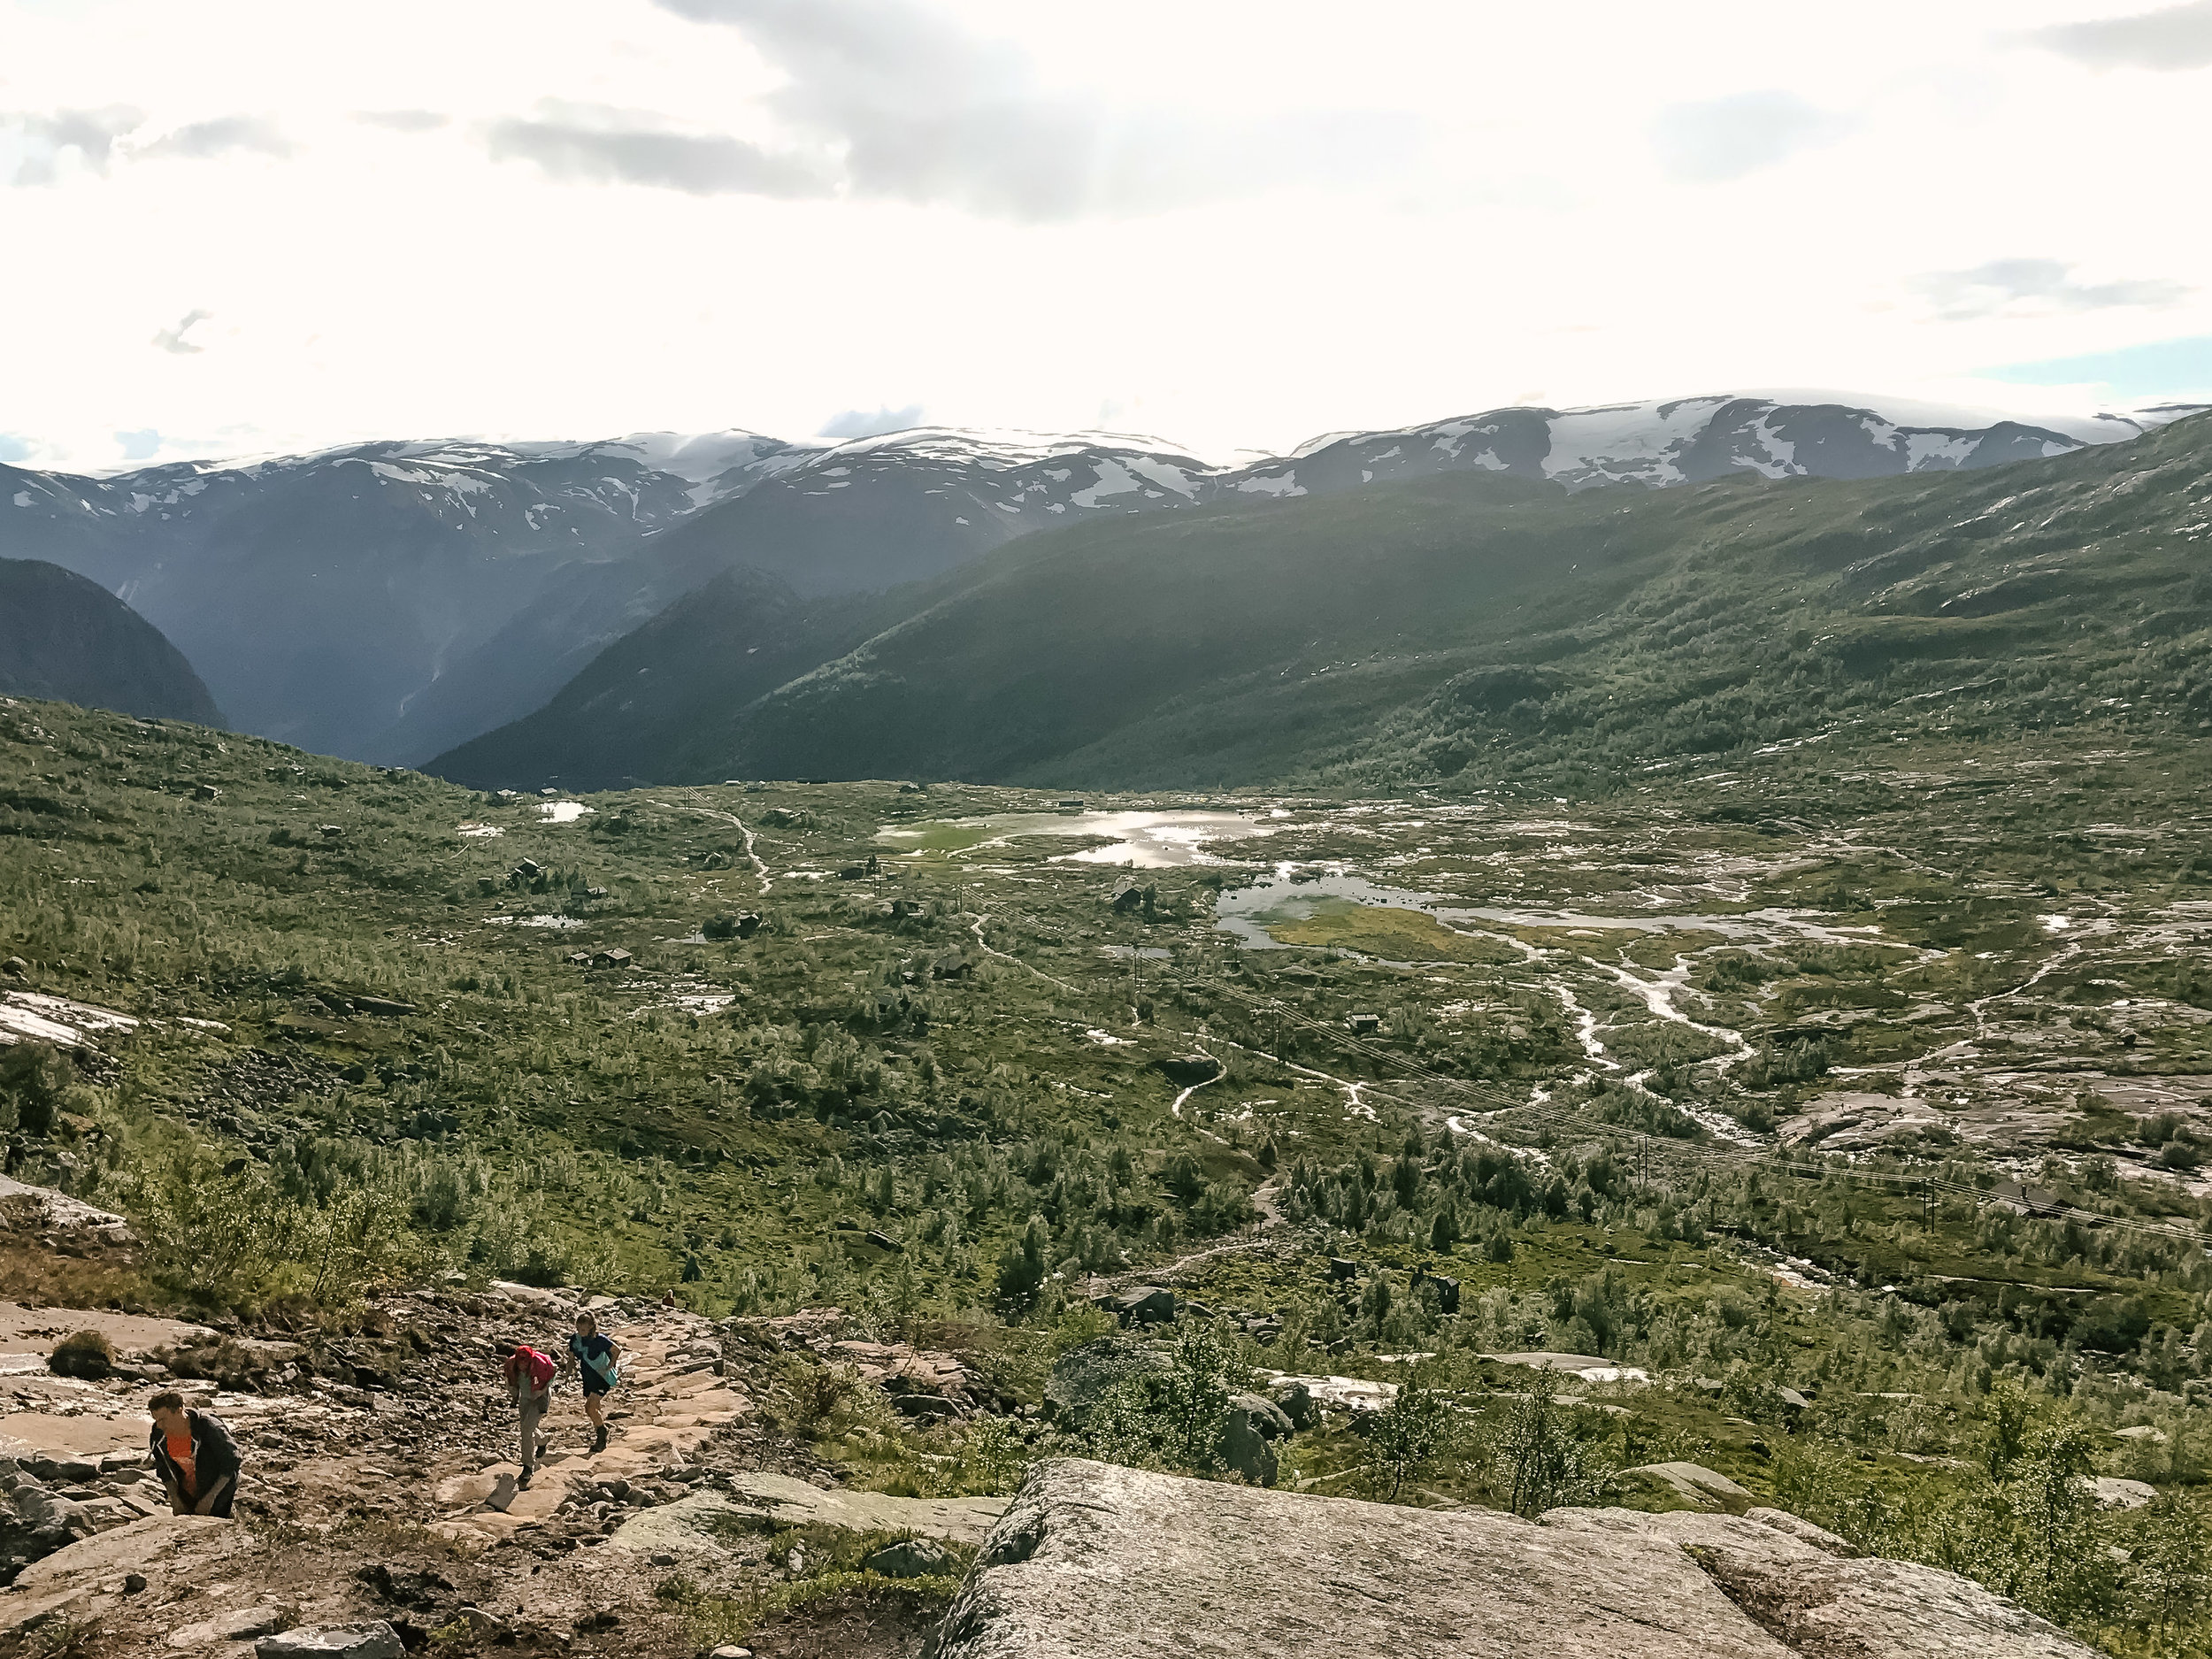
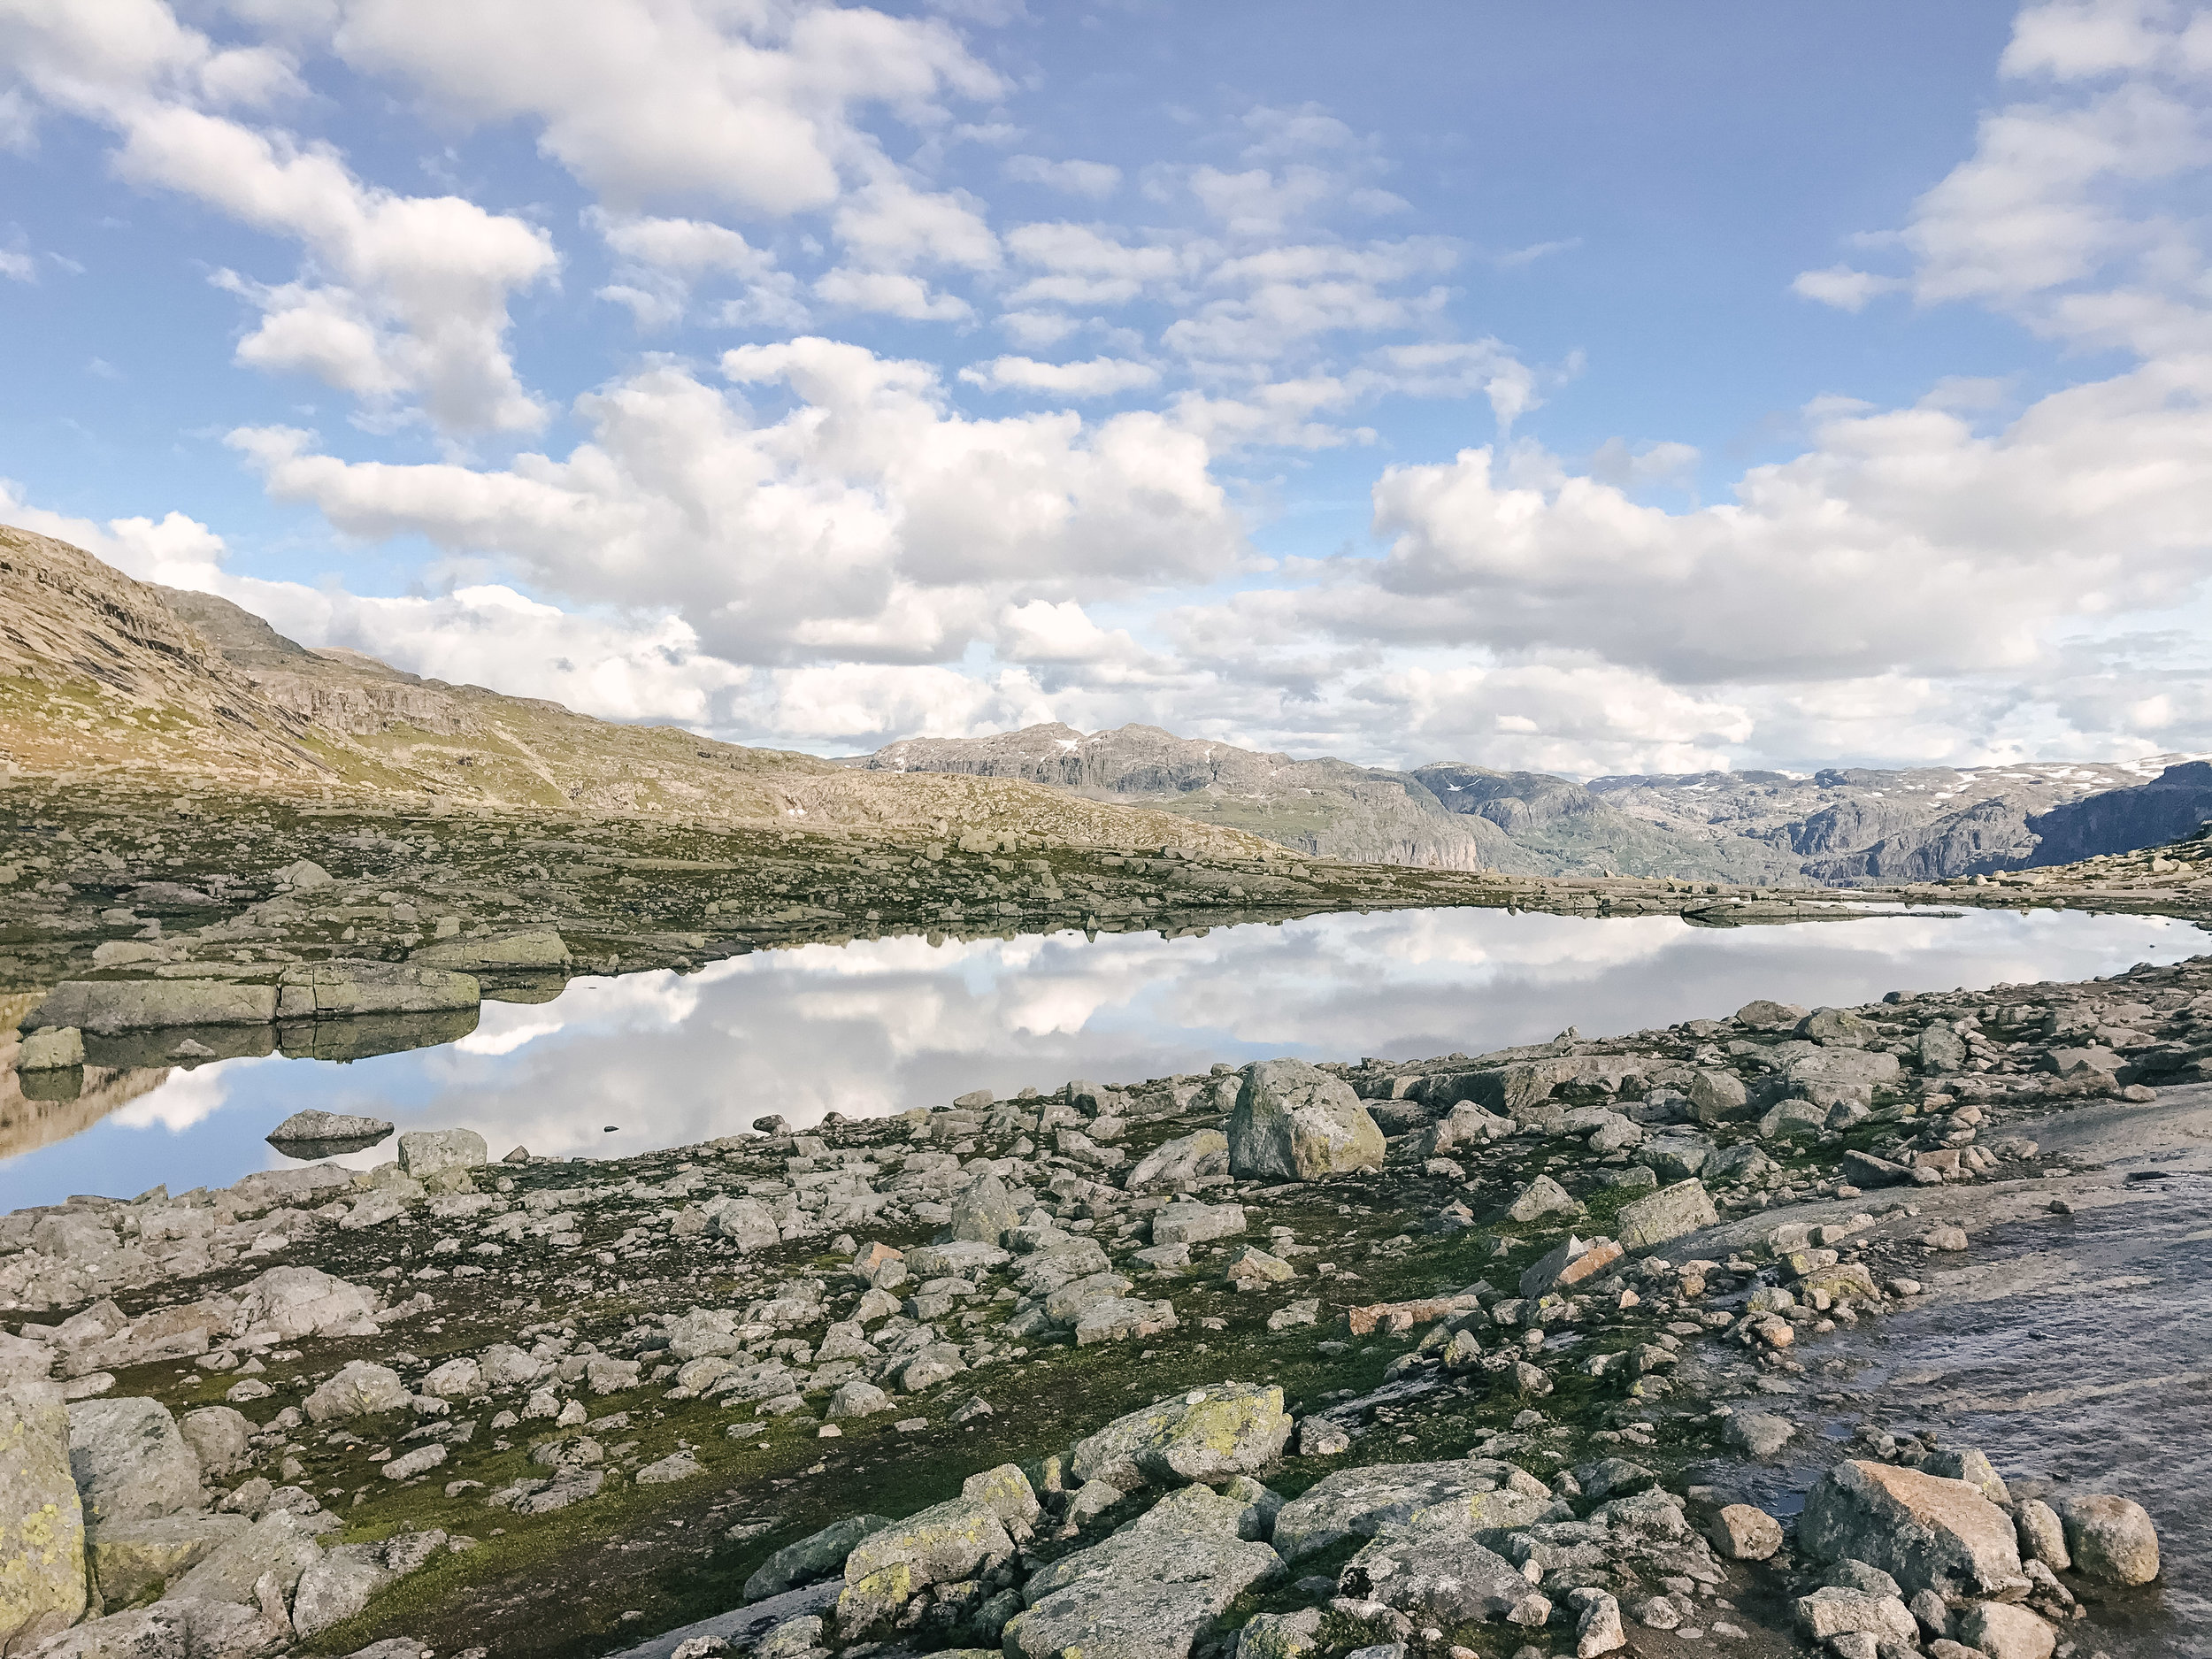
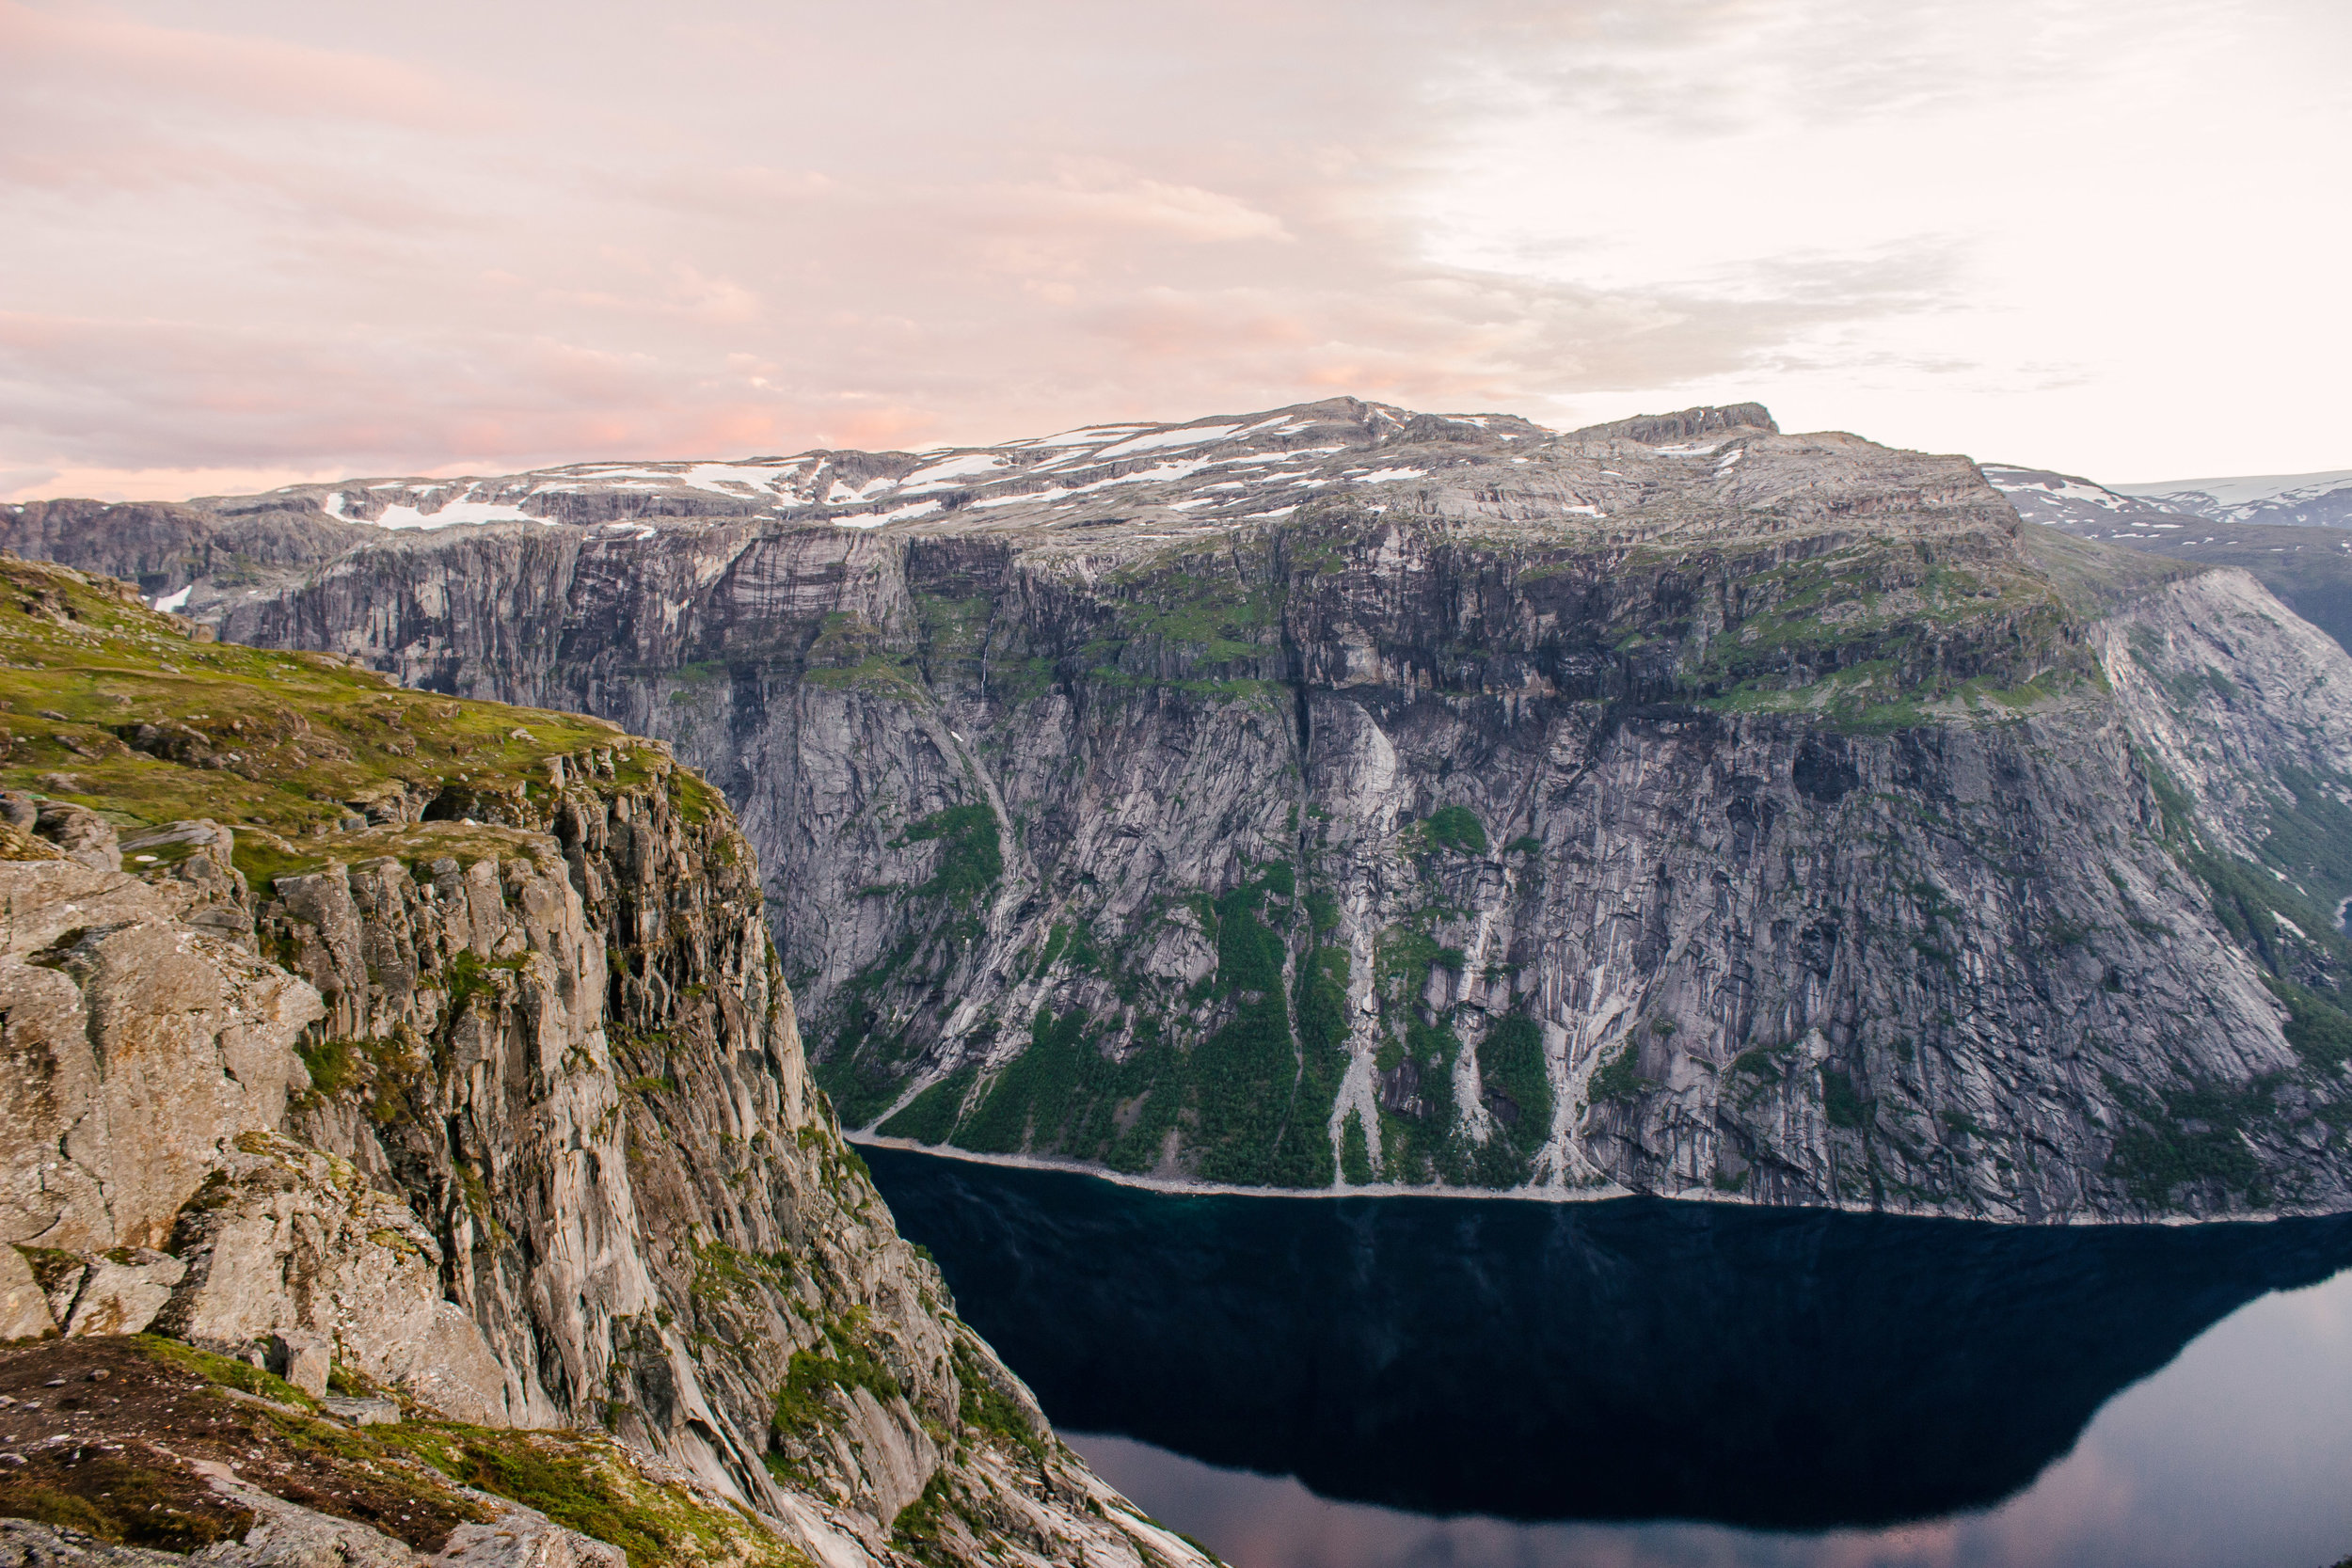
The next few kilometers will be relatively easy. The terrain starts to change frequently, ranging from large reflection pools, to left over snow from winter, to mossy wetlands. Eventually you will come to the first outlook of Lake Ringedalsvatnet, the body of water you see in the infamous Trolltunga pictures. Looking out you can see how high you have climbed, the lake’s shore looking unbelievably small.
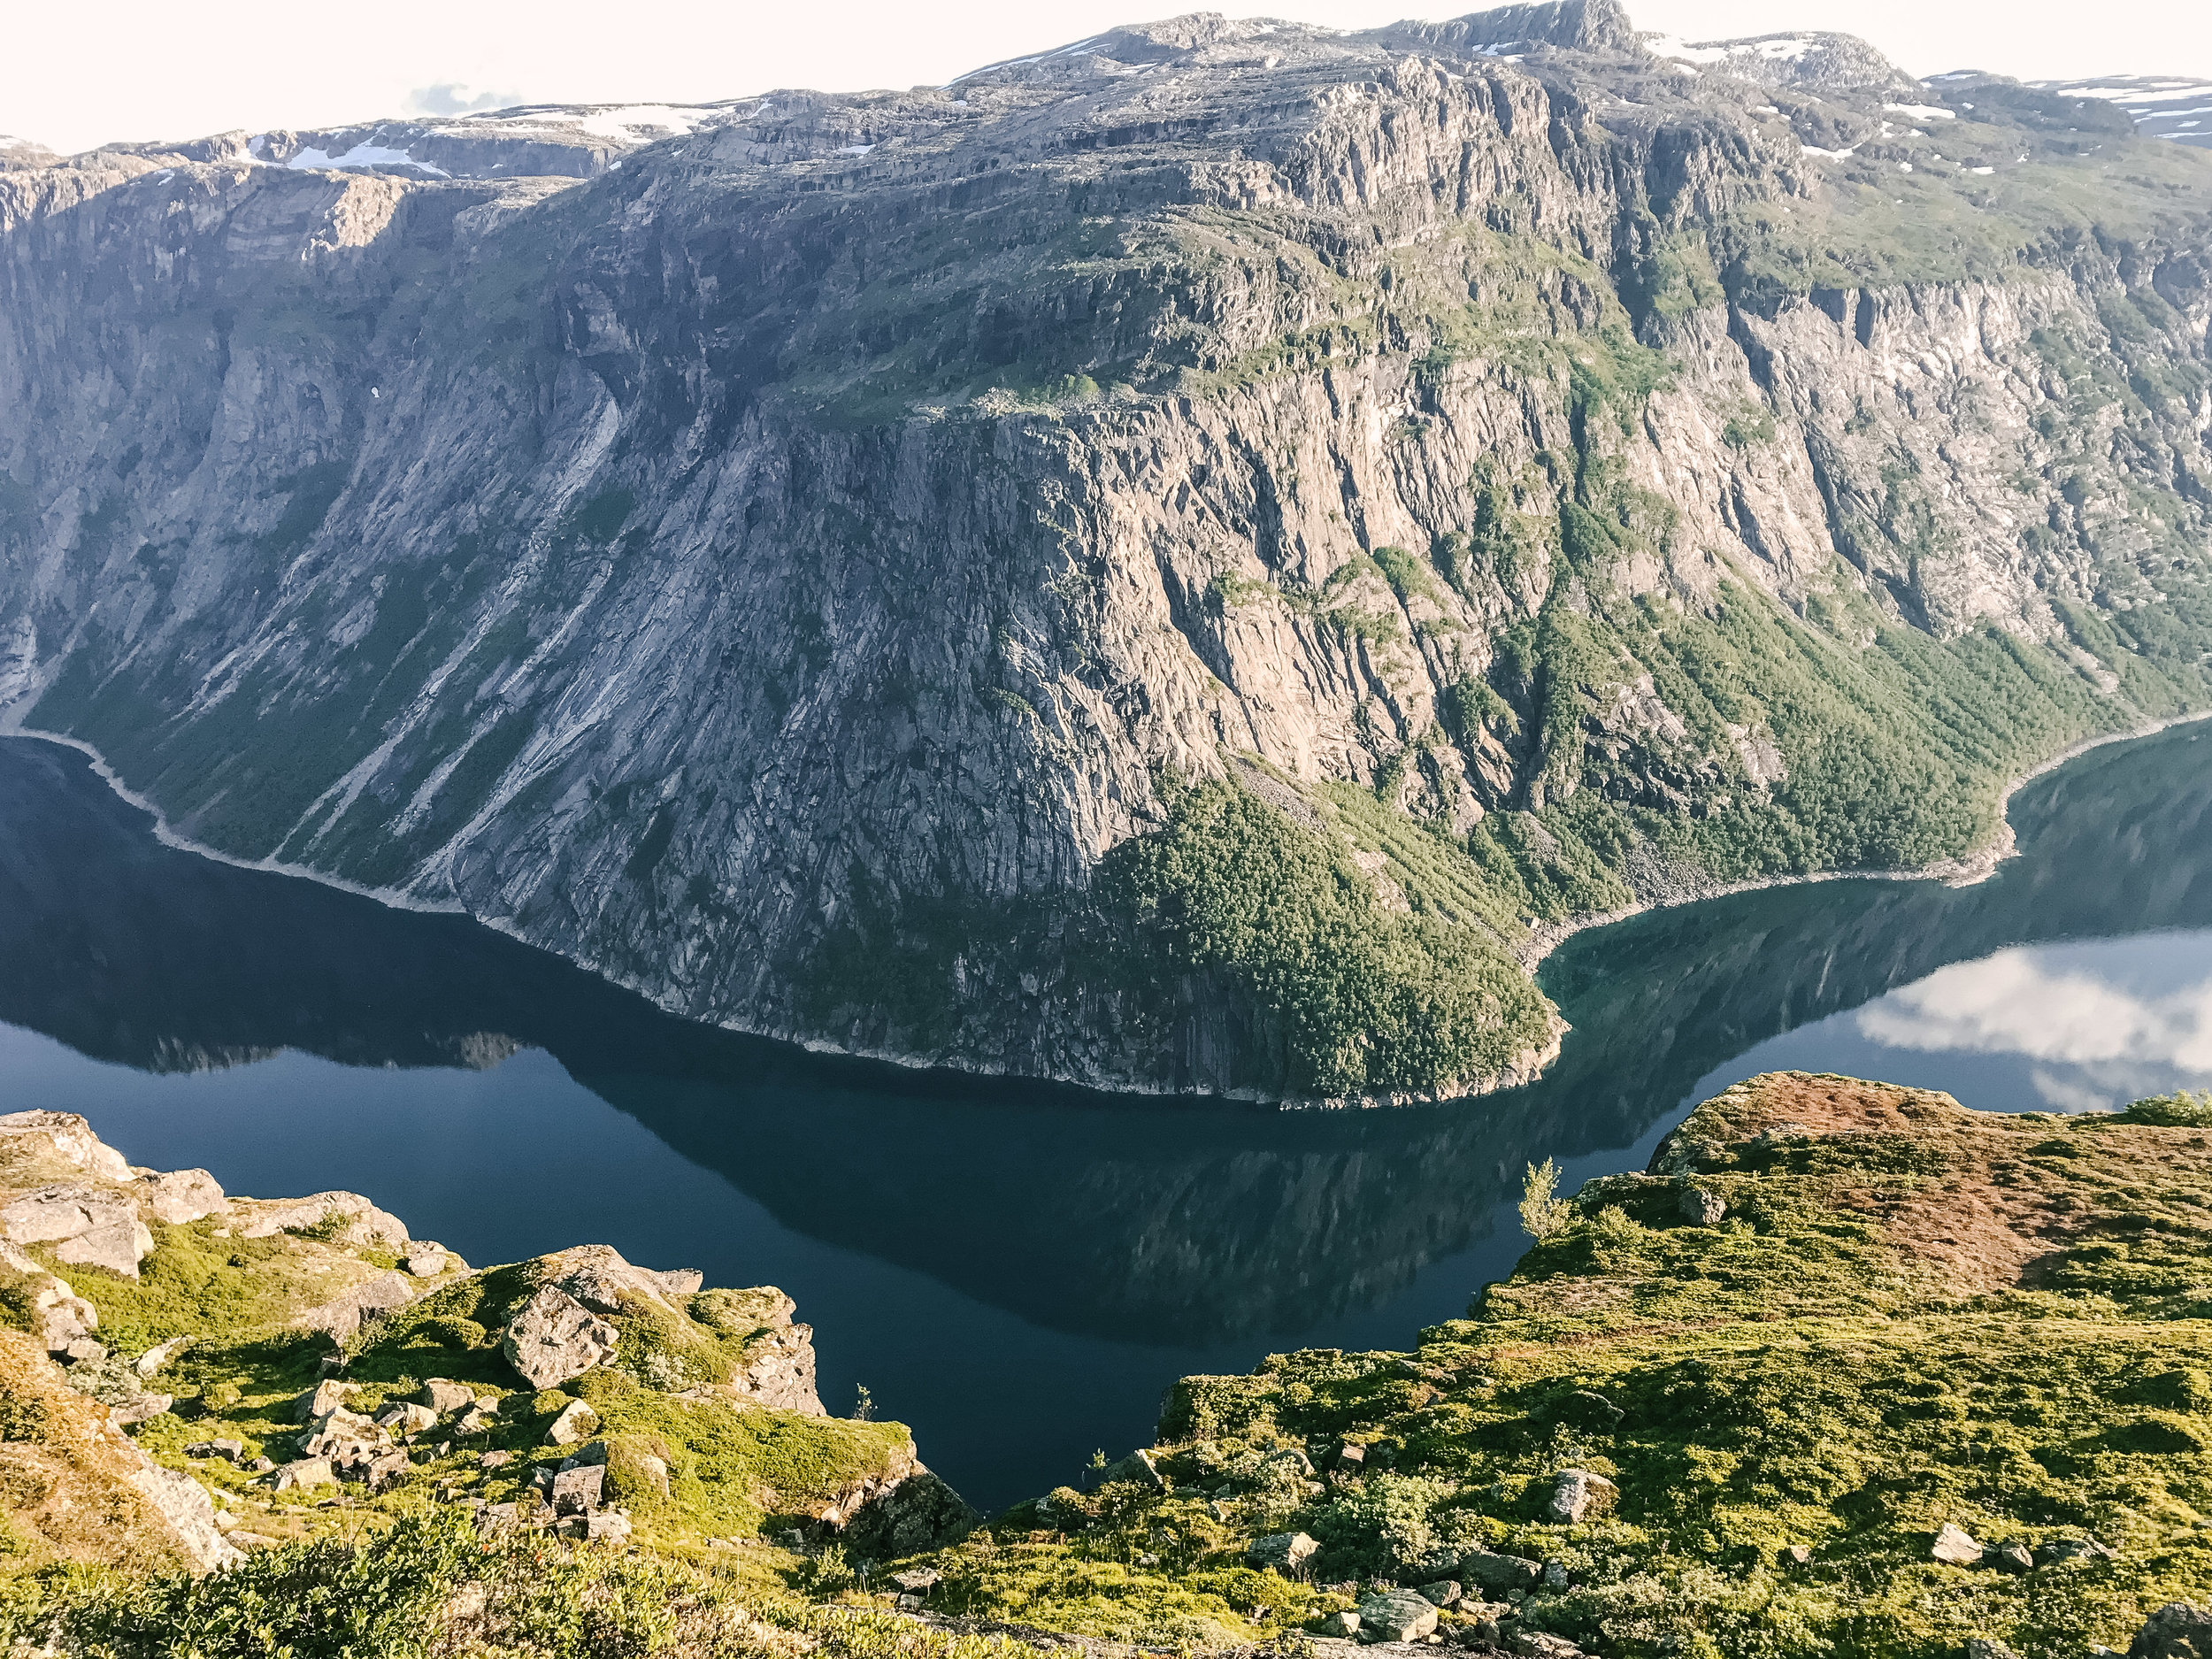
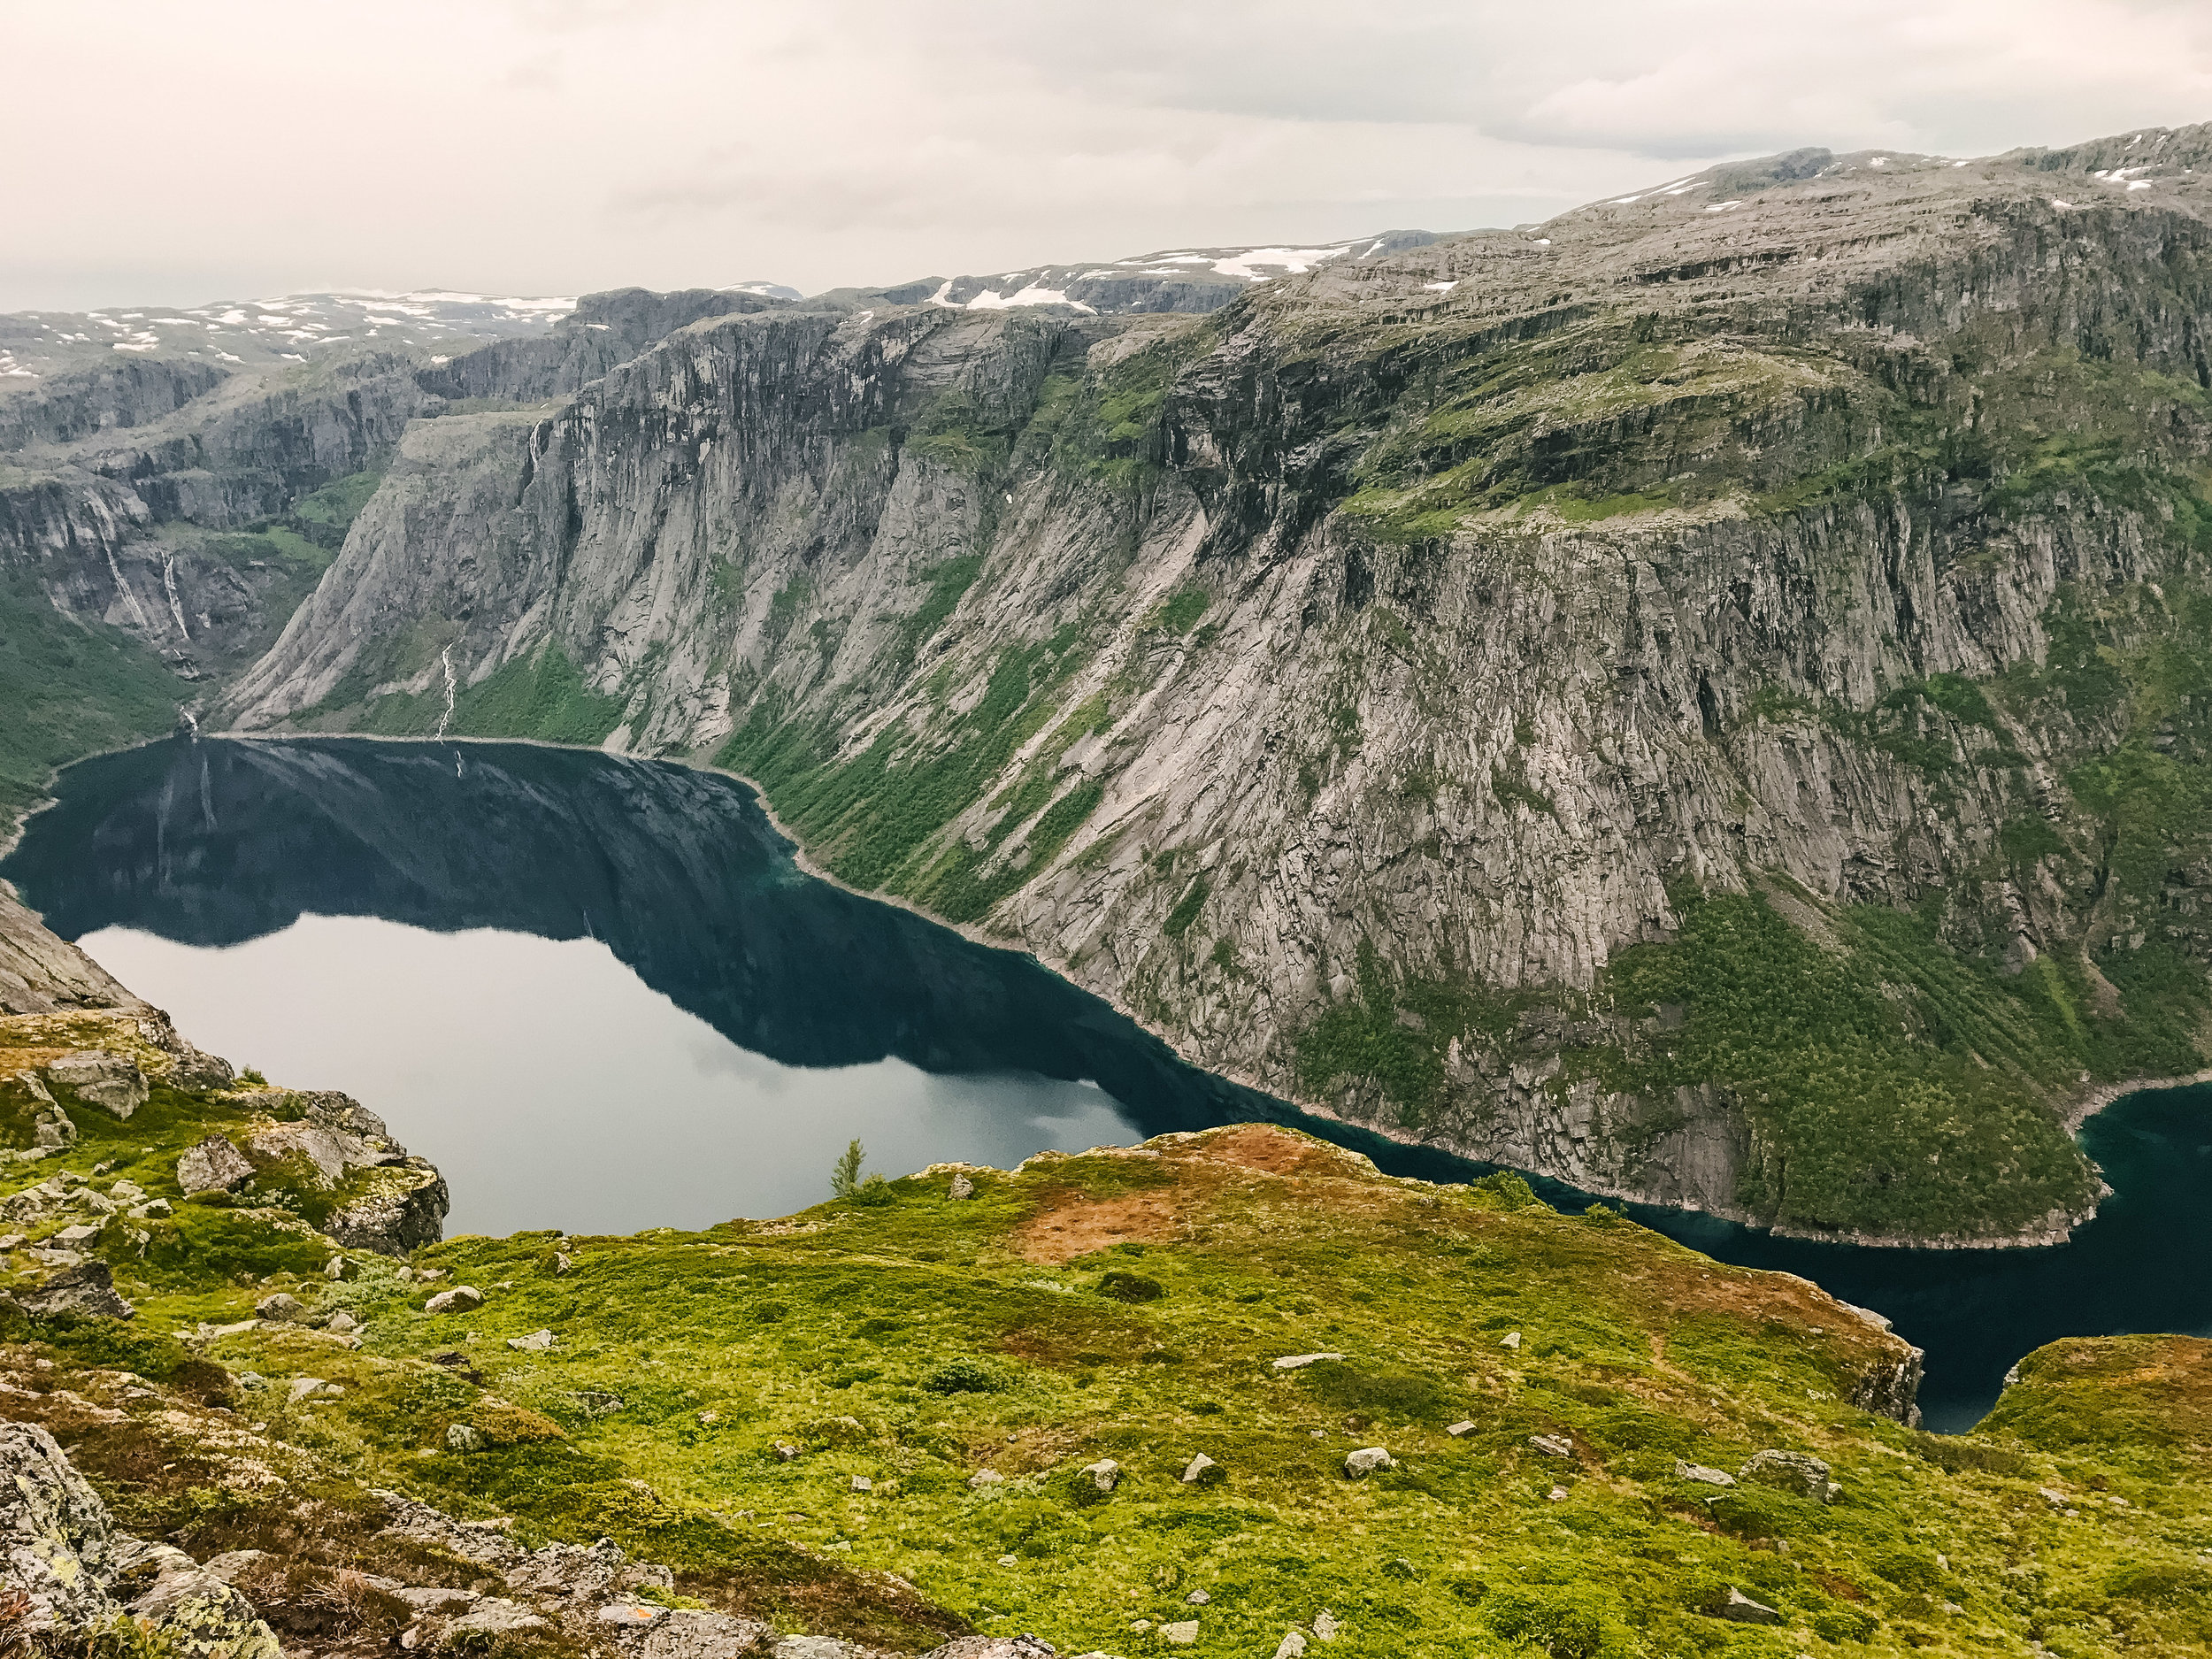
Continuing another couple kilometers through more mossy wetlands, you will make your way along the lake. Soon the terrain will turn into hills of rocks. Climbing up and down these rocks, you may eventually start to hear buzzing. Where there are drones, there is trolltunga! Then after many, many tiring hours, you finally see Trolltunga.


WHAT TO BRING:
Even if you don’t plan on spending the night at the top of the mountain, you should still bring a small pack of essentials.
- Sturdy hiking boots (even better if they are waterproof)
- Rain/wind resistant jacket
- Clothing layers – the weather can change very quickly
- Fresh pair of socks - because changing into fresh socks at the top feels so good!
- Hiking pants - these are advised by all the Norwegian sites, but I wore athletic leggings and was fine
- Water – we took with us one hydration pack and one large water bottle. A lot of other websites will tell you there are frequent safe water sources along the path, including ponds, small lakes, streams, and trickling waterfalls. However we didn’t feel comfortable with most of these sources seeing as some were stagnant bodies of water, and others were streams with an easily accessible upstream where an animal could have peed in. We waited until we were at the top of the mountain – there were a few trickling waterfalls from the glacier runoff – to fill up on water, because this had less of a chance of contamination.
- A map and/or compass
- Sunglasses
- Flashlight or headlamp
- Biodegradable toilet paper
- Protein bars
- Plastic bags/small trash bag – please respect nature and save all of your trash to be disposed of properly when you return to the base.
Trolltunga Active has a few of these essentials for purchase should you have forgotten them. They carry clothing, hiking poles, energy bars, water, maps, and of course, souvenirs. They also have vaffels (Norweigan waffles) for purchase. There is a bathroom at the start, located in the parking lot, so be sure to utilize it because on the trail, it’s all natural.
SAFETY:
Apparently there is limited cell service on the mountain – though we watched a couple at the top face time their family in the US after getting engaged, so not sure about that...?
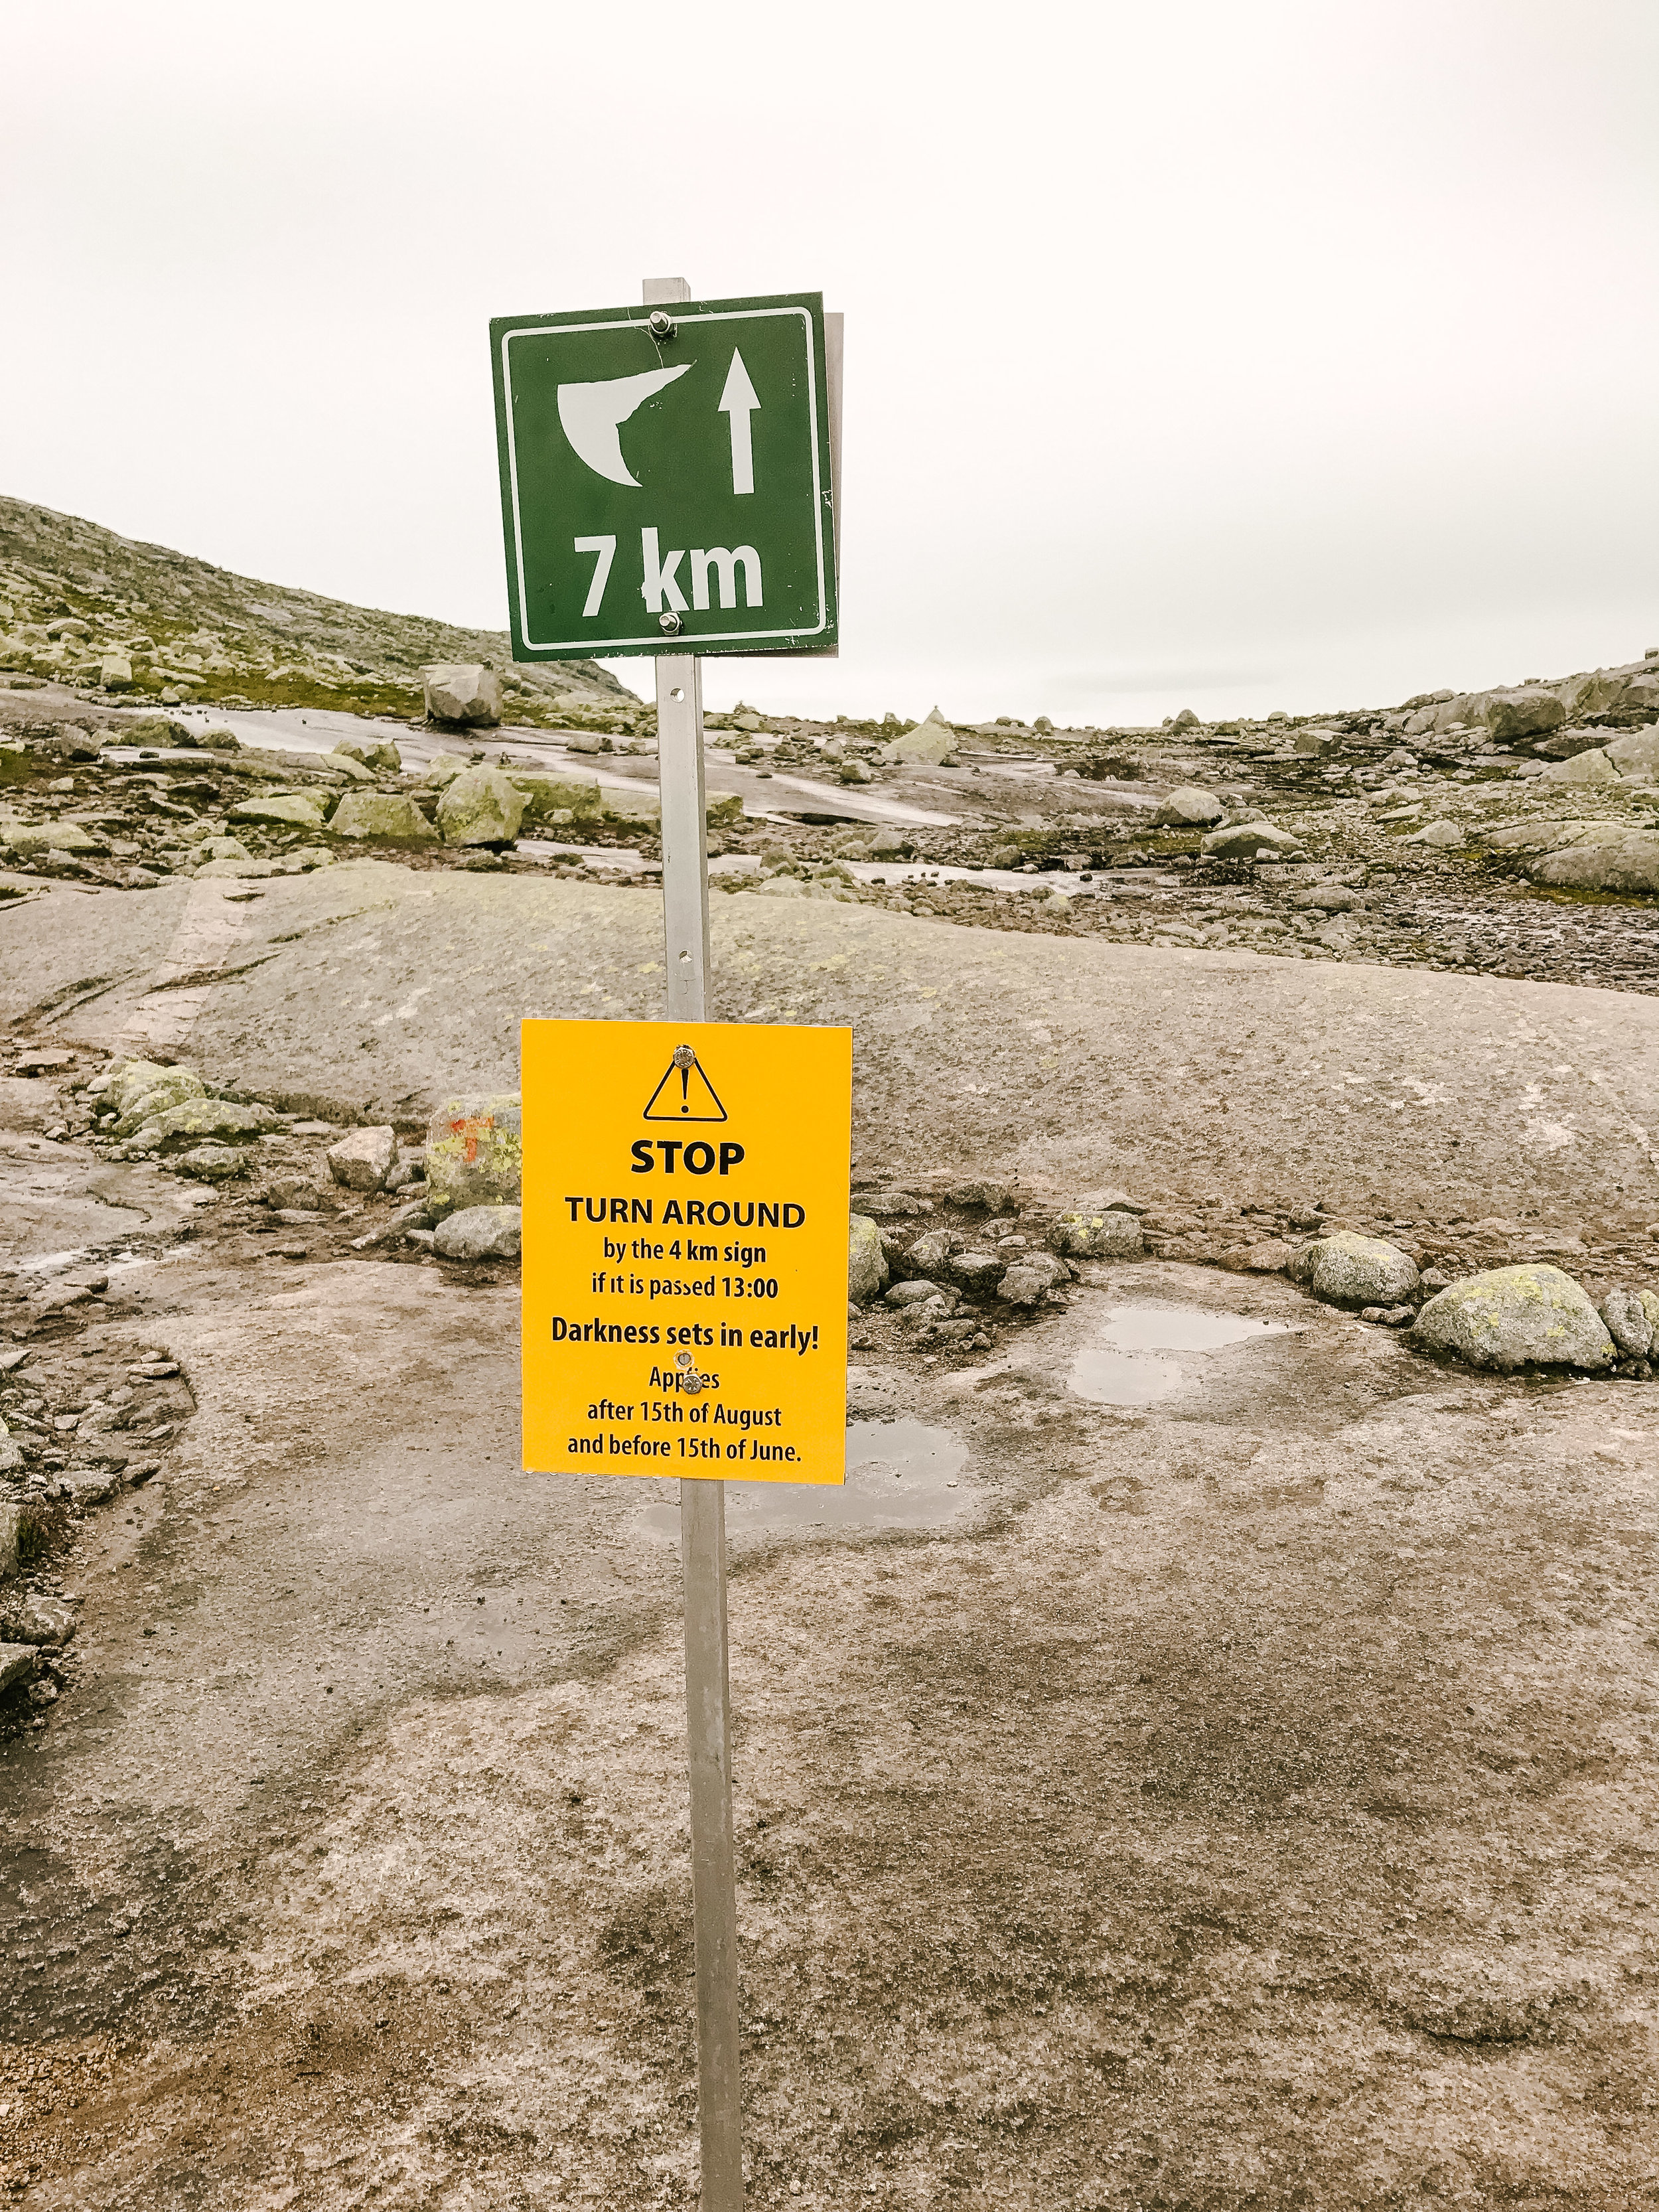
Don’t hike if there is strong wind, heavy rain or fog. If you are doing the hike in 1 day and reach the 4km sign after 1 pm, STOP, and turn around because you will not have enough sunlight to make it to the top and back.
There are a few “survival cabins” located throughout the trail. These cabins are small, but provide shelter from the elements and supposedly are equipped with blankets.
If possible let someone know that you are doing the hike. We foolishly didn’t do this as it was a last minute decision for us, and the itineraries we had sent to our parents didn’t even include this hike as a potential plan.
WHERE TO CAMP:
Norway’s “right to roam” allows you to freely camp in the open country (with a few exceptions of course). But that means it is free to camp on Trolltunga. You can camp anywhere except between the 1 km to 3 km markers. This area is clearly marked as a no-camping zone as it is an environmentally protected area. As I mentioned before, a decent portion of the people camping overnight choose to camp on the cliffs next to Trolltunga. Keep in mind though that camping anywhere along the ridge can be cold and windy. There are PLENTY of camping locations throughout the entire hike. With the “right to roam” law also comes the expectation to LEAVE NO TRACE. Again, take an extra plastic bag or trash bag with you to collect all of your waste so you can dispose of it properly once you complete the hike.
This hike was one of the top highlights from our entire trip in Norway, and therefore I highly recommend it. If you are considering completing this hike and have additional questions regarding our experience, please feel free to comment below or send me a private message!