Mint Ice Cream and Brownie Layer Cake
/
I’ve got another summer dessert for you all today! Well technically I would gladly eat “summer desserts” all year round (thanks to my giant sweet tooth), but the frozen aspect of this cake reallyyyyy makes it perfect for summer.
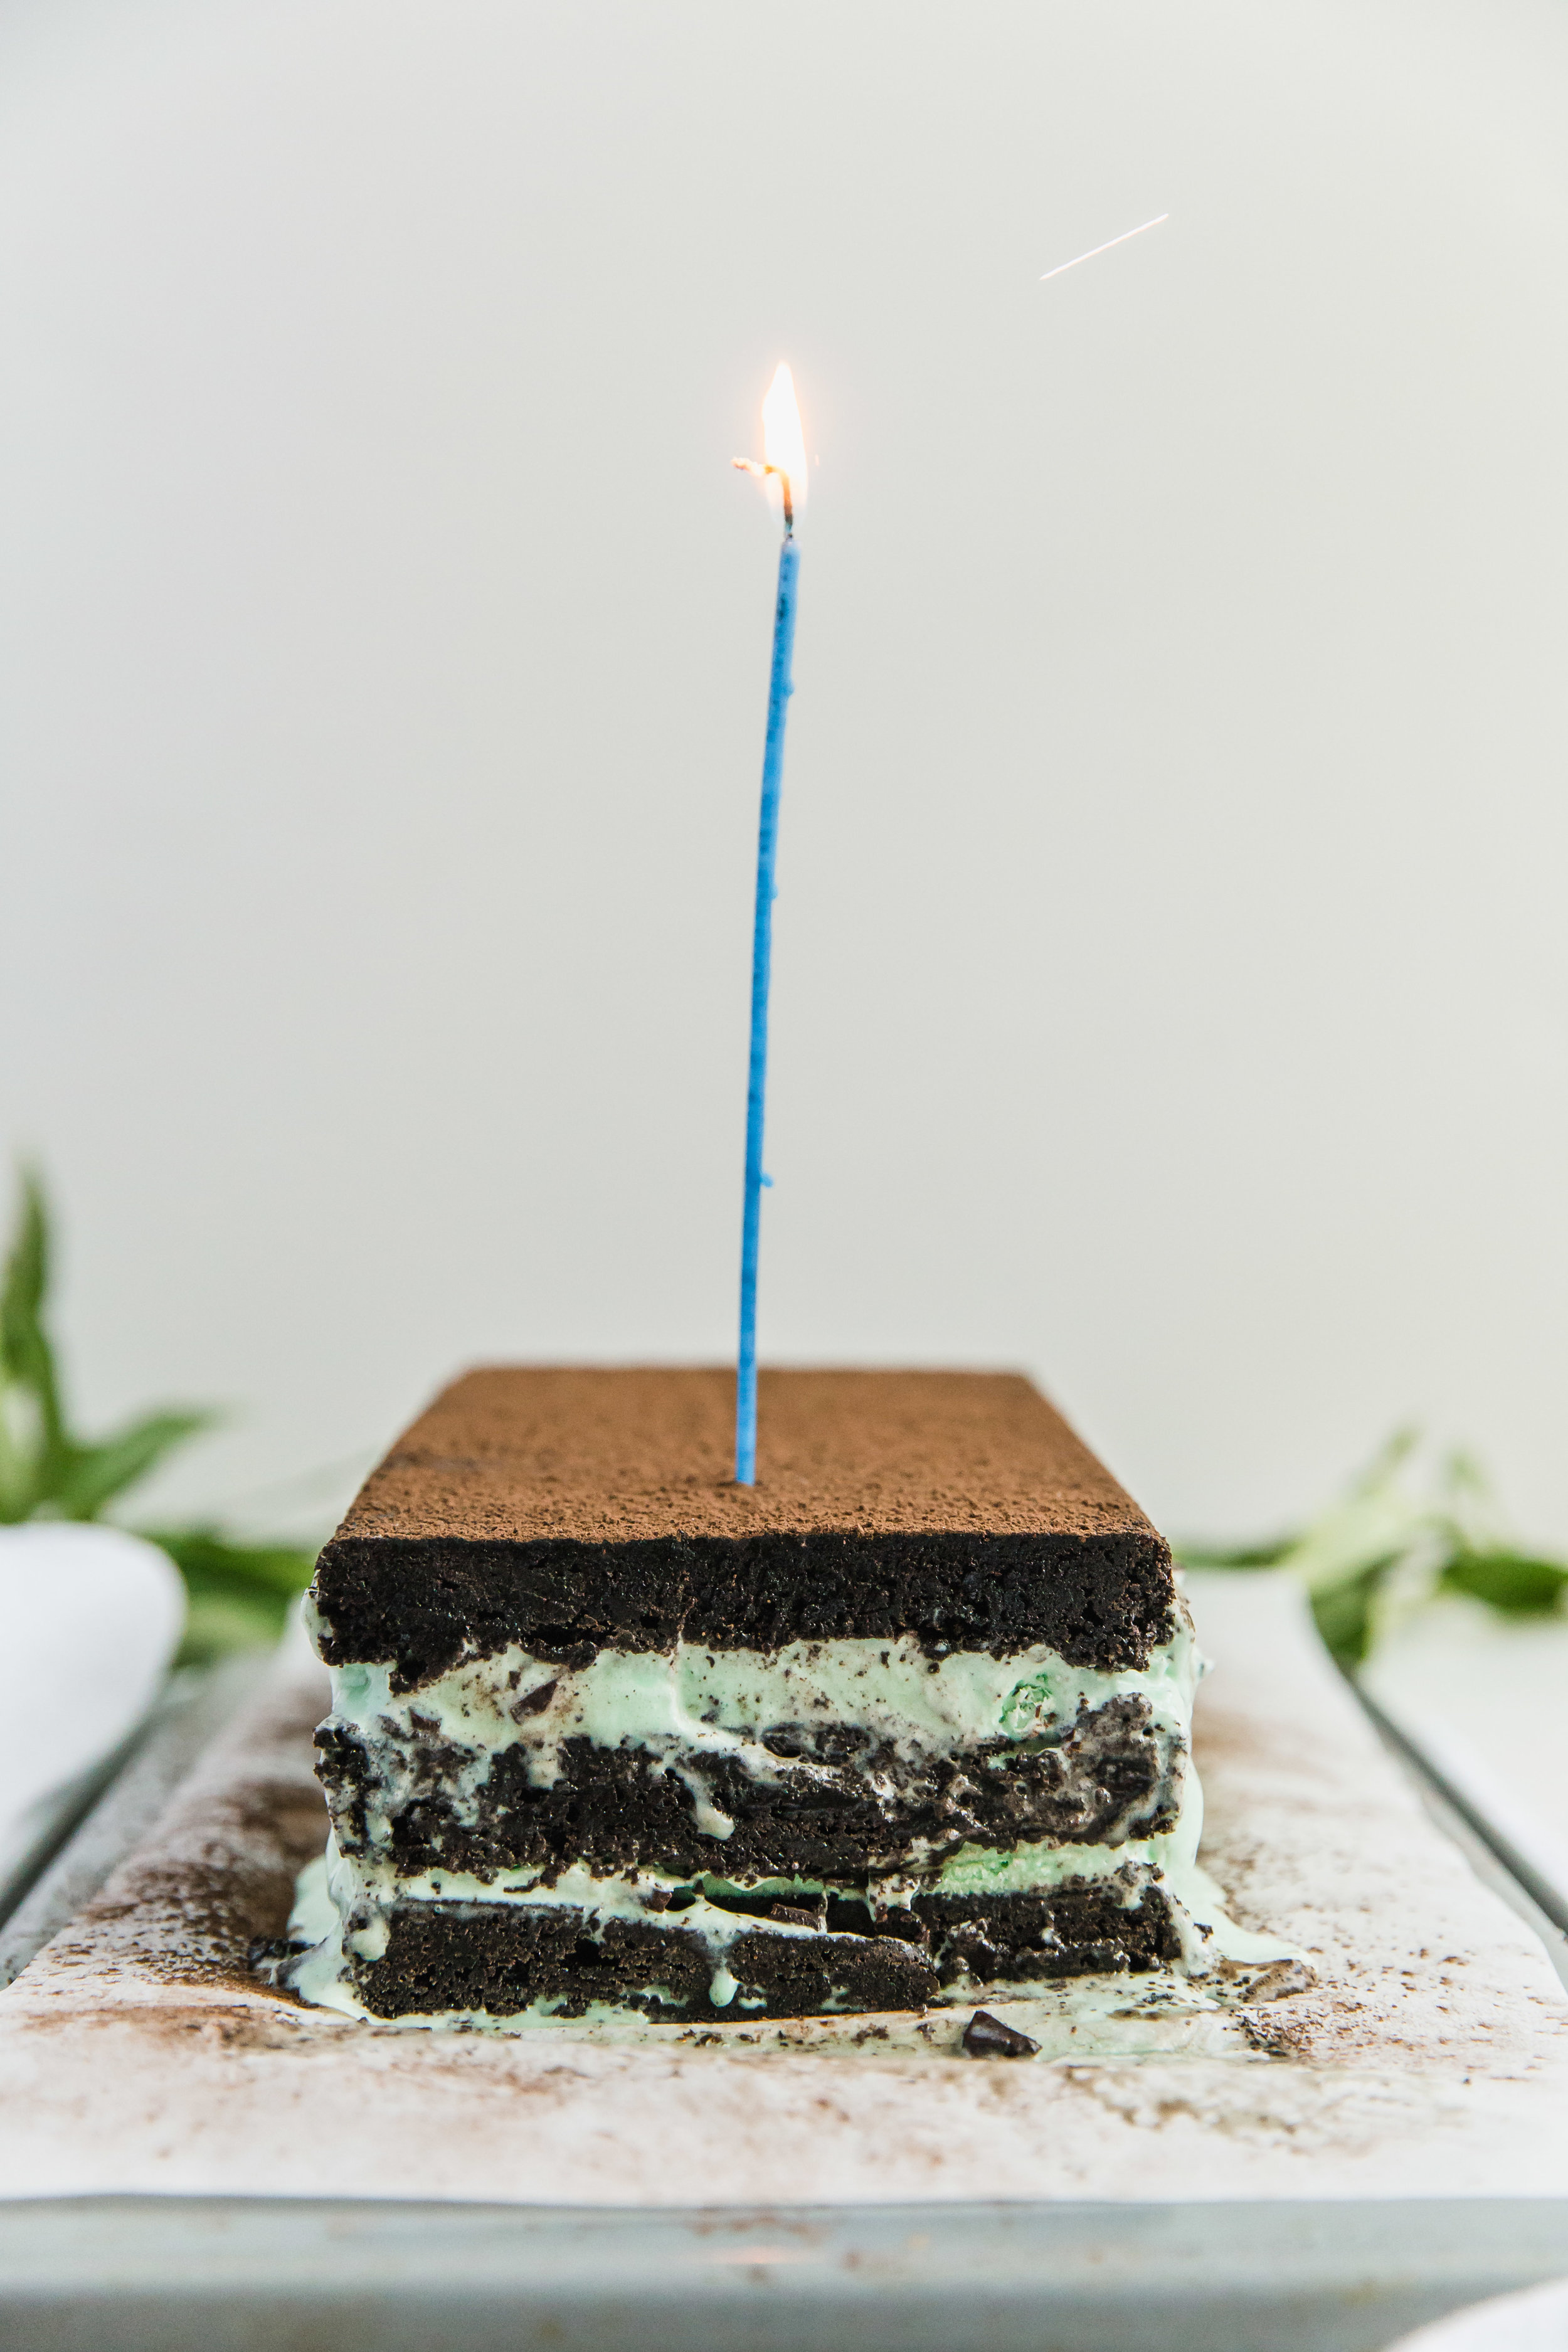
This cake is very special to me. The recipe entered my life during my sophomore year of college when Alex created this perfect concoction for my birthday. That kid knew me too well in combining my two favorite desserts into a mega dessert. Each year he makes it for my birthday and I look forward to it every year.
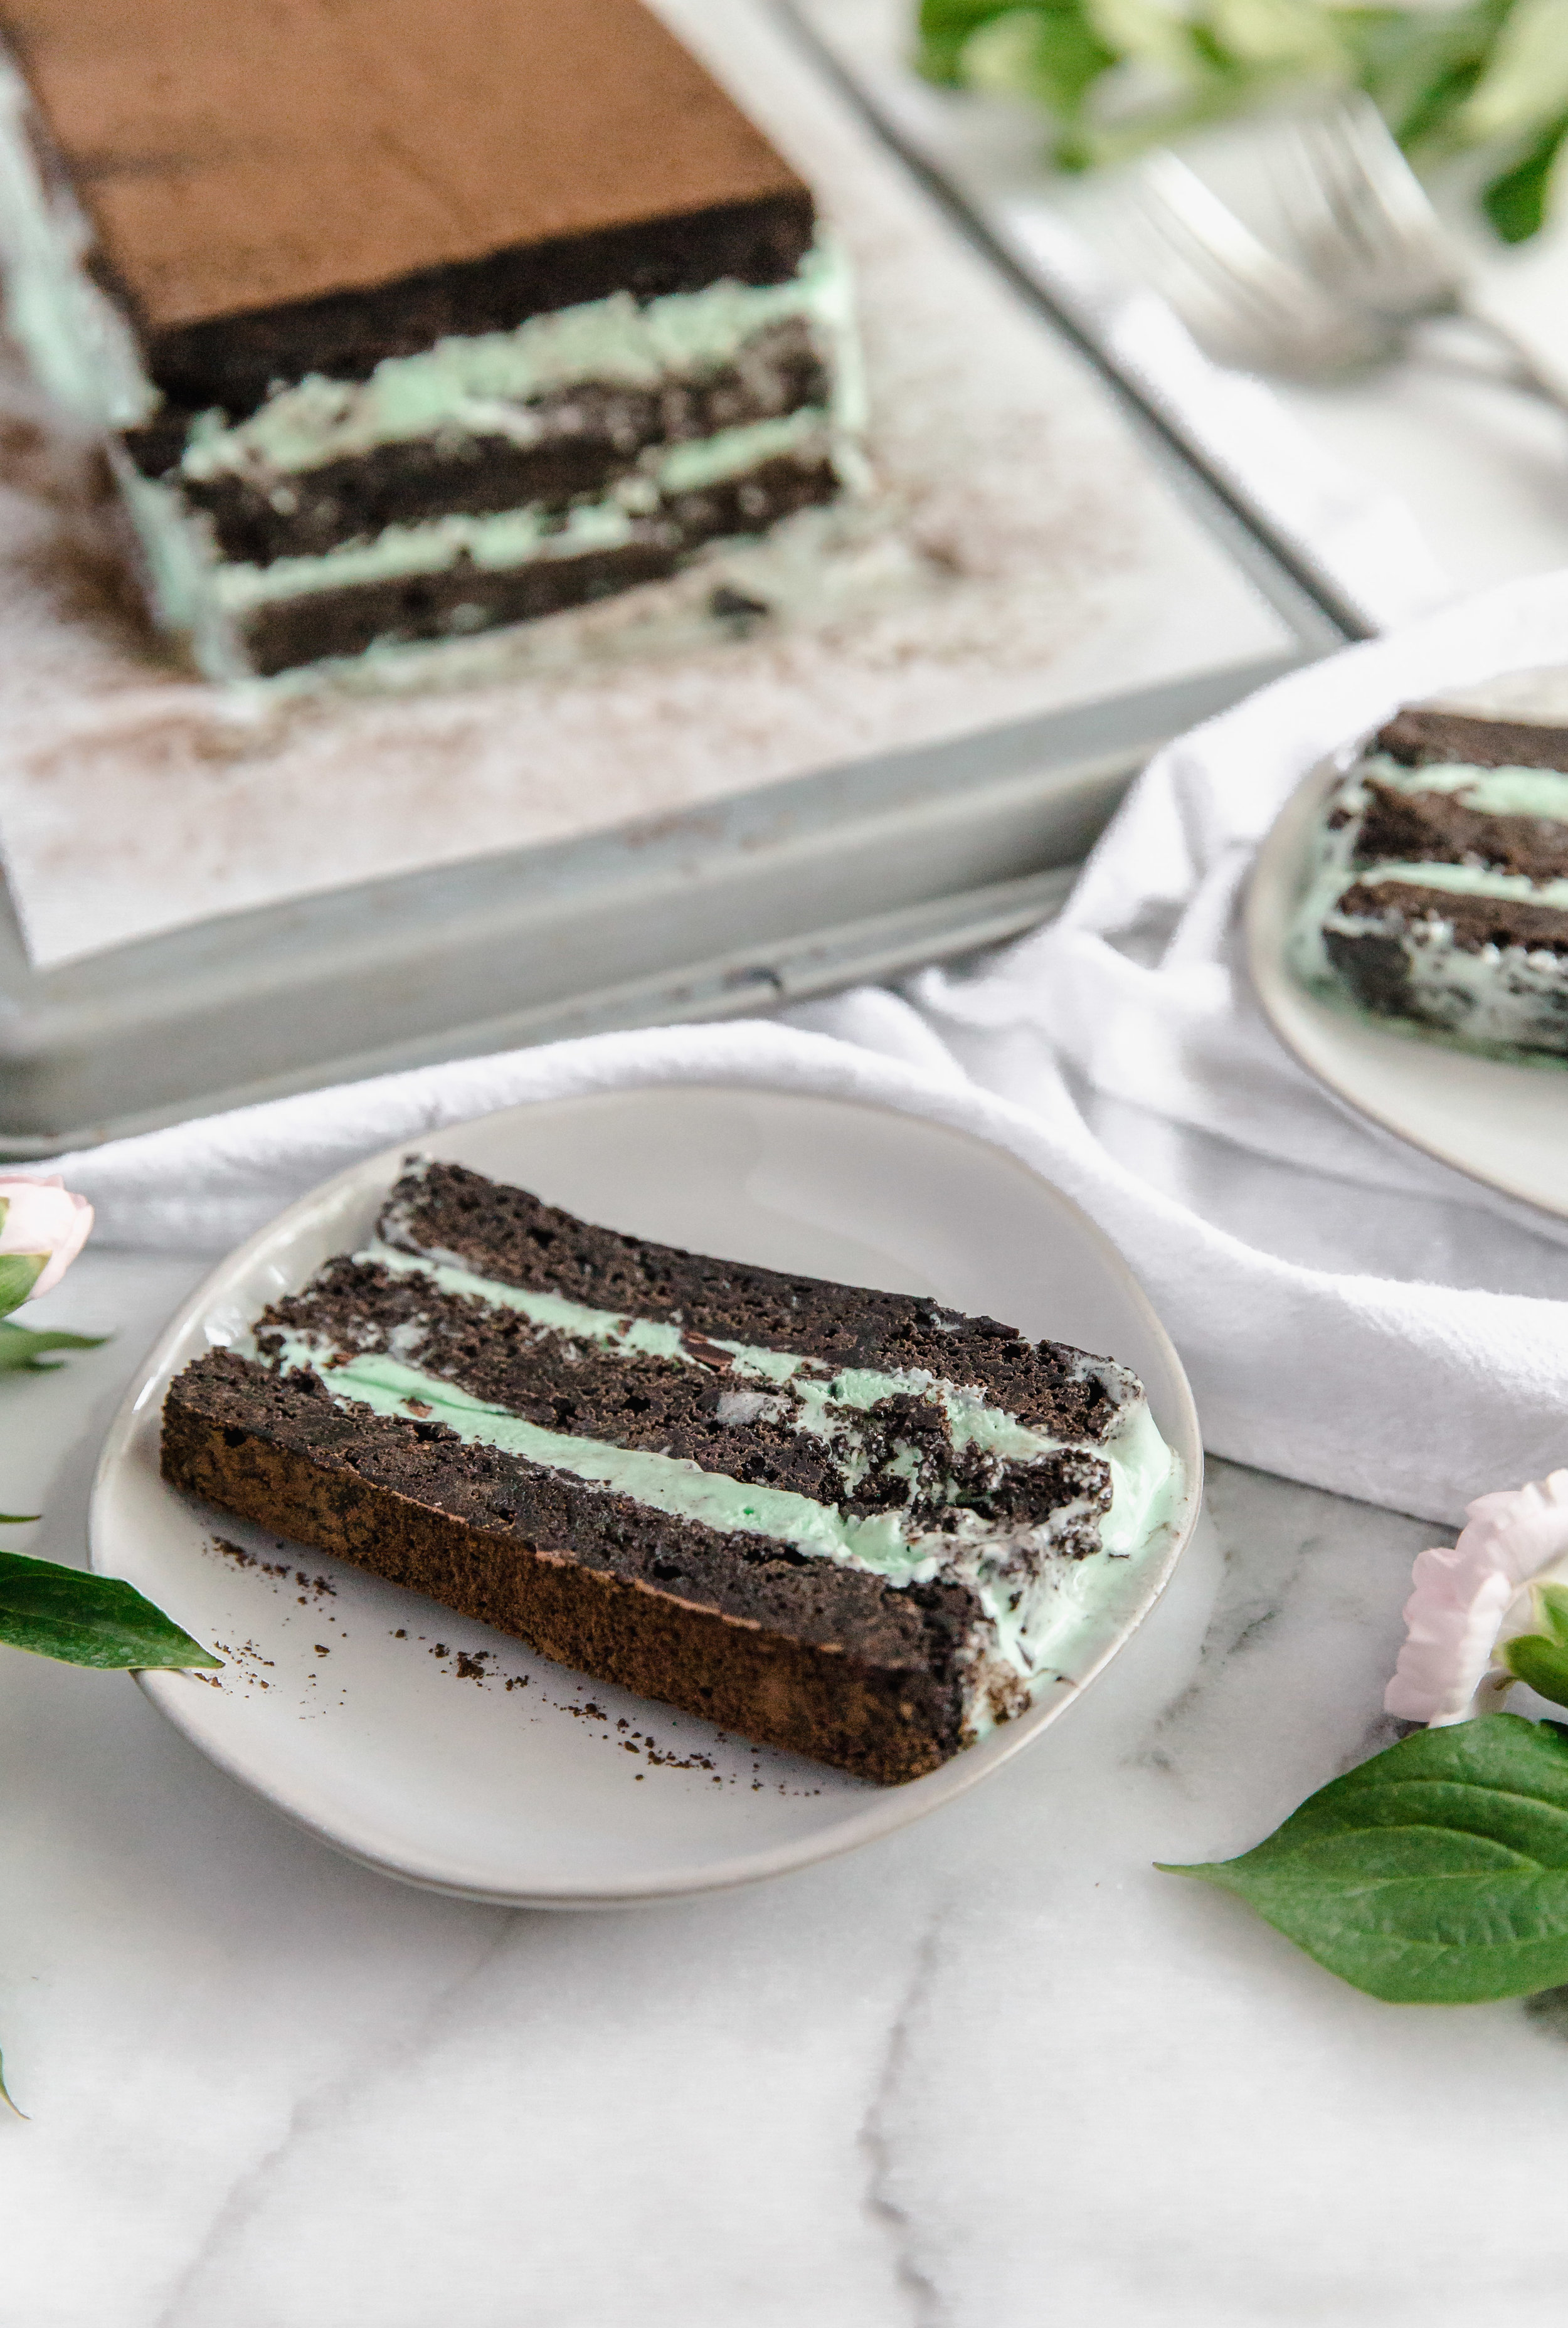
Hands down my favorite aspect of this treat is when the mint ice cream slowly incorporates itself into the brownie layers. Like OMG, talk about let-me-melt-into-a-puddle-of-joy-while-I-eat-this-mint-infused-frozen-brownie. If you have never had a frozen brownie, let me be the first to tell you that they are AMAZING because the chocolate flavoring is significantly more pronounced and rich. Therefore, you really only need a thin slice of this cake to have your sweet tooth satisfied.
This recipe does require a lot of waiting time as the cake freezes, so if you are making this cake for a get-together, I would recommend making it the day before!

Mint Ice Cream and Brownie Layer Cake
Prep time:
Bake time:
Wait time:
Serves: 12Ingredients:
- 4 ounces (~3/4 cup) semi-sweet chocolate
- 1/2 cup unsalted butter
- 1 cup brown sugar, packed
- 1 cup granulated sugar
- 1/4 cup oil
- 3 eggs
- 2 teaspoons vanilla
- 3/4 cup flour
- 3/4 cup cocoa powder
- 1 teaspoon salt
- Tub (1.5 quarts) of mint chocolate chip ice cream
- (Optional) 1 Tablespoon cocoa powder
Instructions:
- Preheat oven to 350F. Spray 3 loaf pans (*) with nonstick spray, and line with parchment paper so it hangs over the sides. Set aside.
- In a double boiler with a large bowl on top, melt the chocolate and butter together, stirring until smooth.
- Whisk in the sugars and oil. Once combined, remove the bowl from the double boiler, wiping the water off from the bottom.
- Whisk in, one at a time, the eggs. Add the vanilla, and stir until combined.
- Add the flour, salt, and sift in the cocoa powder. Fold in until all the dry ingredients have been incorporated. The batter will be thick.
- Divide evenly into 3 bowls. Transfer the batter from each bowl into the 3 prepared loaf pans (*). Spread evenly, and hit the bottom of the pans against the counter to release any air bubbles. Bake for 20-22 minutes, or until an inserted toothpick doesn't have wet batter on it.
- Transfer the brownies to a cooling rack by lifting them out of the pans via the over-hanging parchment paper. Do not take them off the parchment paper yet as they are more prone to break when they are warm.
- Cool the brownies to room temperature, then place in the freezer.
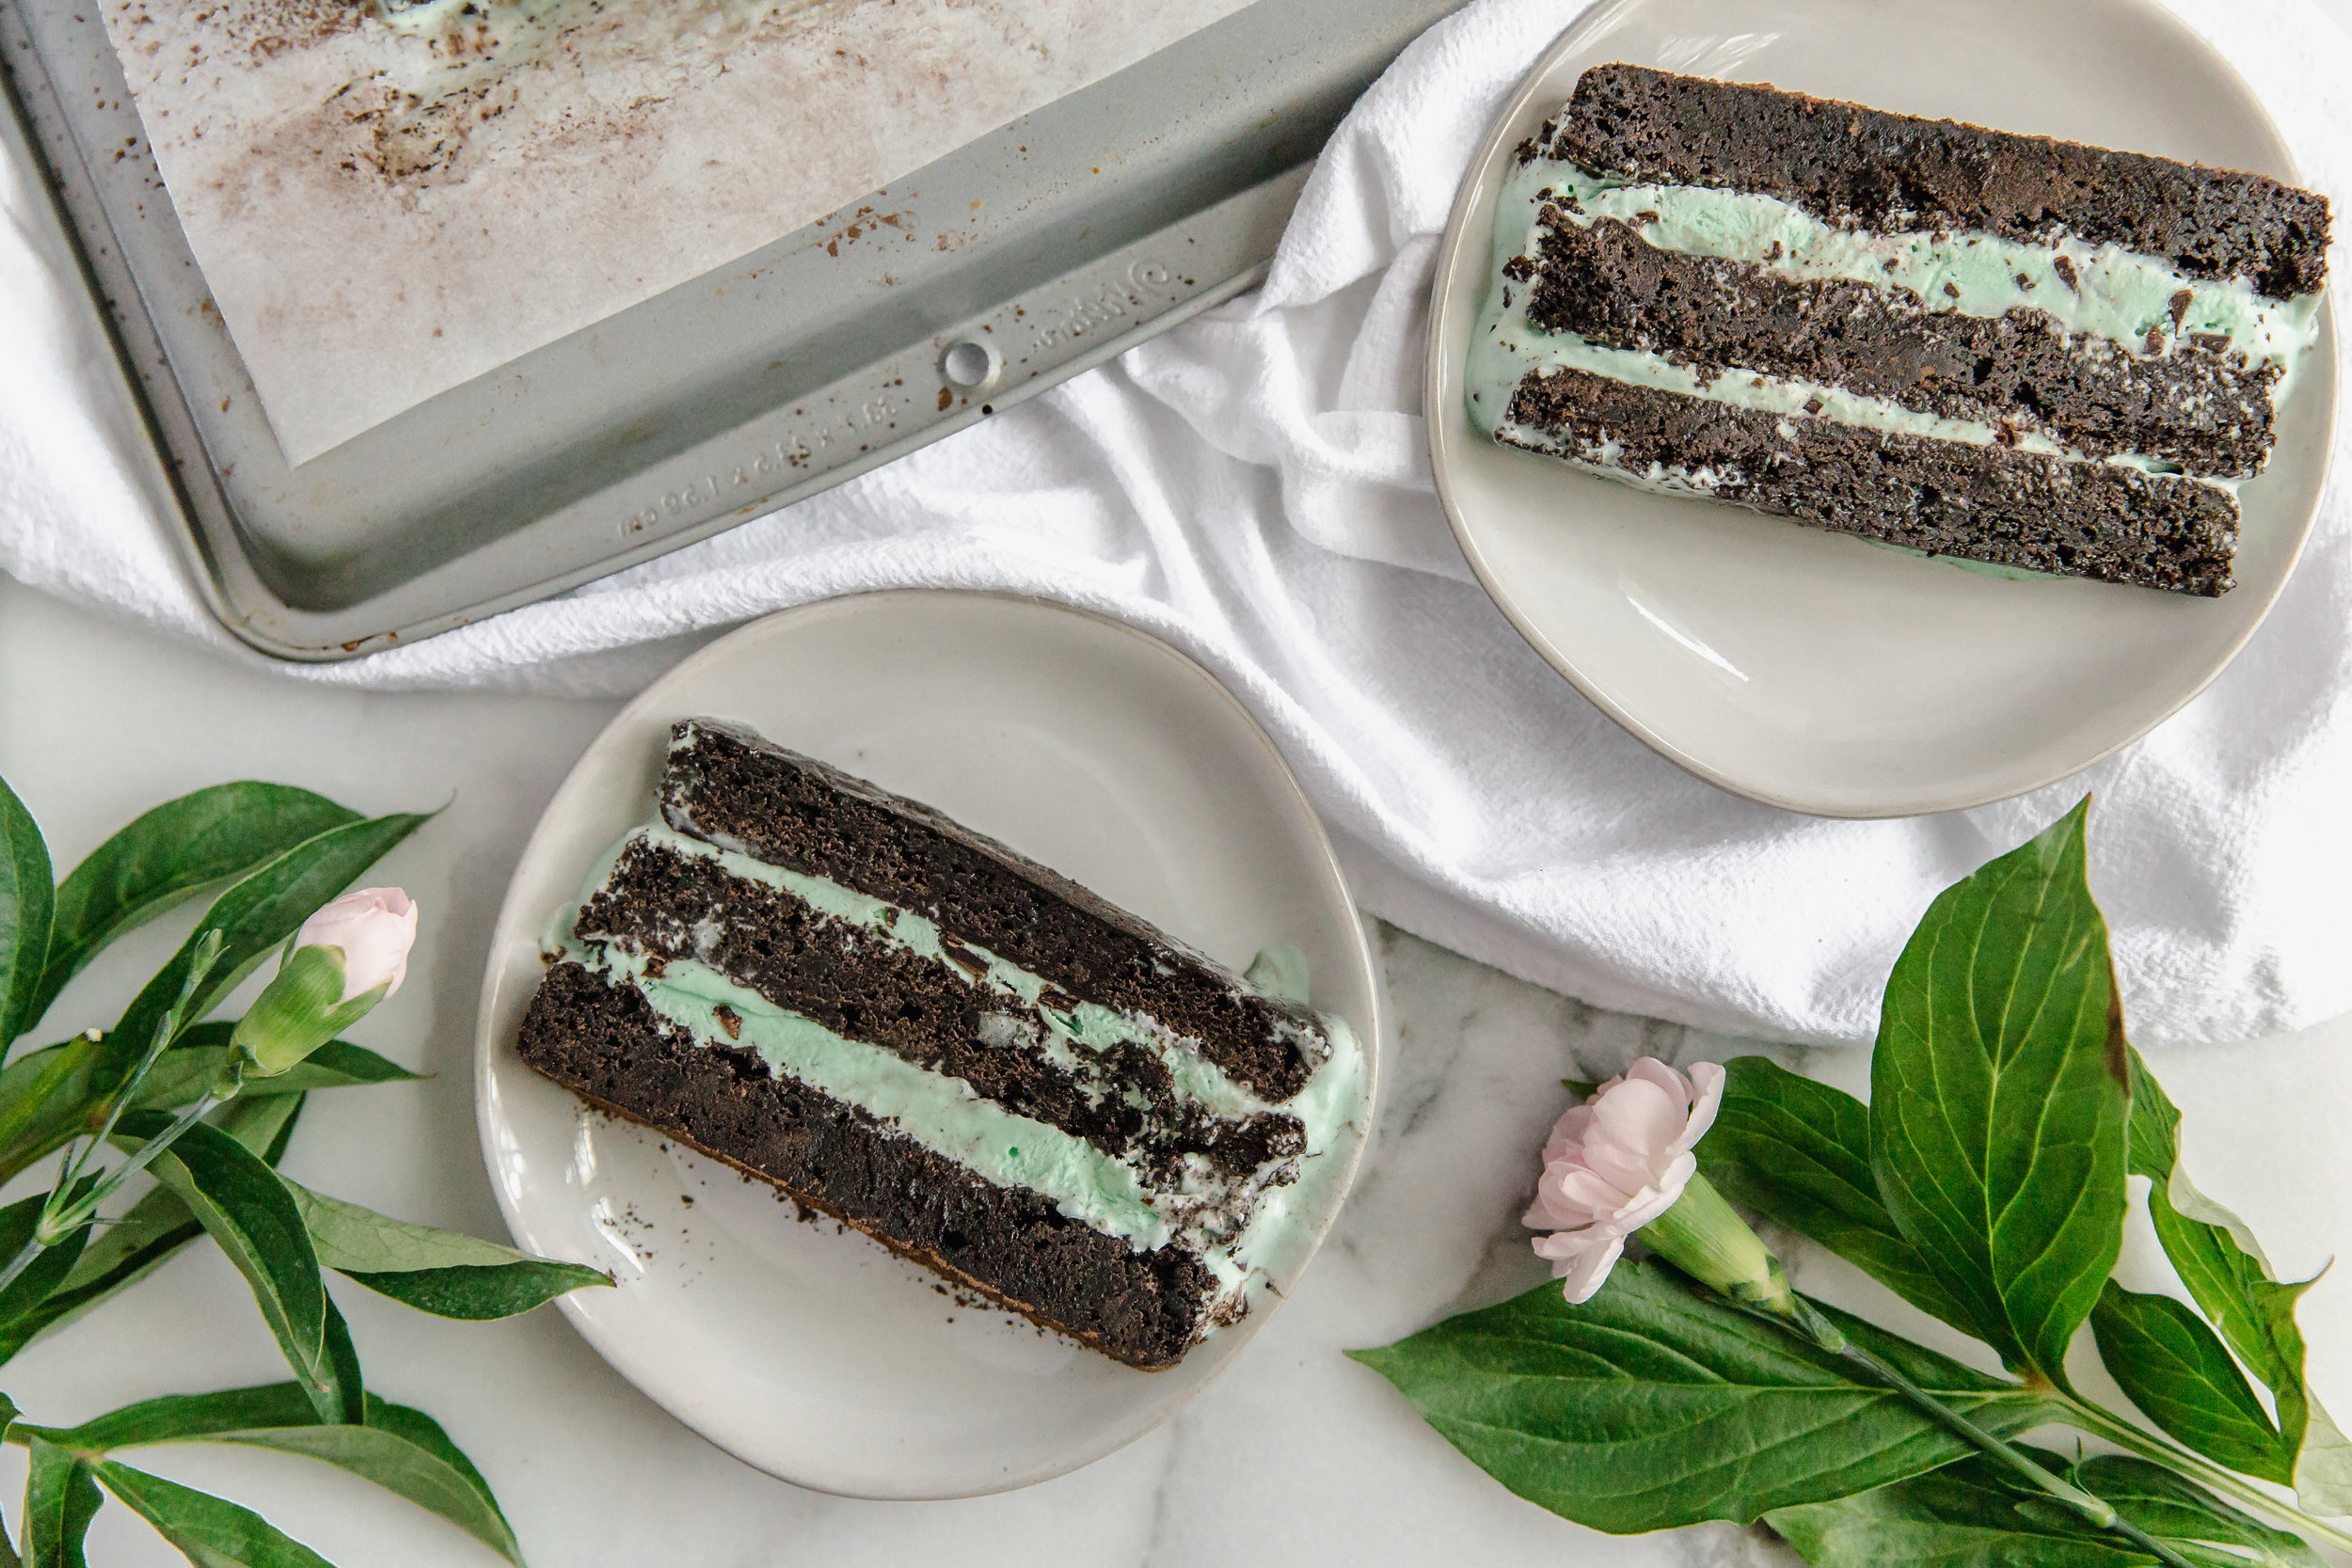
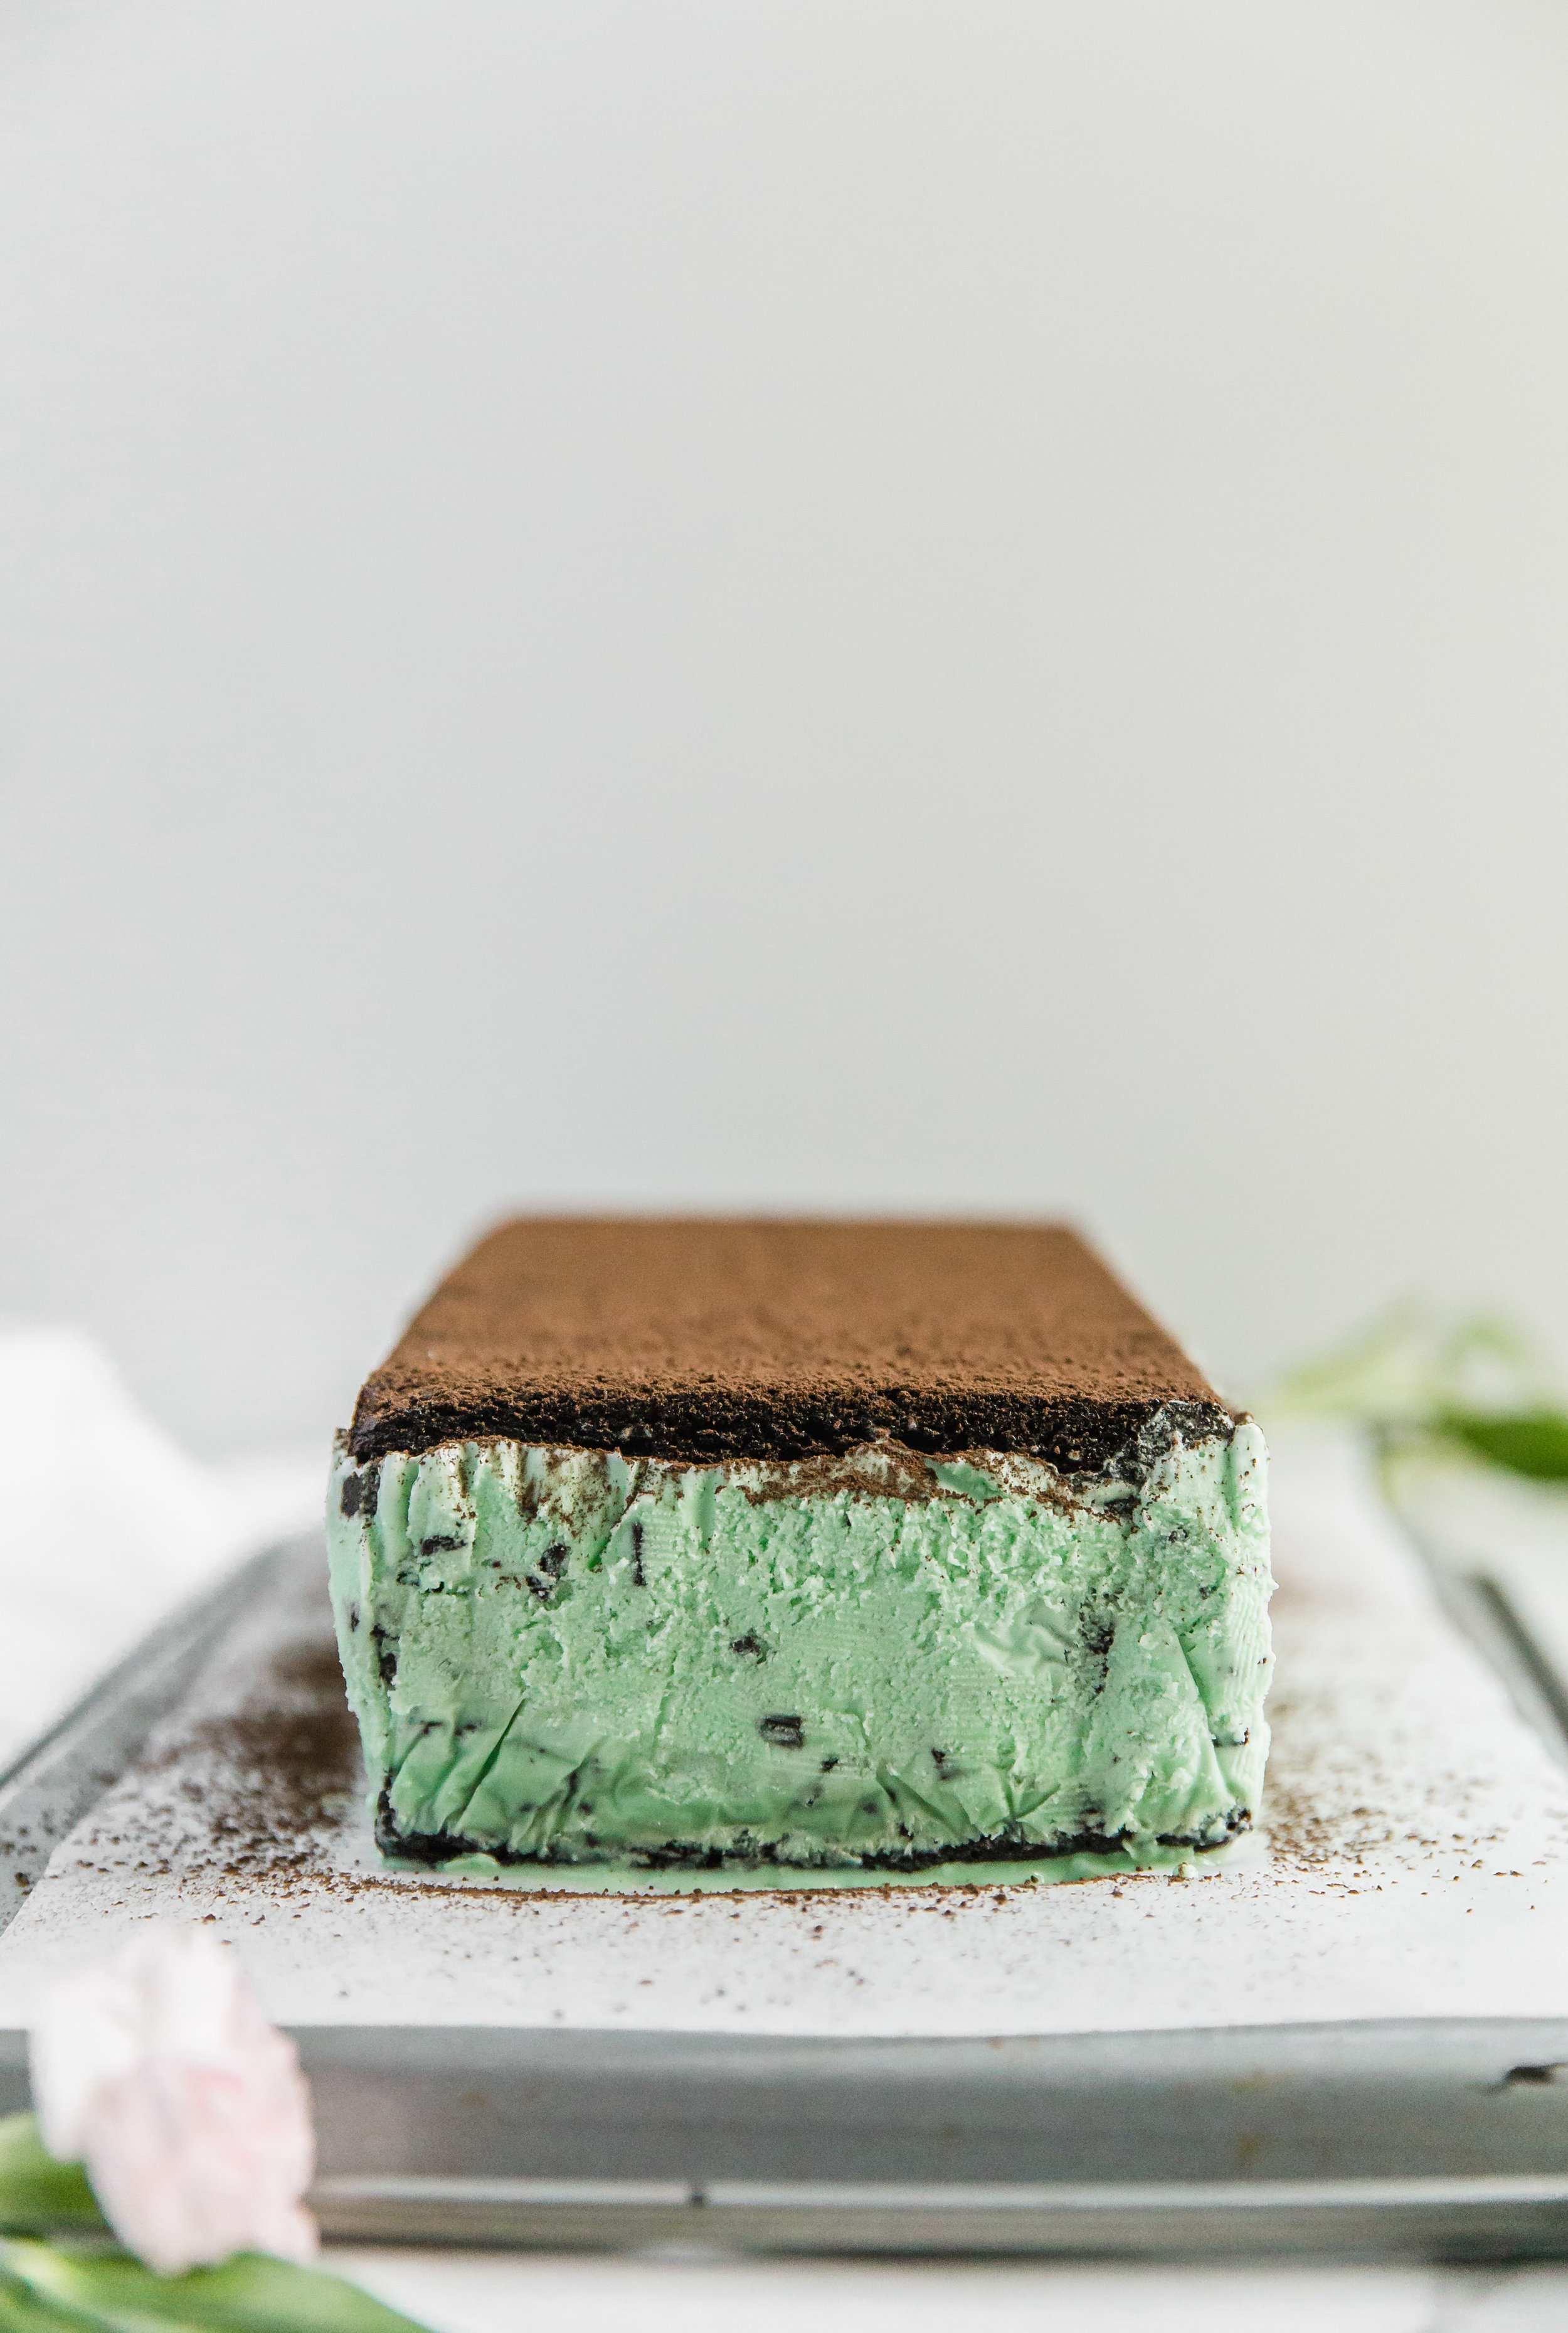
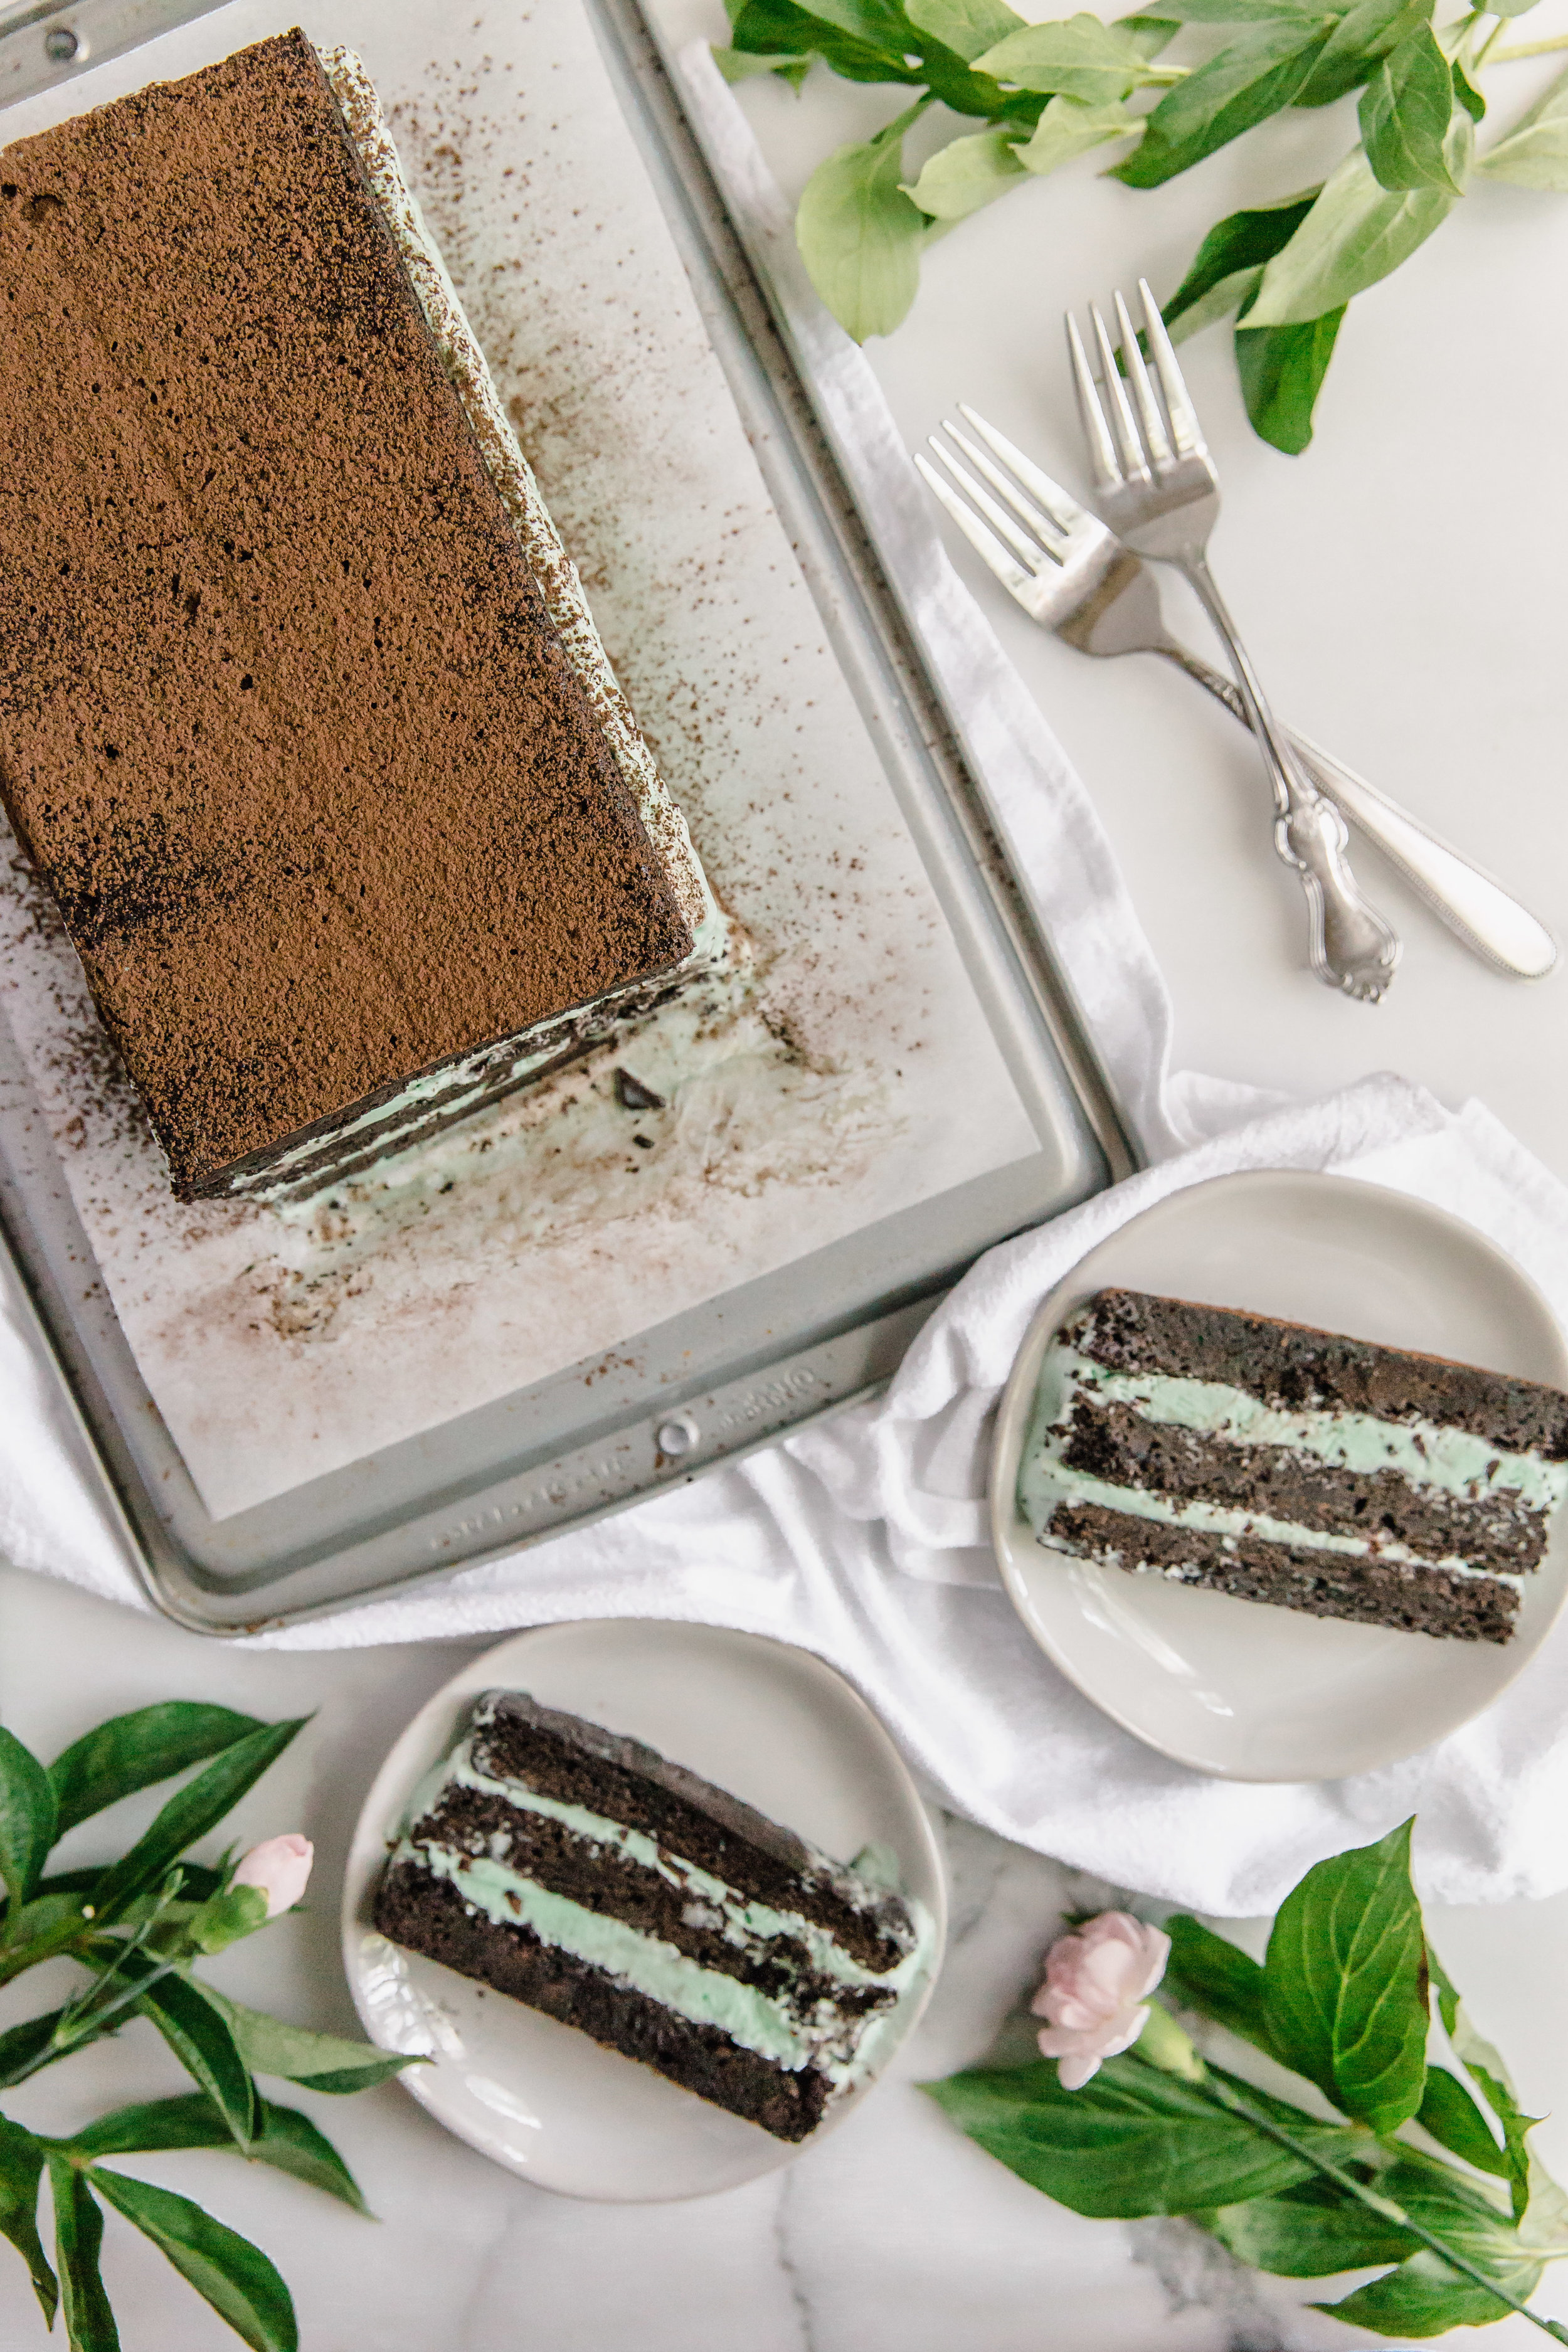
- Once the brownies are frozen, assemble the cake. Line one of the loaf pans with plastic wrap. Place a brownie layer on the bottom. Scoop as much ice cream as you desire on top (I used 2 cups), and smooth evenly. Place the next brownie on top. Repeat this process until you have two even ice cream layers sandwiched between 3 brownie layers. Cover with plastic wrap.
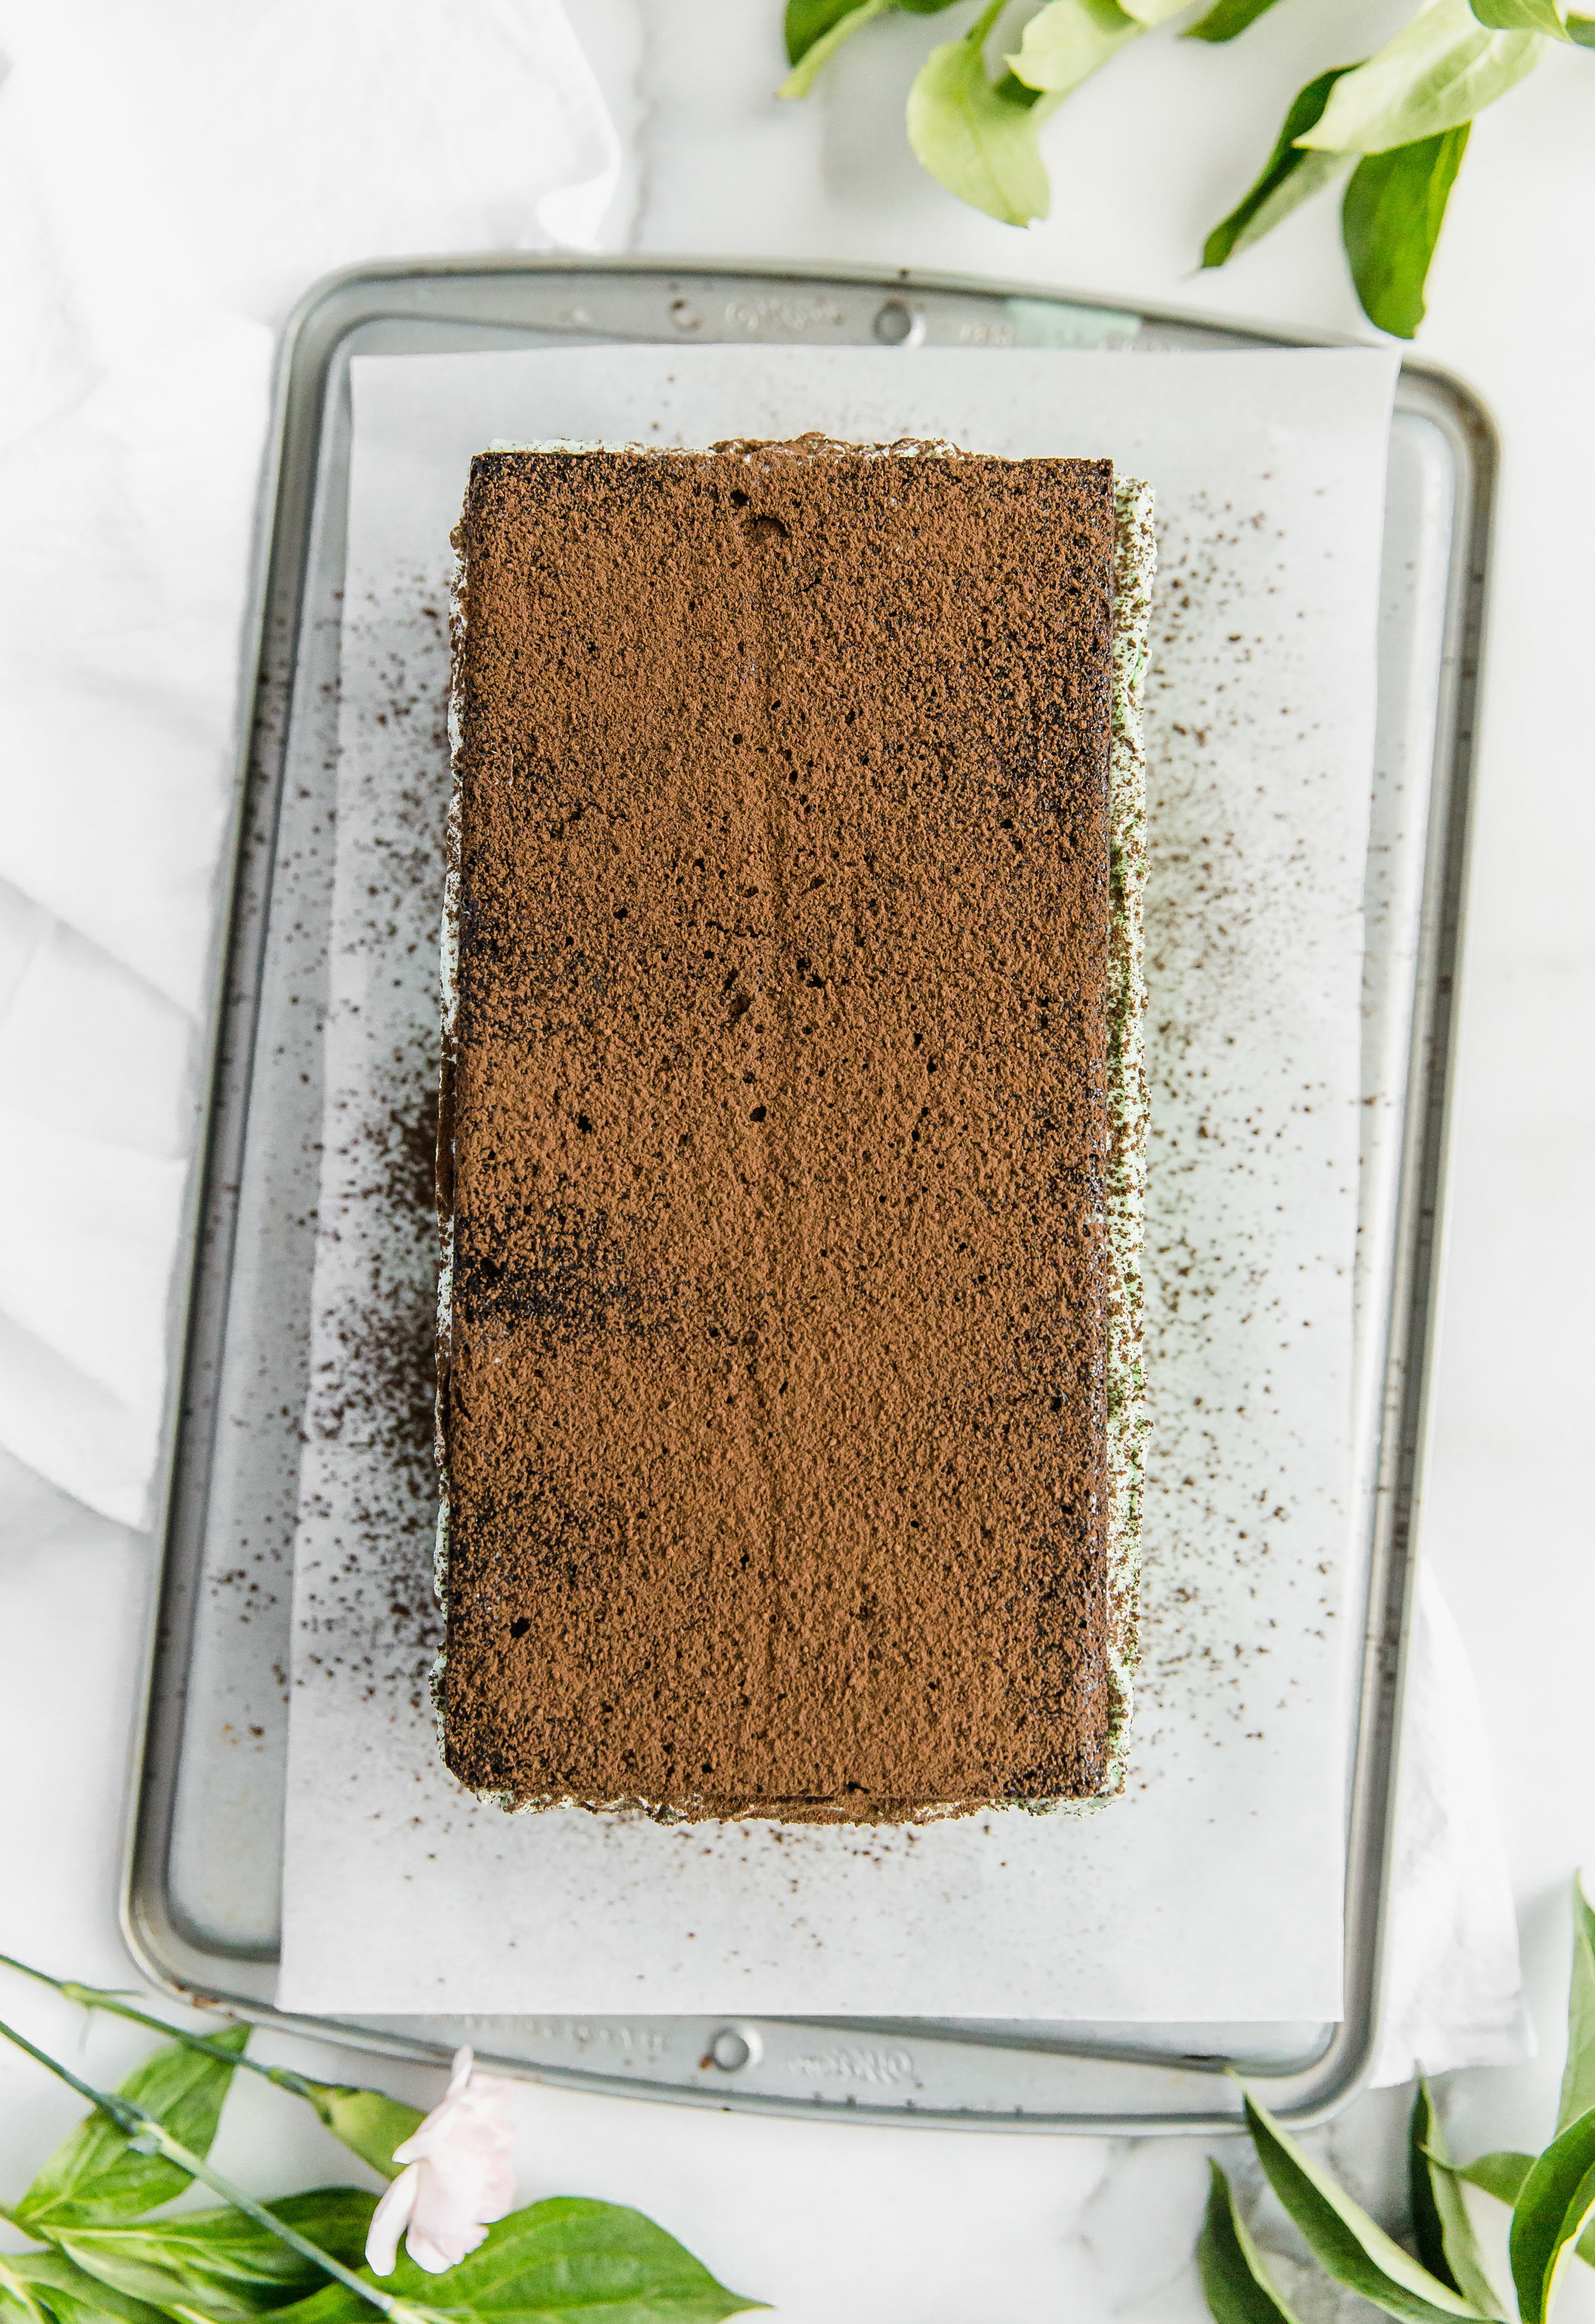
- Place cake in the freezer for 2-3 hours, or overnight. Once frozen, invert the pan to remove the plastic wrap covered cake. Peel away the plastic wrap. (Optional: sift 1 Tablespoon cocoa powder on top).
- For easy cutting, run a large, sharp knife under hot water. Dry the knife, then cut the cake.
*Note:
If you do not have 3 loaf pans (like me), then these are the adaptations I recommend: (1) prepare 3 parchment paper linings, cutting to the correct size. When you use the parchment paper to lift each of the baked brownie layers out of the pan, you will be able to replace the parchment paper with a new one for the next layer. (2) You can leave the brownie mixture on the counter until needed for the next layer. Because the brownie mixture is thick, you may want to microwave it briefly before transferring to the loaf pan to help with spreading.